Free Amish Star Quilt Block Tutorial
The Amish Star block is easier to construct than it looks. The design is based on a Nine Patch block with Half Square Triangles, Flying Geese and squares making up the patches. I always think of Amish quilts as being mostly solids but I put my own spin on the block by using prints and making it scrappy. Let's get started!
(Update: I now have this tutorial available as a PDF pattern for purchase in my Etsy shop. Click HERE to find out more.)

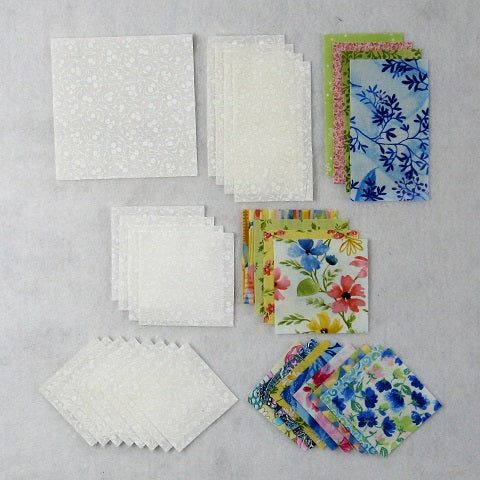
Fabric Requirements for a 12" Finished Amish Star Quilt Block:
- Light/White: 1 - 4.5" square, 4 - 2.5" x 4.5" rectangles, 4 - 3" squares, and 8 - 2.5" squares
- Assorted Prints: 4 - 2.5" x 4.5" rectangles, 4 - 3" squares, and 8 - 2.5" squares
Sewing Directions:
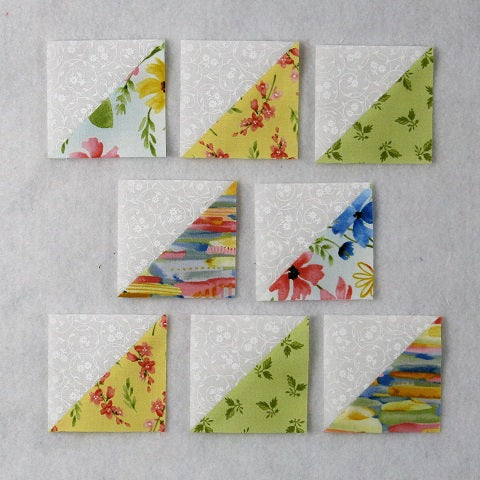
Half Square Triangle Units:
Step 1:
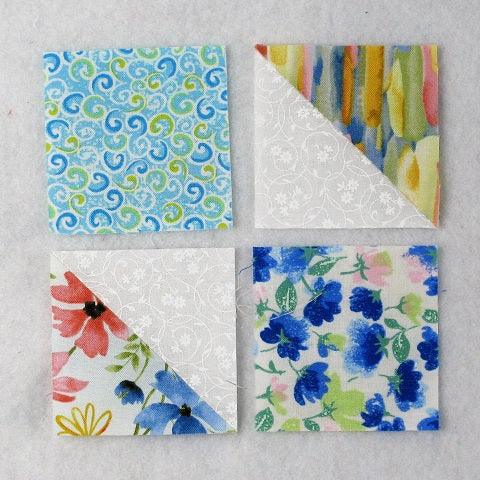
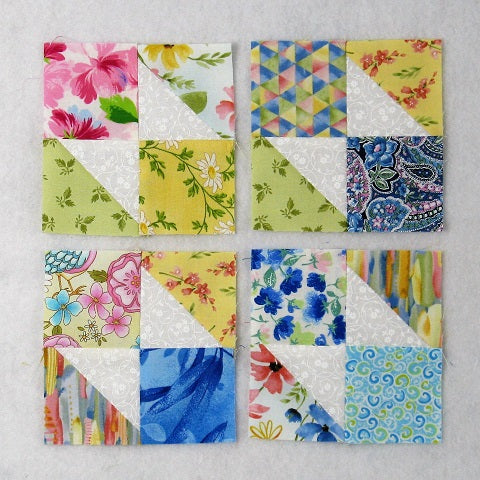
Using the Light/White 3" squares and the Assorted Prints 3" squares, sew together 8 Half Square Triangle units as shown in the picture below. Trim/square up the units to 2.5" square. You can find the tutorial for making Half Square Triangles at https://fabric406.com/blogs/fabric406-blog/how-to-sew-a-basic-half-square-triangle-block If you are making multiple blocks, you can mix in more prints. Here you can see that I have 2 of each color fabric.
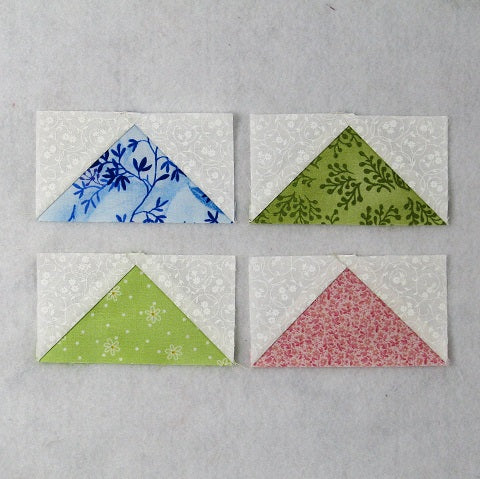
Flying Geese Units:
Step 2:
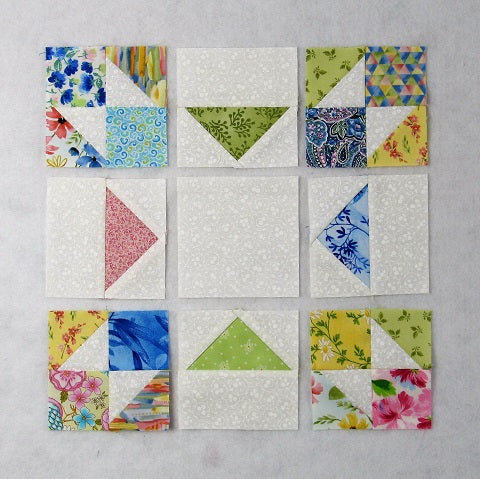
Next you need to sew together four Flying Geese patches using the 4 Assorted Prints 2.5" x 4.5" rectangles and 8 Light/White 2.5" squares like shown in the picture below. You can find a tutorial using my no-trim method for perfect Flying Geese at https://fabric406.com/blogs/fabric406-blog/how-to-sew-a-basic-flying-geese-block
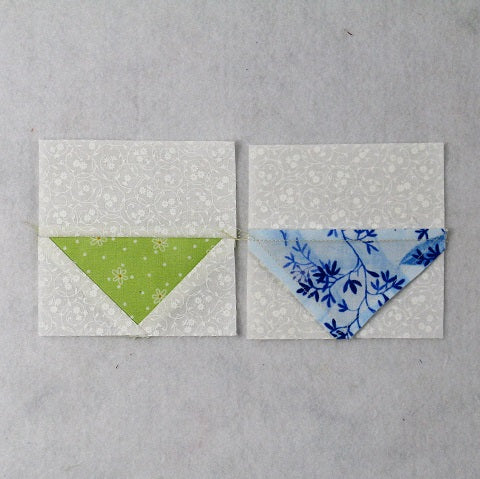
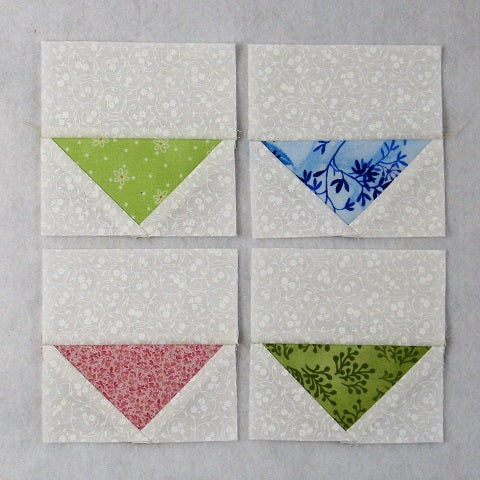
Step 3:
Match up one Step 2 unit and one Light/White 2.5" x 4.5" rectangle and sew together as shown in the picture below. Press seam allowance toward the Light/White fabric.
Step 4:
Repeat Step 3 for a total of four Flying Geese units.
Corner Units:
Step 5:
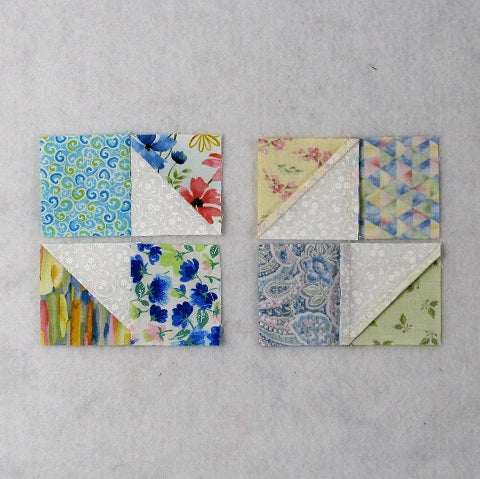
Lay out two Half Square Triangle units and two Assorted Prints 2.5" squares as shown below.
Step 6:
The Corner unit will go together like a typical Four Patch block. First sew the patches into two rows and press the seam allowances toward the Assorted Prints 2.5" squares as shown in the picture below.
Step 7:
Then sew the two rows together and press the seam allowance as shown below.
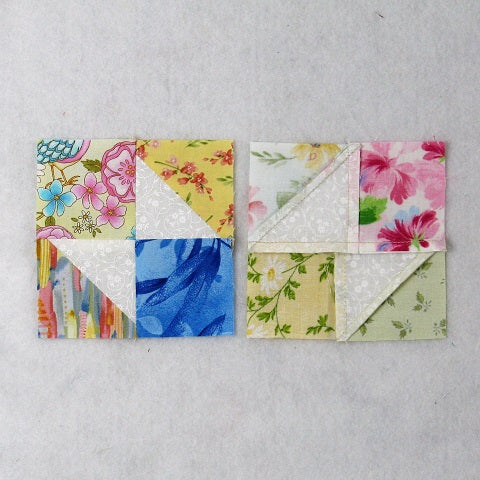
Step 8:
Repeat Steps 6 and 7 for a total of four Corner units.

Putting It All Together:
Step 9:
Lay out the Flying Geese units, the Corner units, and the Light/White 4.5" square as shown in the picture below.
Step 10:
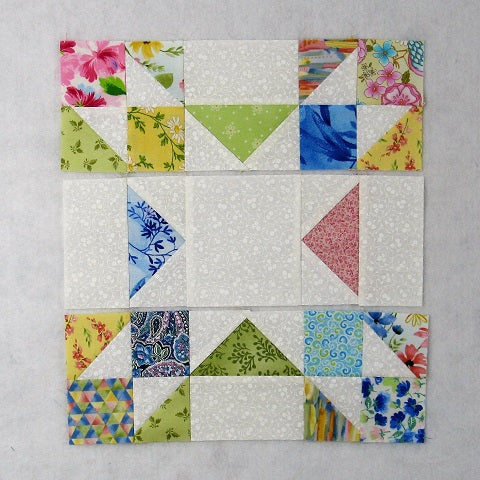
From here the Amish Star goes together just like a basic Nine Patch block. First sew the units into three rows as shown in the picture below.
Step 11:
And press the seam allowances away from the Flying Geese units as shown below.

Step 12:
Then you can sew the three rows together,
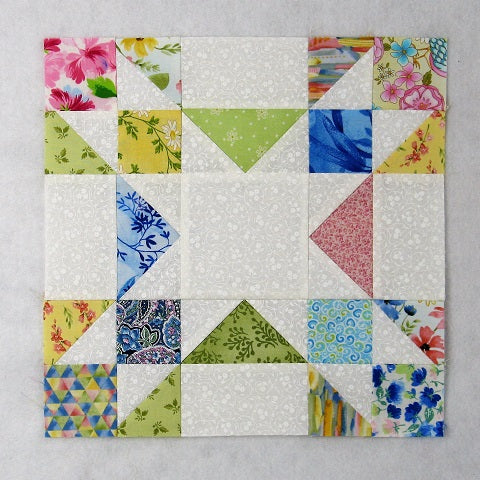
Step 13:
And press the seam allowances toward the center of the block as shown in the picture below. You're done!
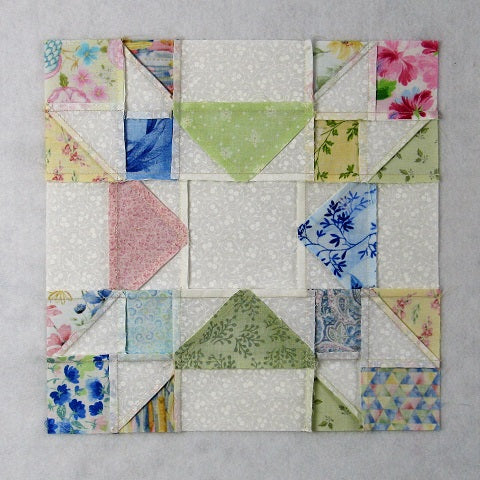
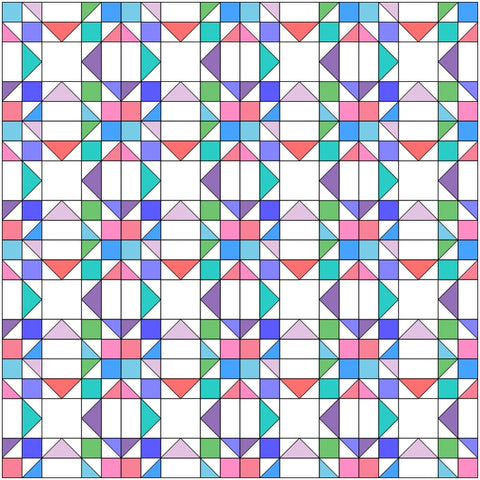
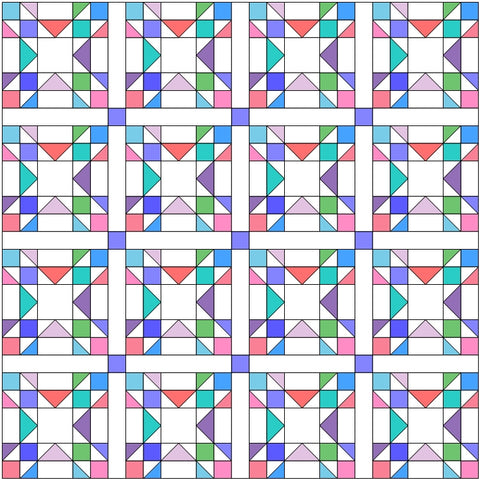
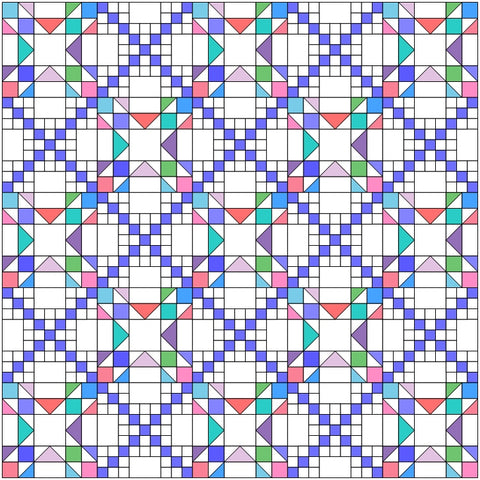
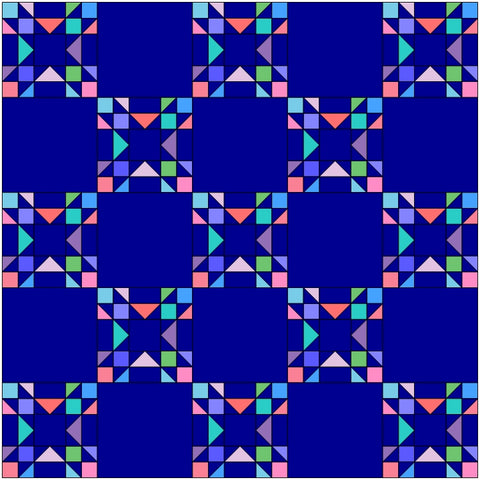
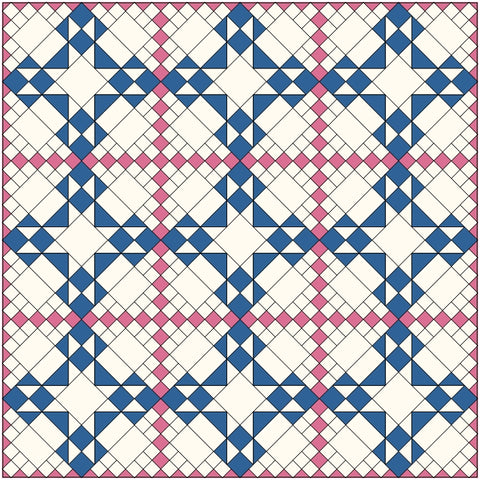
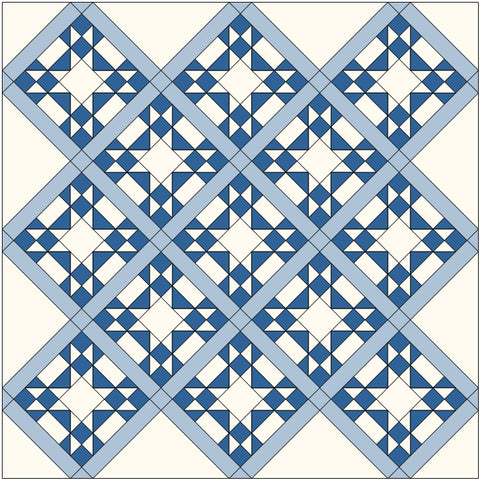
Layout Ideas:
Conclusion:
This was fun to sew together. It felt great to dig into my scrap stash and use up a few pieces! If you use the same fabrics in the Half Square Triangles and Flying Geese units, you would get an interesting diamond Square in a Square design when multiple blocks are joined together. All in all, it is an interesting block!
I hope you've enjoyed this tutorial for the Amish Star block. If you liked this post and want to see more quilting tutorials like this, simply click here to sign up for my newsletter and also receive a free PDF quilt pattern called Chained Weathervane.
Happy Quilting!
Elaine
P.S. To purchase a PDF pattern for this block, click HERE!
P.P.S. Looking for more star quilt blocks? Check out this roundup post: https://fabric406.com/blogs/fabric406-blog/30-of-the-best-star-quilt-block-patterns