How to Make the Traditional Magic Circle Quilt Block (or a different coloring of the Prairie Flower)
Today let's sew together this cute and easy block called Magic Circle. It was first published in the Ladies Art Company and I don't know why it was called Magic Circle - I don't see a circle anywhere! It is also the same block at the Prairie Flower block just with different (and easier) coloring. Let's get started!

Fabric Requirements for a 12" Finished Magic Circle Quilt Block:
- Light/Ivory: 16 - 2.5" squares
- Medium/Coral: 5 - 4.5" squares
- Dark/Rust: 4 - 4.5" squares

Sewing Directions:
Corner Units:
Step 1:
Pair up a Dark/Rust 4.5" square with two Light/Ivory 2.5" squares. Mark a diagonal line from corner to corner on the back of the 2.5" squares as shown in the picture below.

Step 2:
Place the 2.5" squares on opposite corners of the Dark/Rust 4.5" square as shown below and stitch along the marked line (left image, top corner). Match up the corners of the 2.5" square and press (left image, bottom corner). Trim away the excess seam allowance (right image, top corner) and refold (right image, bottom corner).

Step 3:
Repeat Steps 1 and 2 on opposite corners of the four Dark/Rust 4.5″ squares to make four Corner units as shown in the picture below. Basically, you will be snowballing two opposite corners of the Dark/Rust square. You can see my tutorial for the Snowball block at: https://fabric-406.myshopify.com/blogs/fabric406-blog/how-to-sew-a-basic-snowball-block

Step 4:
Repress the seam allowances toward the center of the unit as shown in the picture below.

Modified Flying Geese Units:
Step 5:
Pair up a Medium/Coral 4.5" square with two Light/Ivory 2.5" squares. Mark a diagonal line from corner to corner on the back of the 2.5" squares as shown in the picture below. You can find my tutorial for making a Flying Geese block at https://fabric406.com/blogs/fabric406-blog/how-to-sew-a-basic-flying-geese-block.

Step 6:
Place a 2.5" square on one corner of the Medium/Coral 4.5" square as shown below and stitch along the marked line (top left image). Match up the corners of the 2.5" square and press (top right image). Trim away the excess seam allowance (bottom left image) and refold (bottom right image).

Step 7:
Repeat the steps in Step 6 on an adjacent corner of the Medium/Coral square as shown below.

Step 8:
Repeat Steps 5 through 7 for a total of four Modified Flying Geese units.

Putting It All Together:
Step 9:
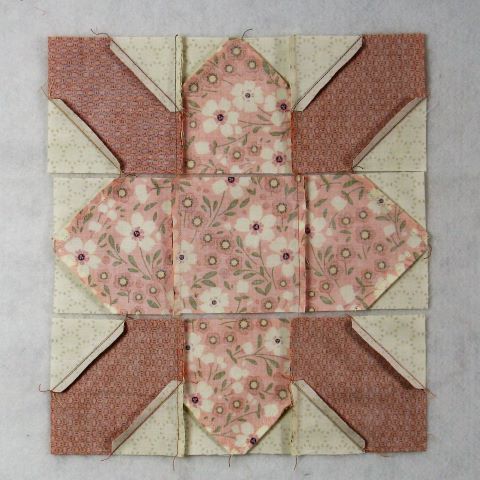
Lay out the Corner units, the Modified Flying Geese units, and the remaining Medium/Coral 4.5" square as shown in the picture below.

Step 10:
From here the block goes together just like a basic Nine Patch block. First sew the units into three rows, then...

Step 11:
Press the seam allowances toward the Modified Flying Geese units as shown in the picture below.
Step 12:
Sew the three rows together, and...

Press the seam allowances away from the center of the block as shown below. You're done!

Layout Options:
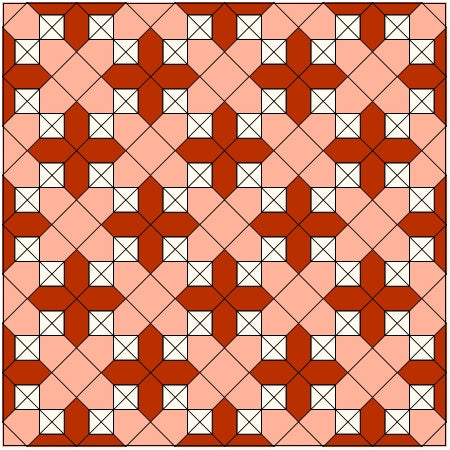
Here's a basic 4 x 4 layout.

And you know me - I had to do a scrappy version. In this example I kept the light and dark fabrics all the same and just switched out the medium with different colors. I think this is my favorite!

Here's the same scrappy quilt but with narrow sashing and cornerstones added.

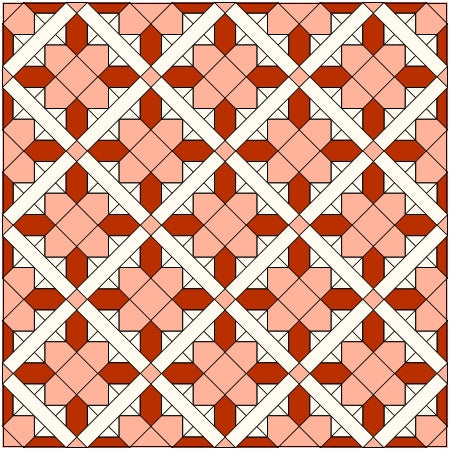
Here's an on point layout. It always amazes me how different an on point layout looks!
In this example, the on point layout is separated by sashing and cornerstones.
So here's an on point layout with a partial/different block in the setting triangles and just light fabric in the four corners.

Conclusion:
I enjoyed sewing an easy block together today! This one is pretty and looks great when made into a quilt. It would also be easy to make into a 9" block by substituting the 2.5" squares with 2" squares, and the 4.5" squares with 3.5" squares.
I hope you've enjoyed this Magic Circle quilt block tutorial. If you liked this post and want to see more quilting tutorials like this, simply click here to sign up for my newsletter and also receive a free PDF.
Happy Quilting!
Elaine
P.S. To figure out yardage for a quilt, check out this post: https://fabric406.com/blogs/fabric406-blog/how-much-fabric-do-i-need