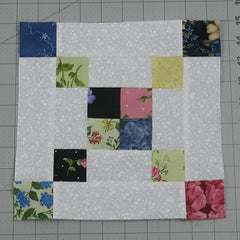
How to Sew a 6-Grid Chain Quilt Block
Today we’re going to put together a 6-Grid Chain block. This block makes a great alternating block to showcase fancy or more difficult blocks – think star blocks, or Dresden plate blocks, or paper pieced blocks. You can use just 2 fabric colors plus the background fabric to make this block (then you’ll have one color go upper left to lower right and the other color go from lower left to upper right). Or you can make it scrappy like I’m doing in the tutorial. The directions here are for a 9″ finished block. Let’s get started!
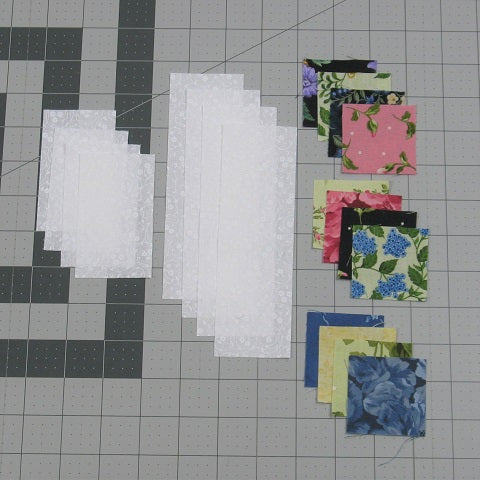
Fabric Requirements for a 9" Finished 6-Grid Chain Quilt Block:
- Light/White: 4 – 2″ x 3.5″ rectangles; and 4 – 2″ x 6.5″ rectangles
- Colored: 12 – 2″ squares
Sewing Directions:
Step 1:
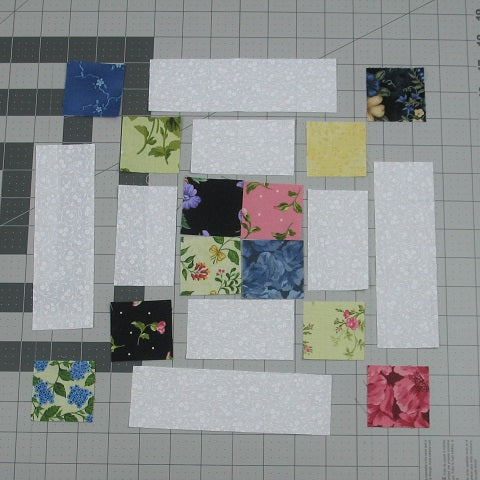
Since this is a scrappy block, I like to lay out all the pieces, rearranging to get a pleasing color combination.
Step 2:
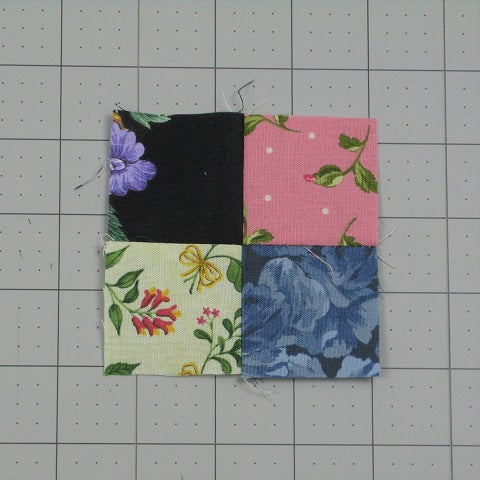
Four-Patch Unit:
First you need to make the center Four-Patch unit. You can find my tutorial on making Four-Patch blocks at https://fabric-406.myshopify.com/blogs/fabric406-blog/how-to-sew-a-basic-four-patch-quilt-block
Step 3:
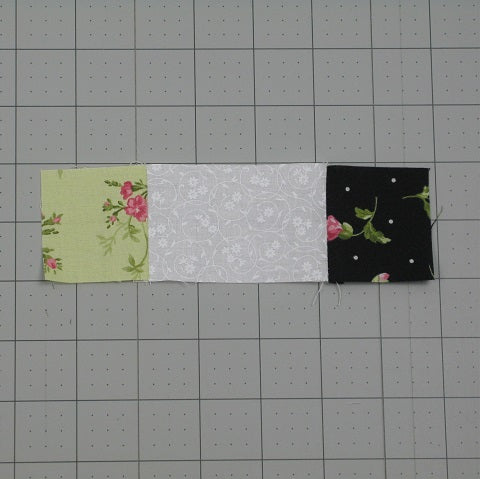
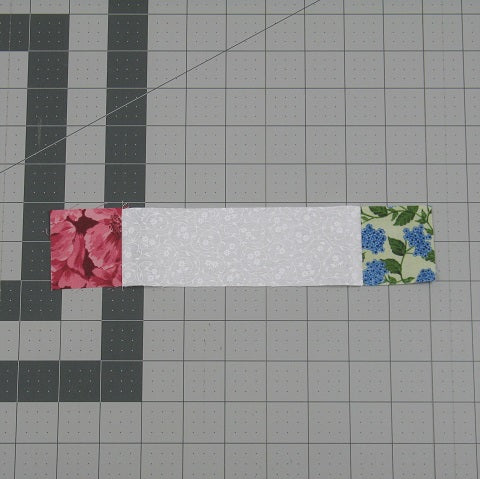
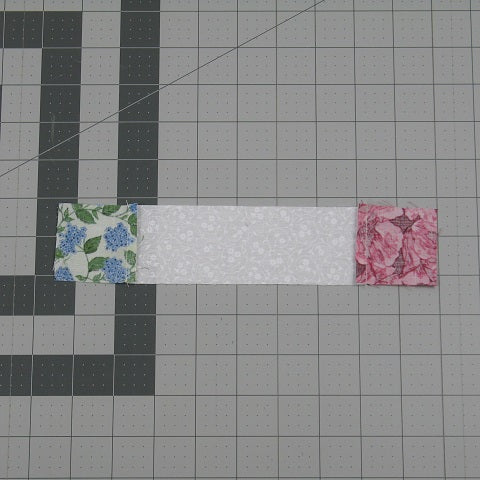
Next you will sew two Colored 2″ squares to each end of one of the Light/White 2″ x 3.5″ rectangles. I recommend to press the seam allowance toward the Light/White rectangle. I pressed toward the Colored squares in this picture and found that it didn’t work so well later in the block – so do as I say, not as I do – Lol! You will need two of these units.
Step 4:
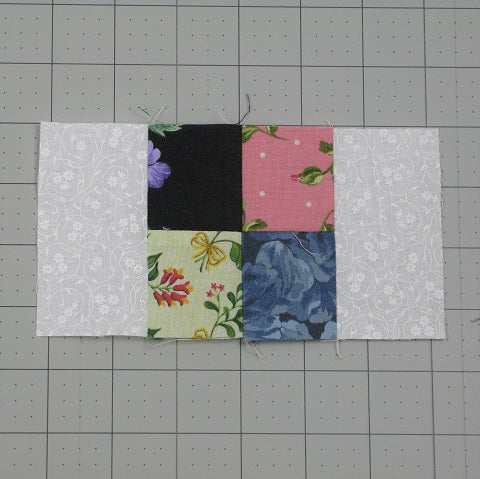
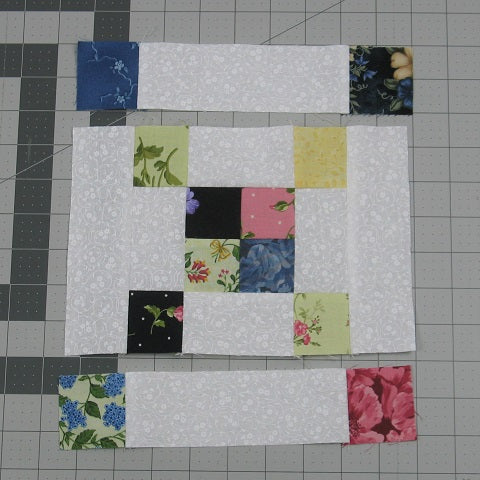
Sew a Light/White 2″ x 3.5″ rectangle to opposite sides of the center 4-Patch unit as shown below. Once again, I recommend pressing the seam allowance toward the Light/White rectangles instead of the way I did!
Step 5:
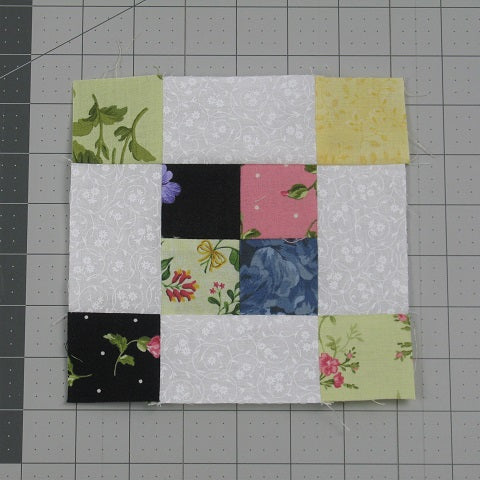
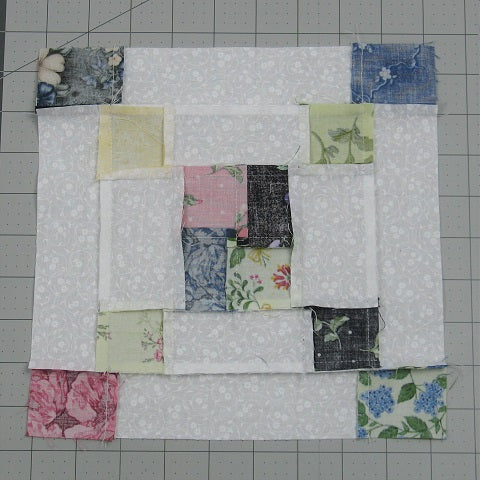
And sew together. The seams should nest together nicely if pressed correctly.

Step 6:
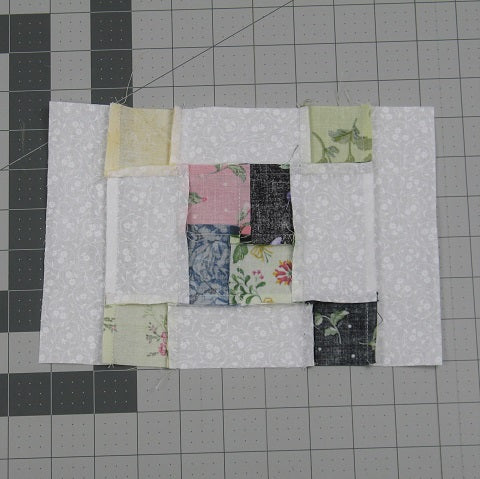
Next you will sew a Light/White 2″ x 6.5″ rectangle to opposite sides of the unit you just completed.

Step 7:
And press the seam allowances toward the Light/White 2″ x 6.5″ rectangles as shown in the picture below.
Step 8:
Now you will sew a Colored 2″ square to each end of a Light/White 2″ x 6.5″ rectangle. Repeat for a total of two units.
Step 9:
Press the seam allowances toward the Light/White rectangle.
Step 10:
Lay out the units you have made as shown below and…
Step 11:
Sew them together! The seams should nest nicely because the seam allowances have been pressed in opposite directions.

Step 12:
Press seam allowances toward the outside of the block and trim the block to 9.5″ square if needed. You’re all done! Oops – I see a seam allowance that tried to flip the wrong way when I sewed it. I’ll take out a few stitches and fix that!
I hope you’ve enjoyed this 6-Grid Chain Quilt Block! If you like it and want to see more, just click HERE to sign up for my newsletter and receive a free PDF quilt pattern called "Chained Weathervane".
Happy Quilting!
Elaine