Basic Quilting Supplies You Need to Begin Quilting
Do you get overwhelmed when you walk into a quilt shop and see all the supplies available? Here's a guide to the basic tools you need.
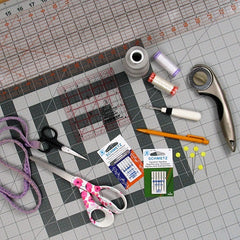
As with most hobbies, there are tons of quilting notions, gadgets, and tools that can make quilting easier but you really only need a few to get started. I'm going to show you what I consider essential and what I use (and why!).
Notice: fabric406 is supported by readers. When you buy with my links, I may earn a commission. Learn more
Cutting Mats, Rulers, and Cutters:
Mat:
I like and use a gray Fiskars 24" x 36" mat. It is printed on both sides - one side is light gray and the other is dark gray. I love the light gray side because most fabric colors contrast with the gray and make it easier to see. I use the dark gray side for lighter gray colored fabrics. If you don't have the space for a mat that big, an 18" x 24" is a good size.
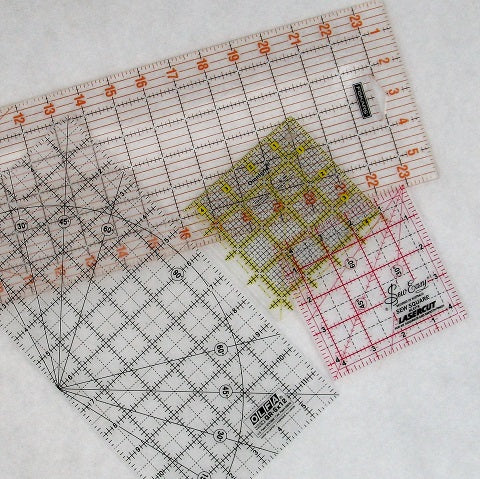
Ruler:
For rulers, I recommend three - a 6" x 24" size is the most important, a 6" x 12" is my next favorite, and I use a 4.5" square up ruler all the time. I use Fiskars brand for the first 6" x 24" size and the Olfa 6" x 12" for the 6" x 12" size. I like the frosted (no glare) and it is less slippery on the back. For the 4.5" square up ruler, my new favorite is by Creative Grids - fewer lines to get messed up on. However, I've used an Omnigrid with yellow markings (the lime green lines mess with my eyes!) and Fiskars for a long time. (I no longer recommend the Sew Easy 4.5" square ruler shown in the picture - markings on the last ones I got were not accurate.)
Rotary Cutter:
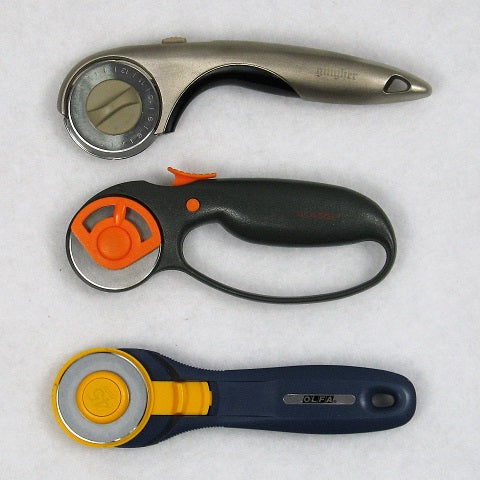
My absolute favorite rotary cutter is made by Gingher (top image in the picture below). I've had mine for years (decades?) and love it. However, it seems that it may be out of production now - which makes me sad. If I had to buy another cutter, I'd probably get a 45 mm Fiskars like the one shown in the middle as I've used it and been happy with it.
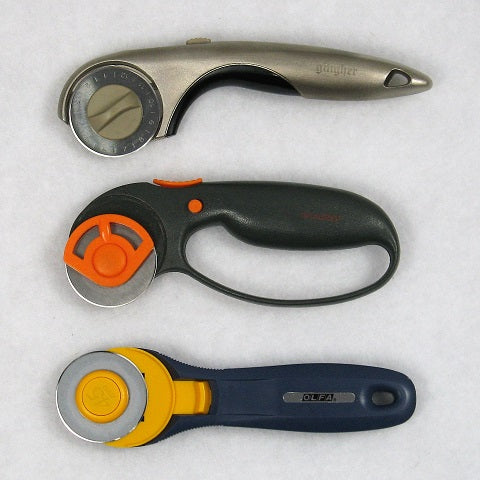
When I took the pictures for the rotary cutters, it dawned on me why I really like my Gingher cutter. I don't have to arch my wrist up in order to have plenty of cutting surface. The picture below shows the angle difference I would need to have to get the same amount of the rotary blade available for cutting.

Here I took a picture of the three with the blades open. It's quite a difference between the top 2 and the bottom one. There's nothing wrong with the Olfa cutter in the bottom image - just my wrists don't want to move that way any more!
Starter Sets:
Fiskars puts together a quilting starter kit that has a better price than buying each piece individually. The package has an 18" x 24" gray mat, a 6" x 24" ruler, and a basic stick 45 mm ruler.
Olfa also makes a beginner quilting tools kit that is an option. It contains a 12" x 18" mat, a 6" x 12" ruler, and a 45 mm cutter.
Sewing machine:
Unless you plan to sew by hand (kudos to you!), you will need a sewing machine. Several years ago, I wanted/needed an inexpensive, decent sewing machine to have in my studio for piecing. I was carrying my Viking machine back and forth from home to studio and that got old.
I settled on a Brother XR1355. It is lightweight so I can easily carry it to sewing circle/retreats too. It came with a bunch of feet including a 1/4" foot and a walking foot. I like the large platform for piecing which you can remove to use the machine as a free arm machine. Additionally (and maybe most importantly), I have a local Brother repairman (although I've never had any trouble with this machine).
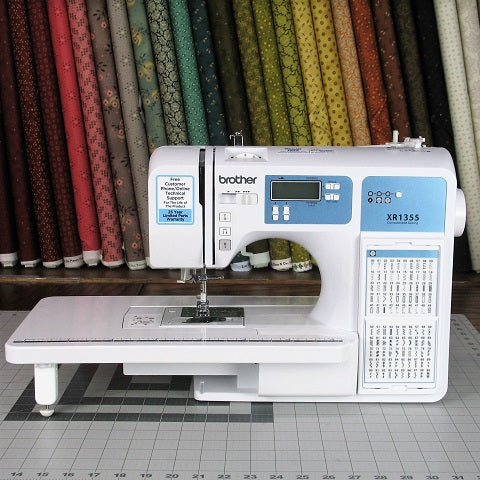
Of course, the model I bought is no longer available. I highly recommend test driving a sewing machine before purchasing. However, I know a lot of you don't have a local quilt shop that sells sewing machines. And a lot of the time, they don't carry the lower priced models. The Brother XR9550 looks like the new version of my machine or maybe the Brother HC1850. Whatever machine you purchase, I would make sure it has a 1/4" foot or that you can buy one for that machine.
Machines I wouldn't even consider - Singer (unless it was made before 1970 or is an industrial model); and anything from Joann's, Walmart, Hobby Lobby, etc. I know several ladies who went that route and had nothing but trouble with their machines. Perhaps you've had good experiences with machines from those stores, I just haven't.
Marking, Ripping, and Holding Tools:
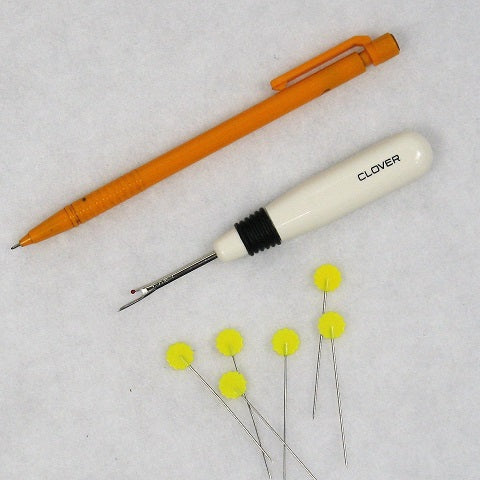
Marking Tool:
I'm pretty old-school with my favorite marking tool - a 7 mm mechanical pencil. I switch out the included HB lead with 2B lead. The 2B lead leaves a little bit darker line so I don't have to mark twice to get a line I can see. Here's a combo pack of pencils and lead. Of course, the pencil won't work for marking on the right side of the fabric or where it will be seen. Pencil marks are a bugger to get out although an artist eraser or fabric eraser work pretty well but both can stretch your fabric.
Seam Ripper:
I use a Clover seam ripper exclusively. I've tried other brands, but the Clover lasts quite awhile before getting dull. It also fits in my hand nicely.
Pins:
The long (2") flower head pins are my favorite pins. Clover makes a good one as well as Bohin. Pins that say they are for quilting tend to slide through fabric much easier than a regular pin. I believe because they are thinner and sharper.

Scissors and Snips:
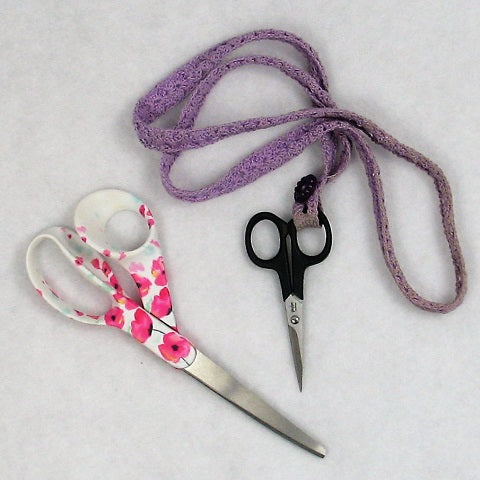
Scissor:
I really don't use a scissor much. I usually buy a less expensive shear like this Fiskars for fabric and when it starts getting dull, it becomes my paper (and everything else) scissor. I've not had much luck with the scissor sharpeners you can buy. If you have a local scissor sharpener person who does a good job (ask your hairdresser for a recommendation), then your favorite scissors can last a long, long time.
Snips:
However, I do use snips and/or small embroidery scissors frequently. I have a lanyard with a snip on it around my neck whenever I'm quilting. Unfortunately, I really can't recommend one brand over another. I've tried several and I feel that they have a short life span considering all I do is snip thread with them. Frustrating to say the least.
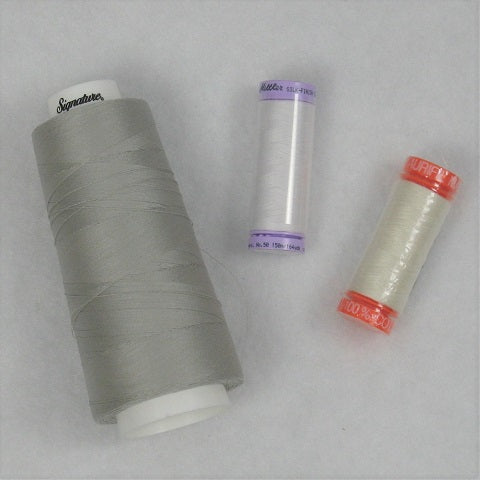
Thread:
I'm not much of a thread snob! However, that thread from Aunt Judy's sewing basket on the cute wooden spool - don't use it, it's too old and will break easily. But if you have quite a few of those spools, you could put them all in an old glass canning jar and make a nice decoration for your sewing room!
That said I use Signature thread the most. Mostly because it works well with my longarm machine and so I have a lot of it. I have used lots of other thread brands with success - Mettler, Aurifil, Star, King Tut, Dual Duty - to name a few. I recommend using a light gray or light beige thread for piecing. That way you don't have to buy a bunch of different colors. Another benefit is that you can wind 10 bobbins and when you run out of bobbins, it's time to change your needle!
Needles:
Machine Needles:
For machine sewing I use and like Schmetz needles. I use their Topstitch 12/80 the most - it has a larger eye so I can thread it easily. Second favorite is their Microtex 80/12 - nice and sharp and lasts.
Hand Sewing Needles:
For hand sewing - I'm still trying to find a favorite. I had this needle I used for literally years that was perfect. Alas, I lost it and have no idea what brand or type it was. My main issue with hand needles is the eye on the nice thin ones is too small for my old eyes!

I hope you've enjoyed this informational post. These are just my recommendations - there are lots of products out there to choose from - and I had trouble narrowing down to the very basics. I'll probably do another post about the notions and tools I use that aren't entirely necessary but do make quilting easier.
If you liked this post and want to see more like this plus quilting tutorials, simply click here to sign up for my newsletter and also receive a free PDF quilt pattern called Chained Weathervane.
Happy Quilting!
Elaine
P.S. To print a PDF of this tutorial, check out the free app at https://www.printfriendly.com/.
P.P.S. To figure out yardage for a quilt, check out this post: https://fabric406.com/blogs/fabric406-blog/how-much-fabric-do-i-need