Duck's Foot in the Mud Quilt Block Free Tutorial
Welcome to the tutorial on how to make the Duck's Foot in the Mud quilt block! How can you not make this block with a name like that?!? This traditional quilt block goes by many names, including Bear Paw, and is known for its cute and playful design. I will guide you through the process of making a scrappy 13.5-inch block that uses a nine-patch construction method. Whether you are a beginner or an experienced quilter, this tutorial will provide you with the steps and tips you need to create a beautiful and unique quilt block. Let's get started!
(Update: There is now a pattern available for purchase of this block in my Etsy shop at DUCKS FOOT IN THE MUD!!)

Fabric Requirements for a 13.5" Finished Duck's Foot In the Mud Quilt Block:
For this block I used the minimum amount of fabrics to make one block. If I were making multiple blocks, I would use more fabrics so it would be really scrappy.
- Light/Whites: 4 - 5” squares, 2 - 4” squares, 8 - 2.5” squares, and 4 - 2” squares
- Assorted Medium to Dark Fabrics: 1 - 5” square, 2 - 4” squares, and 8 - 2.5” squares

Sewing Directions:
Half Square Triangle Units:
Step 1:
Using the two Light/White 4” squares and the two Medium/Dark 4” squares, sew together four Half Square Triangle (HST) units like the ones shown in the picture below. Trim units to 3.5” square. You can find my detailed tutorials on making HST blocks at https://fabric406.com/blogs/fabric406-blog/how-to-sew-a-basic-half-square-triangle-block and https://fabric406.com/blogs/fabric406-blog/two-easy-methods-for-making-half-square-triangle-quilt-blocks.

Step 2:
Sew together 16 Half Square Triangle units using the eight Light/White 2.5” squares and the eight Medium/Dark 2.5” squares as shown below. (That would be a cute block all on its own!) Trim the units to 2” square.

Bear Paw Units:
Step 3:
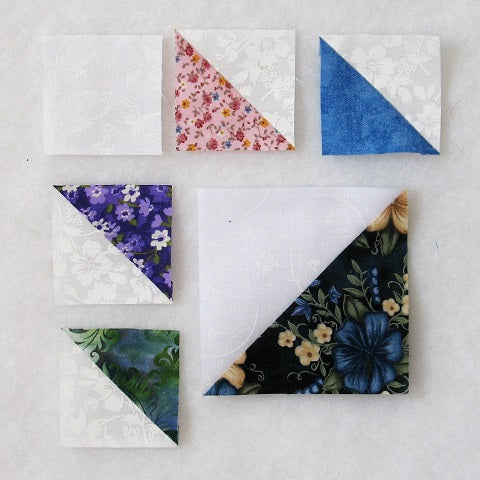
Lay out one Step 1 unit, four Step 2 units, and one Light/White 2” square as shown in the picture below. This is a good step so that you get a pleasing arrangement. In fact, I would lay out all four units at once as to be sure to get a nice color placement.
Step 4:
Sew the top two Half Square Triangle units together as shown below.

Step 5:
And press the seam allowance toward the Medium/Dark fabric as shown in the picture below. 
Step 6:
Now sew the side two Half Square Triangles together.

Step 7:
And also press the seam allowance toward the Medium/Dark fabric as shown below.

Step 8:
Here are the two units side by side. Notice that they are mirror images of each other.

Step 9:
Lay out the two Step 8 units, a Step 1 unit, and a Light/White 2" square as shown in the picture below. From here the Bear Paw unit goes together like a Four Patch block.

Step 10:
Sew the units into two rows as shown below.
Step 11:
And press the seam allowances toward the Light/White fabric.

Step 12:
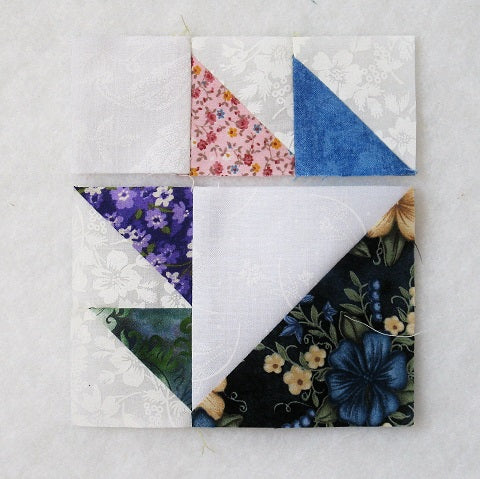
Now you can sew the two rows together to complete the unit.

Step 13:
Press the seam allowance toward the larger Half Square Triangle unit as shown in the picture below.

Step 14:
Repeat Steps 3 through 13 for a total of four Bear Paw units.


Putting It All Together:
Step 15:
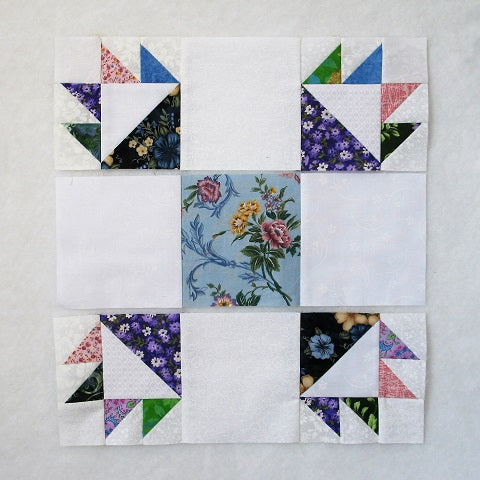
Lay out the four Step 14 Bear Paw units, the Medium/Dark 5" square, and the four Light/White 5" squares in a typical Nine Patch configuration as shown in the picture below.

Step 16:
Sew the units into three rows as shown.
Step 17:
Now press the seam allowances toward the Light/White 5" squares.
Step 18:
Finally, sew the three rows together and...

Step 19:
Press the seam allowances toward the center of the block as shown in the picture below. Finished!

Layout Options:
Here's the basic 4 x 4 layout. I like how a star shape appears when multiple blocks are sewn together!

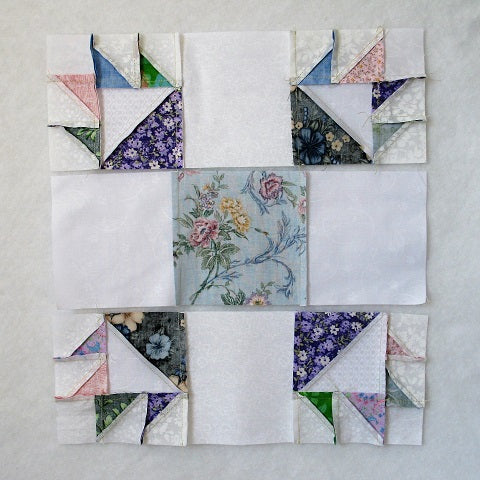
And here's the same layout but with sashing and cornerstones added.

Here it is with an alternating large Hourglass block.

This on-point layout gives the block a different look.

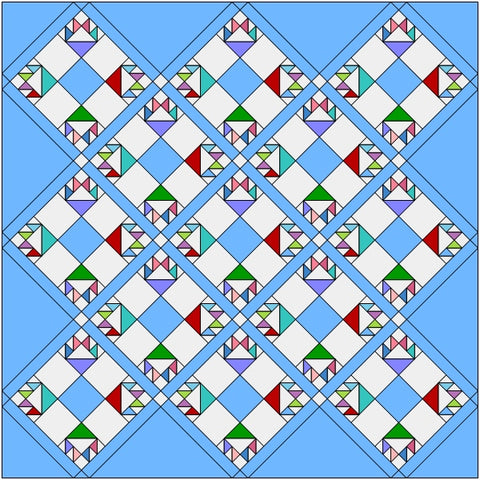
Here's the same on-point layout but with blue setting triangles.

For this on-point layout I've added in sashing and cornerstones for a lovely design.
Conclusion:
Even though the small Half Square Triangles were a little time-consuming, I really enjoyed putting together this scrappy Duck's Foot in the Mud block. I like how it turned out and used up some of my scraps!
I hope you have enjoyed this tutorial. If you like it and want to see more, just click HERE to sign up for my newsletter and receive a free PDF quilt pattern called "Chained Weathervane".
Happy Quilting!
Elaine
P.S. Click HERE to check out my Etsy shop for downloadable PDF quilt block patterns.