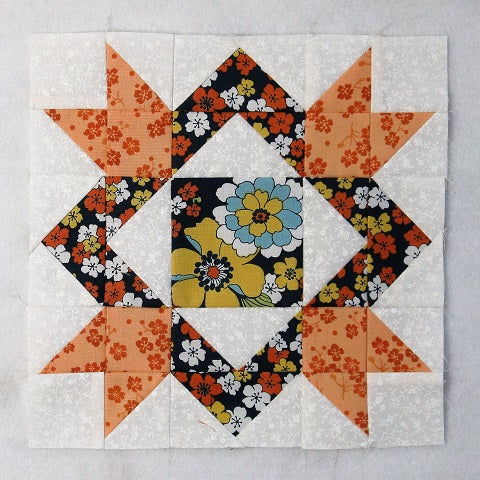
Free Arrowhead Star Quilt Block Tutorial
Today let's sew together an Arrowhead Star Quilt Block! The Kansas City Star gave it this name but it goes by a host of other names: Laurel Wreath (by Grandmother Clark), Many Pointed Star (by Nancy Cabot), Michigan Beauty (by Clara Stone), etc., etc. It seems that Arrowhead Star and Michigan Beauty are the two most common names.
This block can also be considered a weathervane block. It's a fun traditional star to put together, so let's get started!

Fabric Requirements for a 9" Finished Arrowhead Star Quilt Block:
- Light/White: 12 - 2" squares, 4 - 2.5" squares, and 4 - 2" x 3.5" rectangles
- Medium/Orange: 4 - 2.5" squares, and 4 - 2" squares
- Dark 1/Small Print: 4 - 2" x 3.5" rectangles, and 8 - 2" squares
- Dark 2/Large Print: 1 - 3.5" square
Fabric Requirements for a 12" Finished Arrowhead Star Quilt Block:
- Light/White: 12 - 2.5" squares, 4 - 3" squares, and 4 - 2.5" x 4.5" rectangles
- Medium/Orange: 4 - 3" squares, and 4 - 2.5" squares
- Dark 1/Small Print: 4 - 2.5" x 4.5" rectangles, and 8 - 2.5" squares
- Dark 2/Large Print: 1 - 4.5" square
Fabric Requirements for a 15" Finished Arrowhead Star Quilt Block:
- Light/White: 12 - 3" squares, 4 - 3.5" squares, and 4 - 3" x 5.5" rectangles
- Medium/Orange: 4 - 3.5" squares, and 4 - 3" squares
- Dark 1/Small Print: 4 - 3" x 5.5" rectangles, and 8 - 3" squares
- Dark 2/Large Print: 1 - 5.5" square

Sewing Directions:
Half Square Triangle Units:
Step 1:
Sewing directions are given for the 9" finished block. You will need to substitute patch sizes if you are making a 12" finished block.
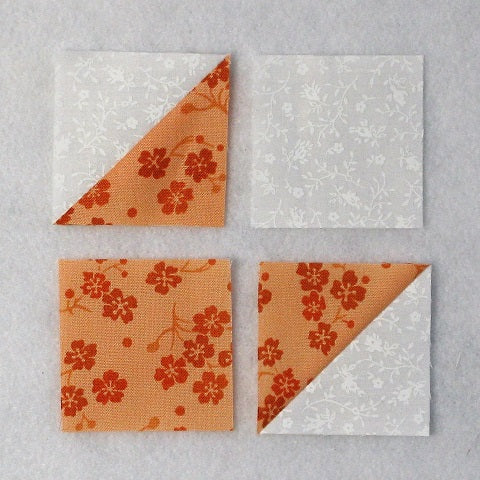
Using the four Light/White 2.5" squares and the four Medium/Orange 2.5" squares, sew together eight Half Square Triangle units as shown in the picture below. You can find my tutorial for making a basic Half Square Triangle block at https://fabric406.com/blogs/fabric406-blog/how-to-sew-a-basic-half-square-triangle-block

Corner Units:
Step 2:
Lay out two of the Half Square Triangle units you made in Step 1, a Light/White 2" square, and a Medium/Orange 2" square as shown in the picture below.
Step 3:
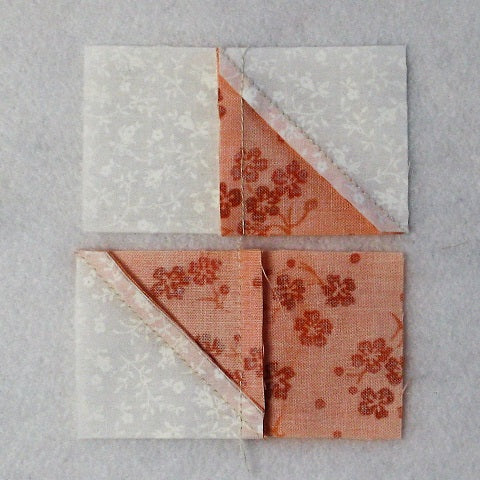
Now you can sew the patches together just like a simple Four Patch block. First sew them together in two rows as shown in the picture below.

Step 4:
And press the seam allowances away from the Half Square Triangle units as shown below.
Step 5:
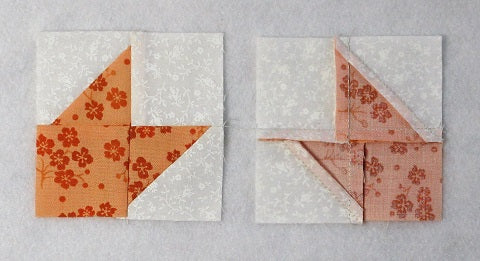
Now you can sew the two rows together and press the seam allowance toward the Medium/Orange 2" square as shown in the picture below. Pressing the seam allowance this way will make it easy to nest with the other units when you sew the block together.
Stacked Flying Geese Units:
Step 6:
Using the eight Light/White 2" squares, and the four Dark 1/Small Print 2" x 3.5" rectangles, sew together four Flying Geese units as shown in the picture below. You can find my no-trim method for sewing perfect Flying Geese blocks together at https://fabric406.com/blogs/fabric406-blog/how-to-sew-a-basic-flying-geese-block
Step 7:
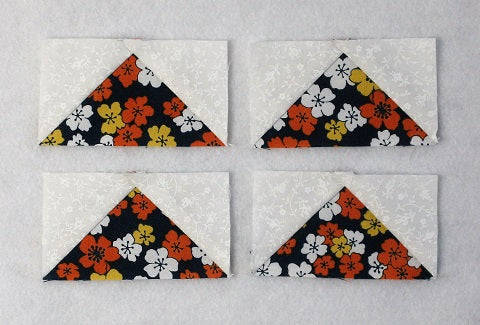
Now you're going to reverse it and use eight Dark 1/Small Print 2" squares and four Light/White 2" x 3.5" rectangles to make four Flying Geese units like the ones in the picture below.
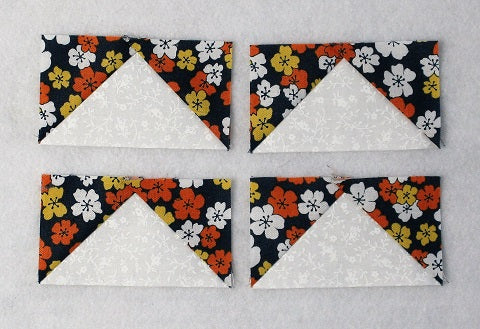
Step 8:
Now you can pair up one Step 6 and one Step 7 Flying Geese units and sew together as shown in the picture below. Press the seam allowance toward the Step 6 unit. This is what is called a Stacked Flying Geese block (or an Arrowhead block).


Putting It All Together:
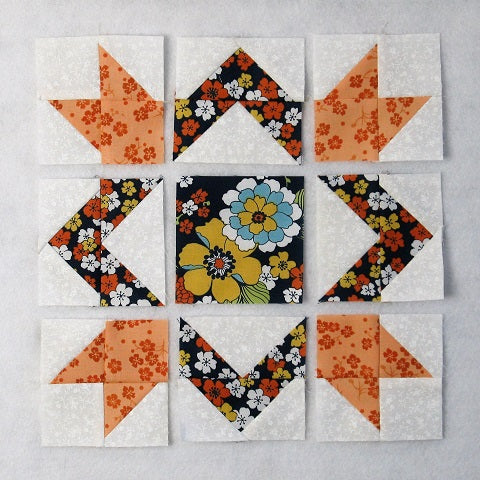
Step 9:
From here on out, the block goes together like a simple Nine Patch. Lay out the Corner units, the Stacked Flying Geese units, and the Dark 2/Large Print 3.5" square as shown in the picture below.
Step 10:
Now you just sew the units into three rows as shown below and . . .
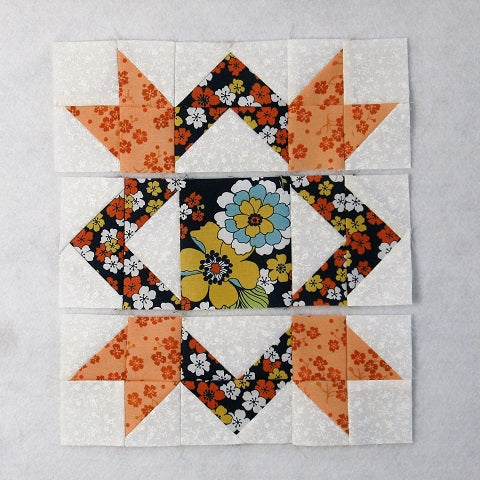
Step 11:
Press the seam allowances away from the Stacked Flying Geese units as shown in the picture below.
Step 12:
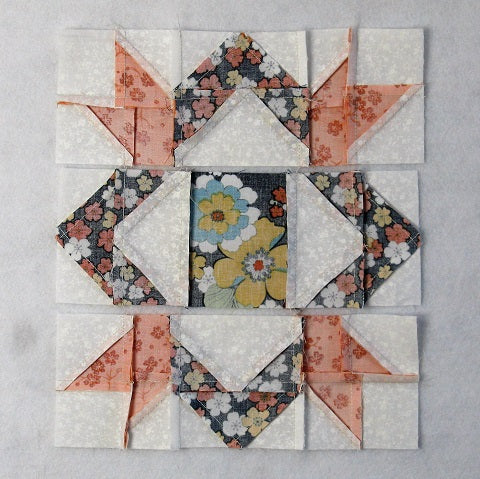
Sew the three rows together (the seams should nest nicely because of the direction of the pressing) and you're done! Except for the final pressing anyway.
Step 13:
Press seam allowances toward the center of the Arrowhead Star quilt block as shown below.

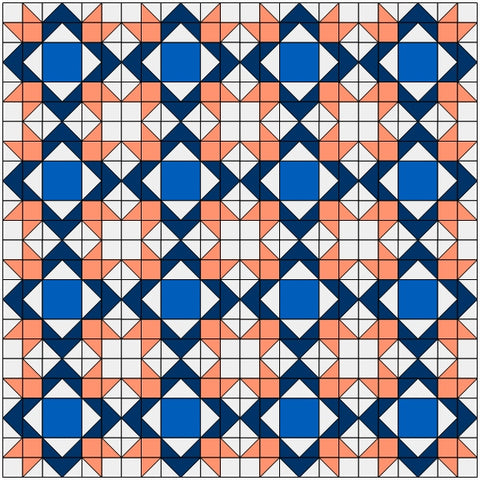
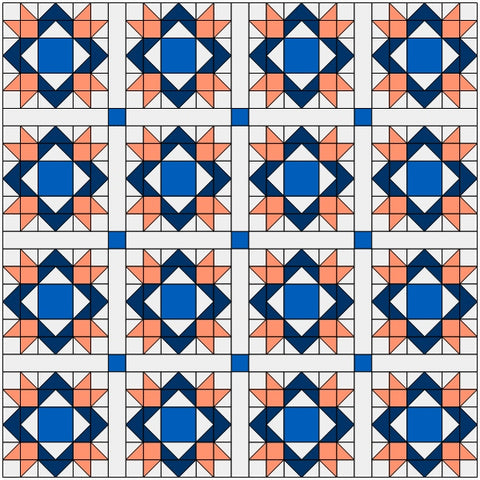
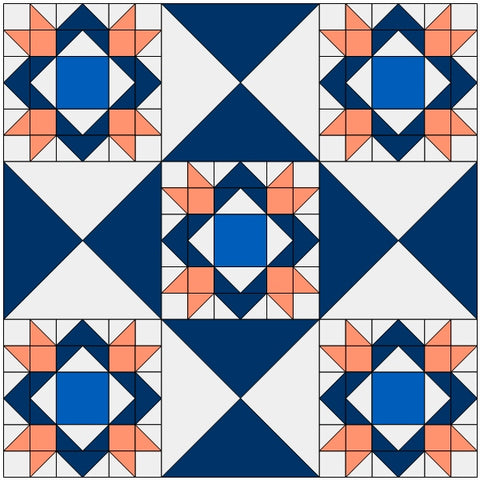
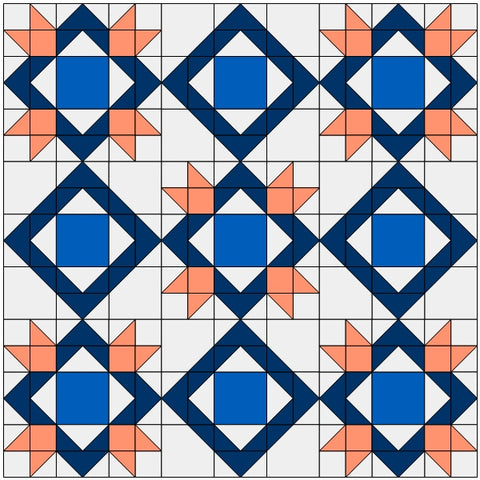
Layout Ideas:
Here's what a basic 4 x 4 layout would look like:
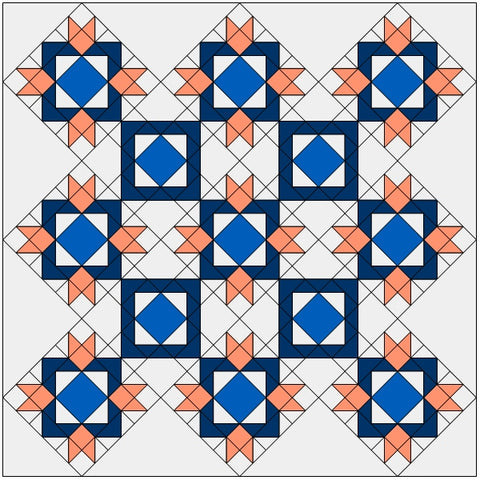
And this the same but with sashing and cornerstones added.
In this example Hourglass blocks alternate with the Arrowhead Star.
And here the alternating block is a Double Nine Patch.

Another alternating option using a block that mimics the diamond shape and center square:
This example is an on-point layout of the above quilt and using background fabric for the setting triangles.
Conclusion:
The Arrowhead Star (or Michigan Beauty) was fun to put together. I like the diamond shape that appears in the block. It also looks amazing when put together in a quilt!
I believe the difference between the Arrowhead Star and Michigan Beauty (although there's another block called Michigan Beauty too!) is the center patch. The Arrowhead Star has a light/white patch in the center and the Michigan Beauty has a colored center patch like what I've shown you in this tutorial.
I hope you've enjoyed this tutorial for the Arrowhead Star quilt block!
Happy Quilting!
Elaine
P.S. If you liked this post and want more quilting tutorials like this, simply click HERE and also receive a free PDF quilt pattern called "Chained Weathervane".