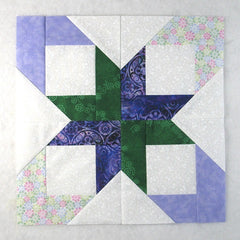
How to Make the Boxed Star Quilt Block - a Variation of the Box Quilt
Let's take a look at this Boxed Star quilt block that is inspired by the Box Quilt block tutorial I did recently. It is an easy, beginner-friendly block that can be colored and/or arranged in a variety of ways so you can make a quilt that is uniquely your own - even scrappy! Read on to learn the simple steps to create this lovely block.
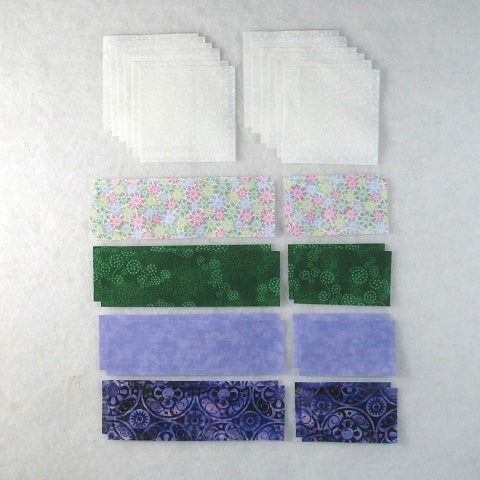
Fabric Requirements for a 12" Finished Boxed Star Quilt Block:
- White: 12 - 3.5" squares
- Light 1/Light Green: 2 - 2" x 6.5" rectangles, 2 - 2" x 3.5" rectangles
- Dark 1/Green: 2 - 2" x 6.5" rectangles, 2 - 2" x 3.5" rectangles
- Light 2/Light Purple: 2 - 2" x 6.5" rectangles, 2 - 2" x 3.5" rectangles
- Dark 2/Purple: 2 - 2" x 6.5" rectangles, 2 - 2" x 3.5" rectangles
Sewing Directions:
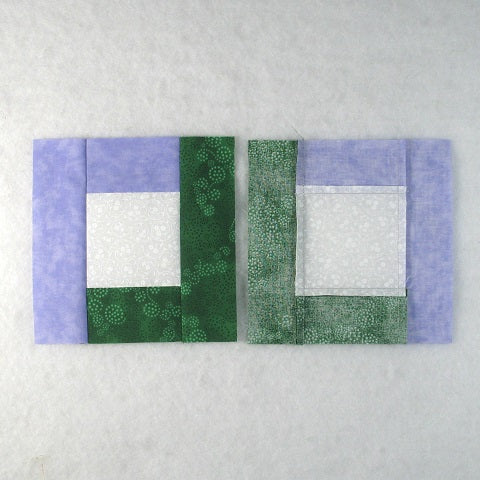
Framed Square Units:
Step 1:
Lay out and sew together a White 3.5" square, a Light Green 2" x 3.5" rectangle, and a Purple 2" x 3.5" rectangle as shown in the picture below. You can see that I pressed the seam allowances away from the White square.

Step 2:
Sew a Light Green 2" x 6.5" rectangle and a Purple 2" x 6.5" rectangle to the long sides of the Step 1 unit as shown below. Again, I pressed the seam allowances away from the White 3.5" square. Repeat for a total of two units.
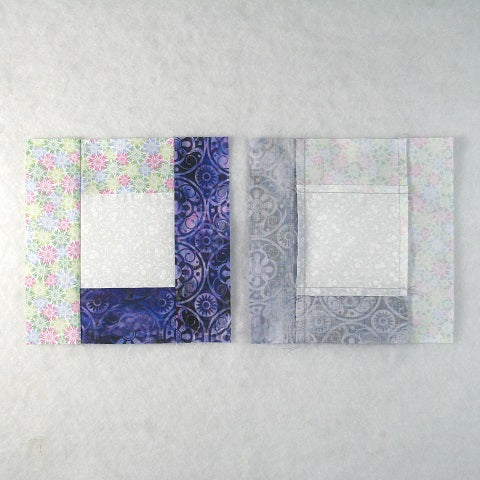
Step 3:
Repeat Steps 1 and 2 only substituting the Light Purple and Green rectangles for the Light Green and Purple ones as shown in the picture below.
Corner Units:
Step 4:
Now you will be "snowballing" two opposite corners of the Framed Square units with White 3.5" squares. Note that the corners with two colors are the ones we'll be working with.
- Mark a diagonal line from corner to corner on the back of two White 3.5" squares.
- Sew a White square to the Light Green/Purple Framed Square unit along the marked line (top right image). Note the orientation of the marked line.
- Match the corners of the White square and press (top left image).
- Trim the seam allowance (bottom right image).
- Refold (bottom left image).
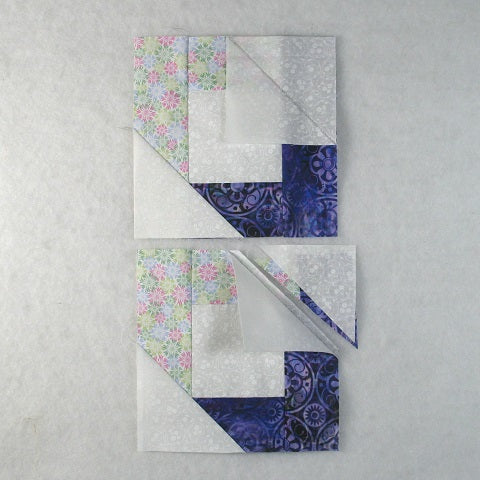
Step 5:
Repeat Step 4 for a total of two Corner units.

Step 6:
Repeat Steps 4 and 5 only using the Light Purple/Green Framed Square units for a total of two Corner units.


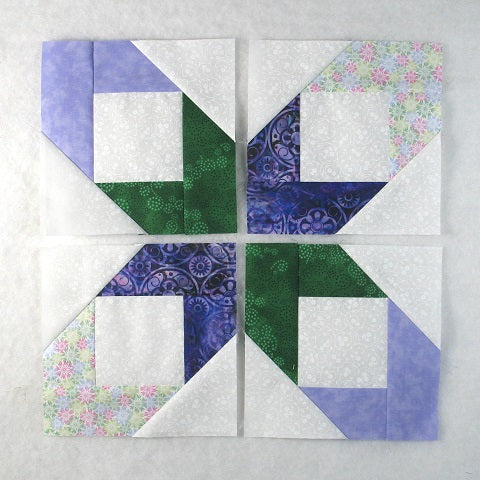
Putting It All Together:
Step 7:
Lay out the four Corner units as shown in the picture below. From here the block goes together like a basic Four Patch block.
Step 8:
Sew the units into two rows. Matching up the diagonal seams is the hardest part of this block. Just take your time.
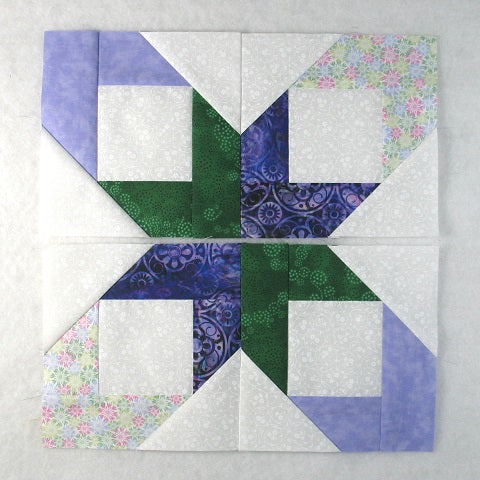
Step 9:
Press the seam allowances in opposite directions so that the seams will nest nicely in the next step.

Step 10:
Sew the two rows together to complete the block.

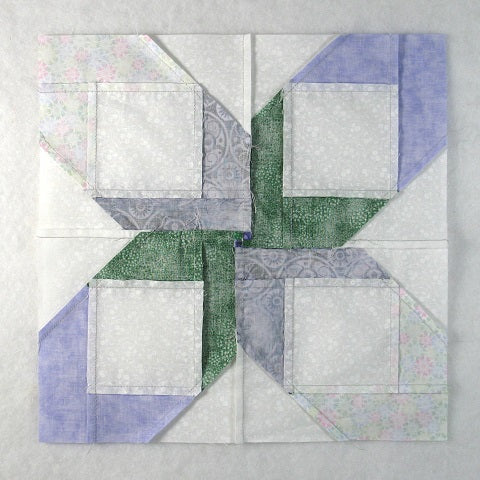
Step 11:
Press the seam allowance. You can see in the picture below that I used the tweak/twirl/furl method for pressing but you can press however you wish.
Layout Ideas:
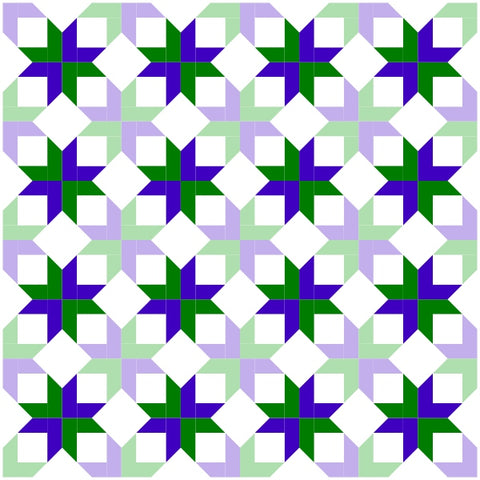
Here's the basic 4 x 4 layout with similar colors to the tutorial.
This example is the same layout as above only sashing and cornerstones were added.

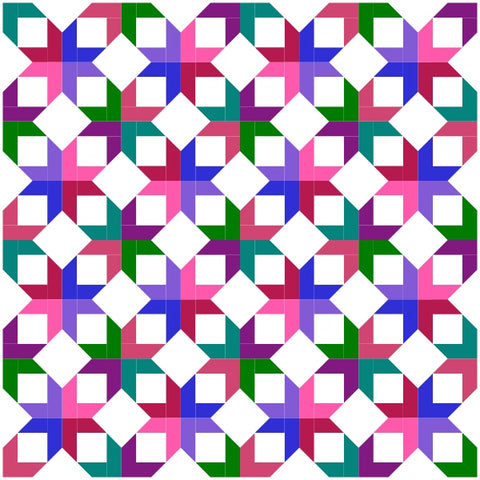
This is the same basic layout but with a scrappy block.
This example shows what happens when two of Framed Square units are made with dark colors and two are made with light colors. Really changes the look!

This layout is on-point and only using two colors plus the background.

And this one is the same layout as above and using only two colors plus background but with dark sashing and cornerstones.

Conclusion:
I had fun working out this variation! I think my version is easier and faster even though there is a little bit of wasted fabric when you trim the snowballed corners. I also think it would be a great scrappy project - just make the Corner units as you gather scraps and sew them into a quilt once you get enough.
I hope you have enjoyed this tutorial. If you like it and want to see more, just click HERE to sign up for my newsletter and receive a free PDF quilt pattern called "Chained Weathervane".
Happy Quilting!
Elaine
P.S. Check out the block that inspired this one at https://fabric406.com/blogs/fabric406-blog/the-box-quilt-block-an-easy-beginner-friendly-quilt-block-tutorial
P.P.S. Check out my patterns I have for sale on Etsy at https://www.etsy.com/shop/fabric406