Learn How to Make the Bonnie Scotland Quilt Block - a Pinwheel Variation Block Tutorial
The Bonnie Scotland quilt block is so fun and fast to sew together! The pattern creates a pinwheel and/or windmill design by itself but when multiple blocks are sewn together, another pinwheel appears! The block's creation is credited to Judy Martin, a prolific pattern designer whose career spans four decades. You can read more about her at https://judymartin.com/about/. Let's get sewing!

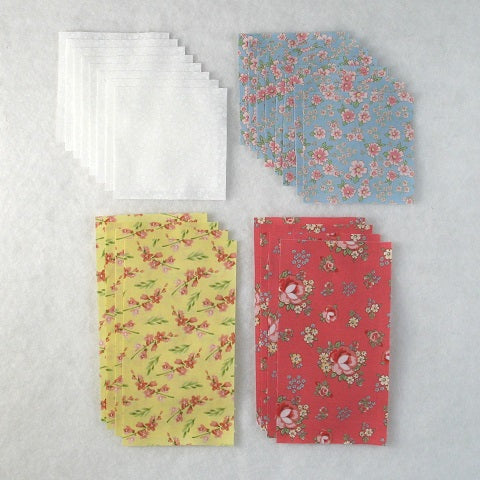
Fabric Requirements for a 12" Finished Bonnie Scotland Quilt Block:
- White: 8 - 3.5" squares
- Blue: 8 - 3.5" squares
- Yellow: 4 - 3.5" x 6.5" rectangles
- Pink: 4 - 3.5" x 6.5" rectangles
Sewing Directions:
Flying Geese Units:
Step 1:
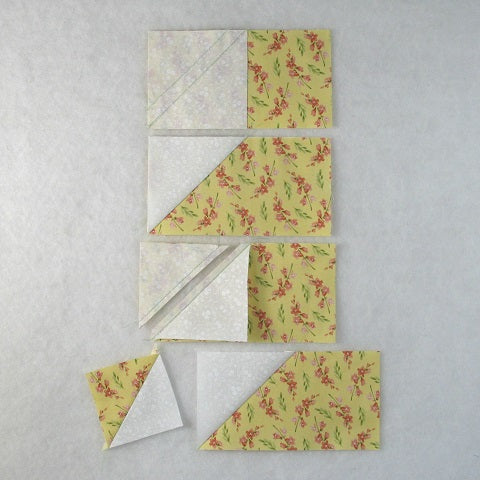
Using four White 3.5" squares, four Blue 3.5" squares, and the four Yellow 3.5" x 6.5" rectangles, sew together four Flying Geese units. For a detailed tutorial of my no-trim method for making perfect Flying Geese blocks check out https://fabric406.com/blogs/fabric406-blog/how-to-sew-a-basic-flying-geese-block. The picture below shows the first four steps.
- Mark a diagonal line from corner to corner on the back of the White 3.5" squares.
- Sew a White square to the Yellow rectangle along the marked line (top image). Note the orientation of the marked line. Because these units are large, I also sewed about a 1/2" from the marked line so I can make a bonus Half Square Triangle (HST).
- Match the corners of the White square and press (second image).
- Cut in between the two seam lines (third image).
- Refold (bottom image). Here you can see the little 2.5" bonus HST that I can add to my stash for a future quilt.
Step 2:
Repeat Step 1 on an adjacent corner only using the Blue 3.5" squares instead of the White ones.
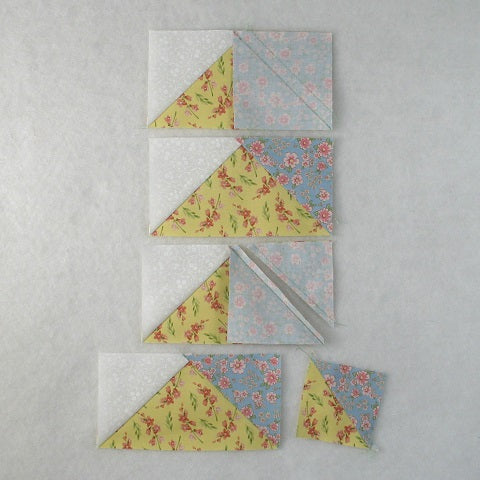
Step 3:
Repeat Steps 1 and 2 for a total of four Flying Geese units like the ones in the picture below.

Diagonal Stripe Units:
Step 4:
The Diagonal Stripe units are made in the same manner as a Flying Geese unit except that opposite corners are used instead of adjacent corners.
Using the four Pink 3.5" x 6.5" rectangles, four White 3.5" squares and four Blue 3.5" squares sew together four Diagonal Stripe units. In the picture below you can see the first four steps using the White 3.5" squares.
Note the orientation of the diagonal line. This is important!
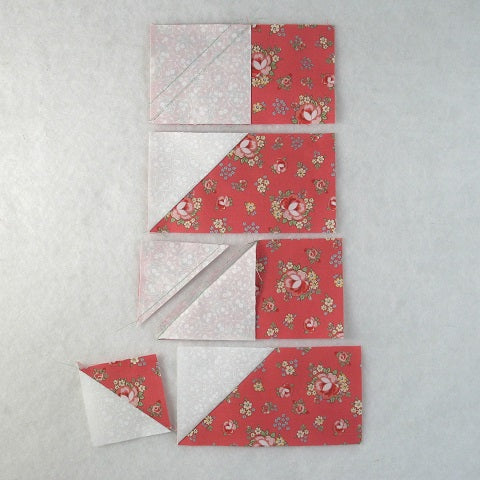
Step 5:
Now you can sew the Blue 3.5" squares to the opposite corner of the Pink rectangle.
Once again, note the orientation of the marked line.

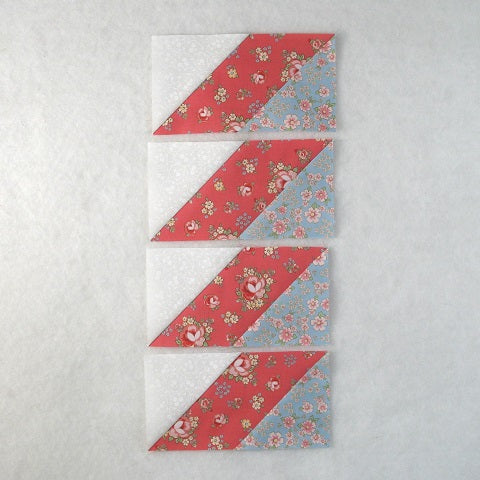
Step 6:
Repeat Steps 4 and 5 for a total of four Diagonal Stripe units like the ones shown in the picture below.
Corner Units:
Step 7:
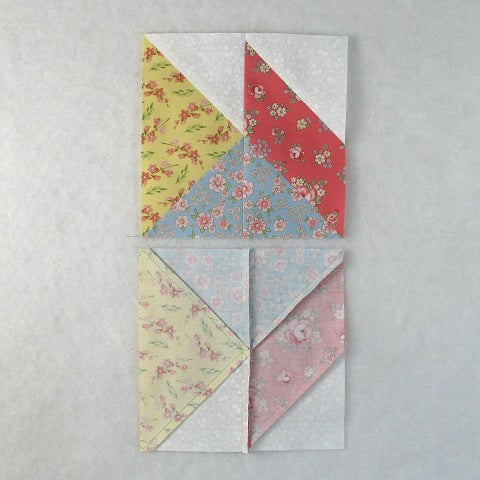
Match up and sew a Flying Geese unit and a Diagonal Stripe unit as shown in the picture below. Press the seam allowance toward the Diagonal Stripe unit.
You may find it easier to reverse the pressing of the Blue/Pink seam on the Diagonal Stripe units. It is not necessary but the seams should nest together nicely if you do. You can see in the bottom image that I did repress that seam so that it goes toward the Pink fabric.
Repeat for a total of four Corner units.

Putting It All Together:
Step 8:
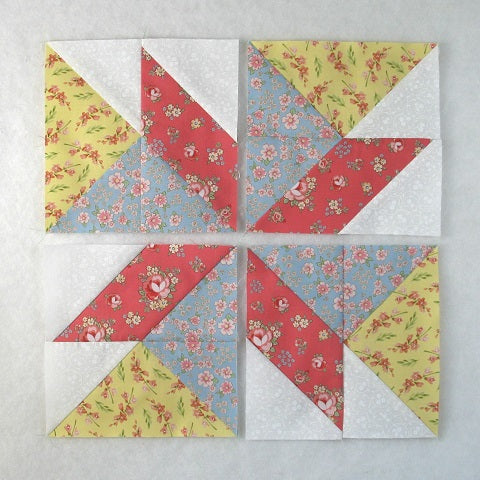
Lay out the four Corner units as shown in the picture below.
Step 9:
Sew the units into two rows.

Step 10:
Press the seam allowances as shown in the picture below. Note that all the seam allowances that will meet in the middle of the block are all laying in a counterclockwise direction.
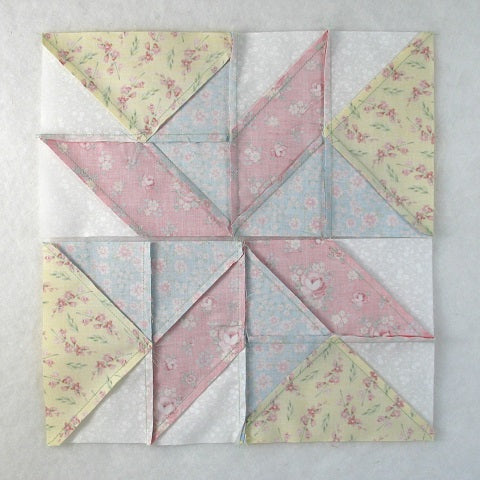
Step 11:
Sew the two rows together to complete the block.

Step 12:
Press the seam allowance. You can see in the picture below that I've used the tweak/twirl/furl method for pressing, but you can press however you prefer.

Layout Ideas:
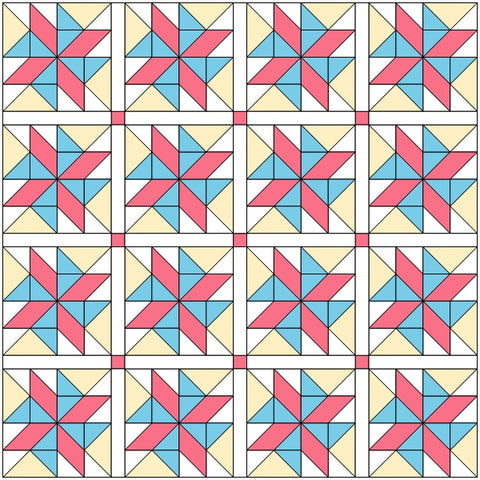
Here's the basic 4 x 4 layout in similar colors to the block I sewed together. See how a yellow pinwheel appears between blocks!

For this one I added sashing and cornerstones. I think you lose the yellow pinwheel in this layout.
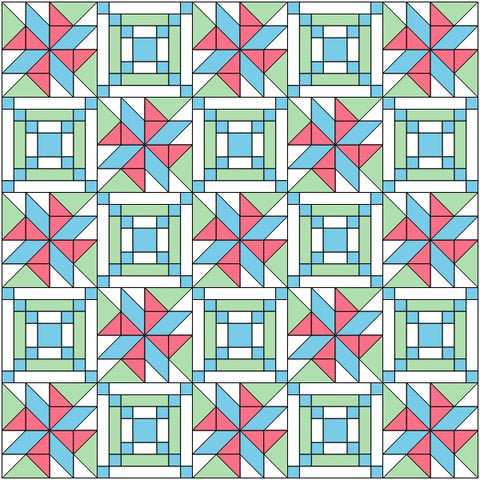
For this example I used a 5 x 5 layout with an alternating chain block.
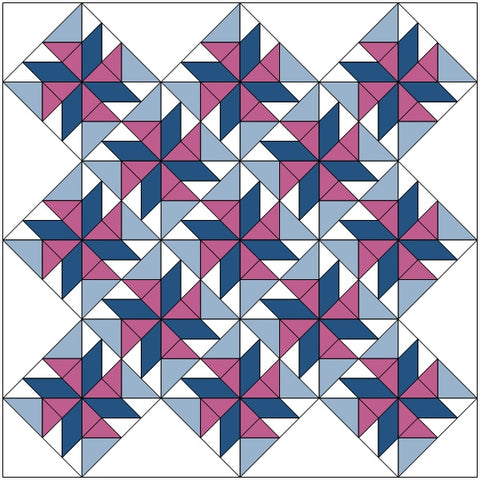
Here's a typical on-point layout with light setting triangles.
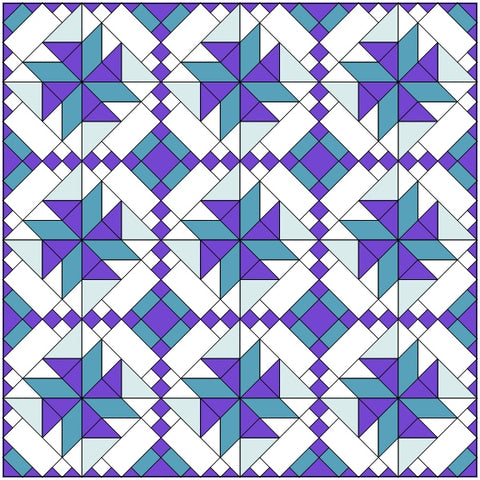
This version is an on-point layout with an alternating chain block in between and in the setting triangles. This is my favorite!
And finally we have an on-point layout with colored sashing and plain setting triangles.

Conclusion:
I had fun sewing the Bonnie Scotland block together! It went together so quickly because of the size of the units. Plus cutting time was minimal! All in all I think it makes for a great quilt!
I hope you have enjoyed this tutorial. If you like it and want to see more, just click HERE to sign up for my newsletter and receive a free PDF quilt pattern called "Chained Weathervane".
Happy Quilting!
Elaine
P.S. Looking for more pinwheel blocks? Take a look at this roundup blog post for some inspiration: https://fabric406.com/blogs/fabric406-blog/20-of-the-best-pinwheel-quilt-block-patterns
P.P.S. Check out my patterns I have for sale on Etsy at https://www.etsy.com/shop/fabric406