How to Make the Free Trade Quilt Block
This lovely traditional star-in-a-star quilt block finishes at 16". So you don't need too many blocks to make a quilt! The block also goes by the name Coronation. I found several tutorials for making this block but they only used the inner star for the entire block. We're going to do the full one with two stars. Let's get started!

Update: I now have a PDF pattern of this block available in my Etsy shop if you prefer to have a printed pattern. Check it out by clicking this link: FREE TRADE
Fabric Requirements for a 16" Finished Free Trade Quilt Block:
- Light/Print: 4 - 4.5" x 8.5" rectangles, 4 - 2.5" x 4.5" rectangles, 5 - 3" squares, and 14 - 2.5" squares
- Medium/Blue 1: 1 - 3" square, and 8 - 2.5" squares
- Medium/Blue 2: 4 - 3" squares
- Dark/Burgundy: 8 - 4.5" squares

Sewing Directions:
Corner Units:
Step 1:
Using four Light/Print 3" squares and four Medium/Blue 2 3" squares, sew together eight Half Square Triangle units as shown below. Trim/square up the units to 2.5" square. You can find tutorials for making a basic Half Square Triangle at https://fabric406.com/blogs/fabric406-blog/how-to-sew-a-basic-half-square-triangle-block and https://fabric406.com/blogs/fabric406-blog/two-easy-methods-for-making-half-square-triangle-quilt-blocks

Step 2:
Lay out two Step 1 units and two Light/Print 2.5" squares as shown in the picture below.

Step 3:
Sew the patches into two rows and press the seam allowances toward the Light/Print squares as shown in the picture below.

Step 4:
Sew the two rows together and press the seam allowances. In the picture below you can see that I pressed using the twirl method. Repeat Steps 2 through 4 for a total of 4 Corner units.

Center Unit:
Step 5:
Repeat Step 1 only using a Light/Print 3" square and a Medium/Blue 1 3" square. You'll have two units.

Step 6:
Repeat Steps 2 through 4 to make one Center unit like the one shown below.

Flying Geese Units:
Step 7:
Sew together 4 Flying Geese units using the Light/Print 2.5" x 4.5" rectangles and Medium/Blue 1 2.5" squares. You can find my method for making no-trim Flying Geese blocks at https://fabric406.com/blogs/fabric406-blog/how-to-sew-a-basic-flying-geese-block

Step 8:
Next you'll need to repeat Step 7 using the Light/Print 4.5" x 8.5" rectangles and Dark/Burgundy 4.5" squares. I do an extra step on these larger sized Flying Geese. I sew (in the seam allowance side) about 1/2" from the first seam.
Step 9:
Then when you cut in between the seams, you get an extra Half Square Triangle that can be used in another project.

Center Star:
Step 10:
Lay out the Center unit, the Step 7 Flying Geese units, and 4 Light/Print 2.5" squares as shown in the picture below.

Step 11:
Sew the units together into three rows as shown.

Step 12:
Press the seam allowances toward the Flying Geese patches as shown in the picture below.

Step 13:
Sew the three rows together. This is where some of the tutorials I found for this block stop. It is a pretty star - but let's make it even prettier!

Step 14:
Press the seam allowance away from the center of the unit as shown below.


Putting It All Together:
Step 15:
Lay out the Center Star unit, the Step 8 Flying Geese units, and the Corner units as shown in the picture below.

Step 16:
Sew the units into three rows as shown below.

Step 17:
Press the seam allowances away from the large Flying Geese units.

Step 18:
Sew the three rows together.

Step 19:
Press the seam allowances toward the center of the block. All done!

Conclusion:
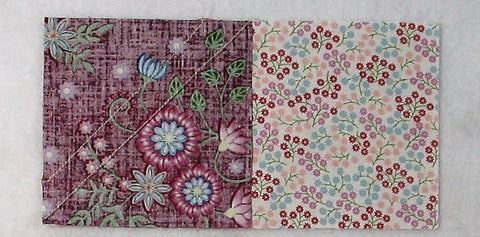
I usually use a tone on tone white or ivory for the background fabric in these tutorials. But I loved this light print from this collection and decided to try it out as the background. I'm pleased that it looks better than I thought it might!
I enjoyed putting this block together. There are a few more steps than normal but you end up with a 16" block! 12 blocks and a border would make a nice-sized throw! Also, when multiple blocks are sewn together, you will get another star at the intersections.
I hope you've enjoyed this Free Trade quilt block tutorial. If you liked this post and want to see more quilting tutorials like this, simply click here to sign up for my newsletter and also receive a free PDF quilt pattern called "Chained Weathervane".
Happy Quilting!
Elaine
P.S. Would you like a PDF of this tutorial? If so, check out FREE TRADE.
P.S. To figure out yardage for a quilt, check out this post: https://fabric406.com/blogs/fabric406-blog/how-much-fabric-do-i-need