How to Sew a Lone Star Quilt Block - Not Your Traditional Lone Star
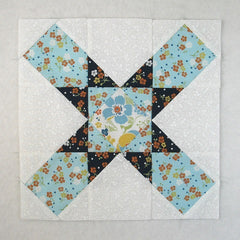
Today let's take a look at this Lone Star quilt block. This block's creation is attributed to Alice Brooks, a name created by a New York needlework syndicate called Old Chelsea Station (among several other names). It is not the traditional quilt pattern that I associate with Lone Star but it is an easy and fun block to sew together.
To learn more about Alice Brooks, you can read more at Barbara Brackman's blog post at https://barbarabrackman.blogspot.com/2020/01/alice-brooks-darn-her.html
Fabric Requirements for a 12" Finished Lone Star Quilt Block:
- White: 4 - 4.5" squares, and 12 - 2.5" squares
- Medium Blue: 4 - 4.5" squares, and 4 - 2.5" squares
- Dark Blue: 8 - 2.5" squares
- Light Center Print: 1 - 4.5" square

Sewing Directions:
Half Square in a Square:
Step 1:
This unit is a take on a Square in a Square block but only two adjacent corners are "snowballed". You can find a detailed tutorial for making a Square in a Square block at https://fabric406.com/blogs/fabric406-blog/how-to-sew-a-basic-square-in-a-square-block. This is also the same procedure as a Flying Geese block but a large square is used instead of a rectangle.
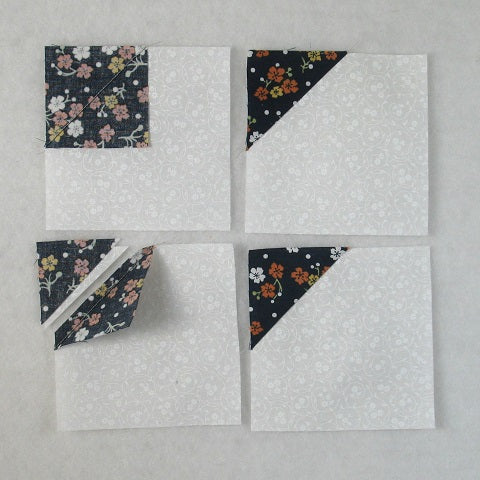
Using a White 4.5" square and two Dark Blue 2.5" squares sew together a Half Square in a Square unit. Here are the first four steps (left to right, top to bottom):
- Mark a diagonal line from corner to corner on the back of the Dark Blue 2.5" squares.
- Sew a Dark Blue square to the White square along the marked line (top left image). Note the orientation of the marked line.
- Match the corners of the Dark Blue square and press (top right image).
- Trim off seam allowance (bottom left image).
- Refold (bottom right image).
Step 2:
Repeat Step 1 on an adjacent corner of the White square as shown in the picture below.

Step 3:
Repeat Steps 1 and 2 for a total of four Half Square in a Square units like the ones shown below.

Three-Quarter Square in a Square Units:
Step 4:
Using the four Medium Blue 4.5" squares and the 12 White 2.5" squares, repeat Step 1 on three corners of the Medium Blue squares.
To be more efficient, you can work on the two opposite corners at the same time.

Square in a Square Unit:
Step 5:
Using the Light Blue Print 4.5 " square and the four Medium Blue 2.5" squares, repeat Step 1 on all four corners of the Light Blue Print square.

Putting It All Together:
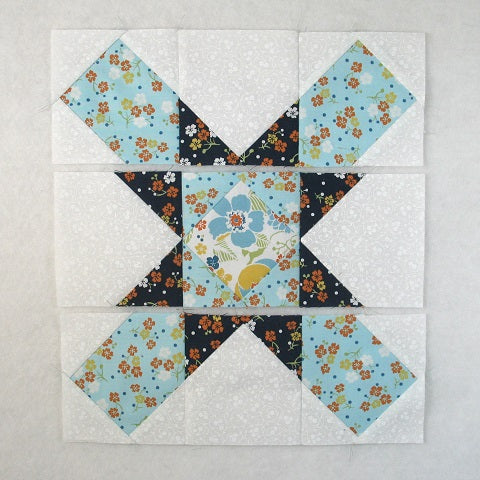
Step 6:
Lay out the Half, Three-Quarter, and full Square in a Square units according to the picture below. From here the block goes together like a typical Nine Patch block.

Step 7:
Sew the units into three rows. Matching up those diagonal seams can be tricky. I simply made sure that the units were matched up top and bottom and trusted that the diagonals would match. Awfully close - from a couple of feet away, one can't even tell if they aren't perfect!
Step 8:
Press the seam allowances toward the Half Square in a Square units as shown in the picture below.

Step 9:
Then sew the three rows together to complete the block.
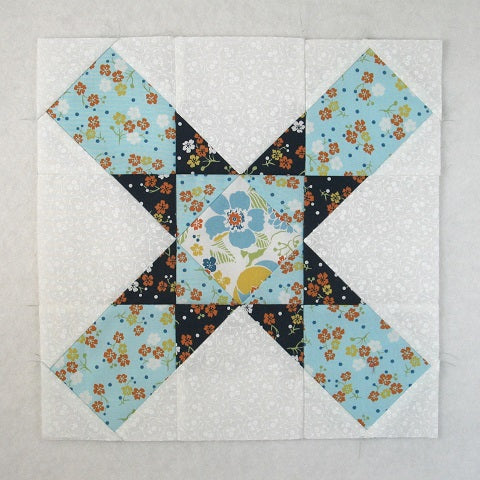
Step 10:
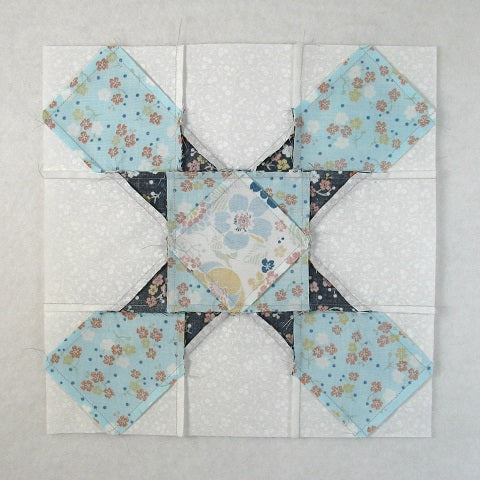
Press the seam allowances away from the center of the block as shown below. All done! That was quick!
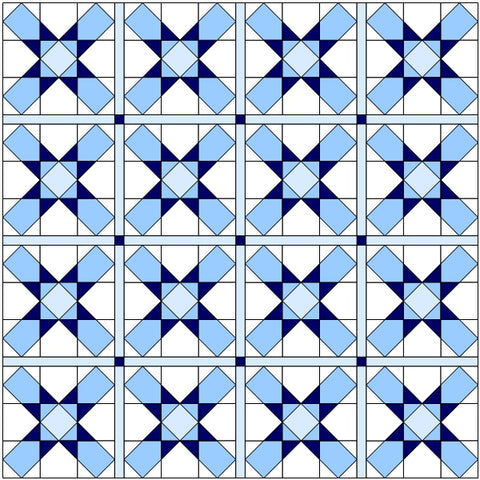
Layout Ideas:
Here's the basic 4 x 4 layout using colors similar to the ones in the tutorial. I like the diagonal design that shows up in this layout - very nice!

This example is the same layout as above but with narrow sashing and cornerstones added.
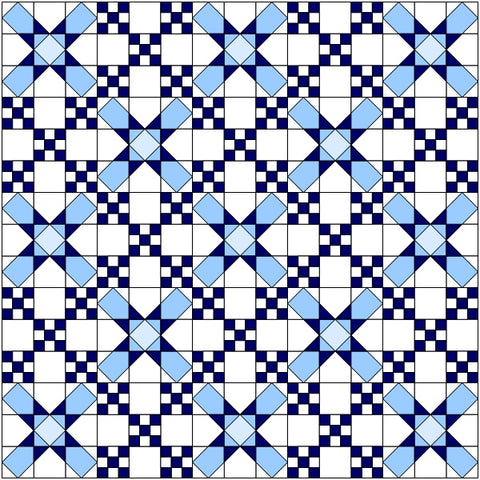
In this version, I alternated the Lone Star with a Double Nine Patch block.
Here's an on-point layout done in red and green for a Christmas look. This could be fun to do as a scrappy quilt by using multiple reds and greens throughout.

In this basic layout, I alternated with a different chain block.

In this on-point layout, I added in a coordinating narrow sashing and cornerstones, plus light setting triangles.

For this idea, I alternated an applique block with the Lone Star. I really like this layout as the Lone Star frames the applique block and sets it off nicely. You could also do an embroidery block or leave plain and do some fancy quilting in the space.

Conclusion:
I found this Lone Star quilt block to be easy, quick and fun to sew together! Traditionally, the center unit would have been white but I wanted to see what a larger print would look like. I was totally impressed that the diagonal seams matched up so good.
I hope you have enjoyed this tutorial. If you like it and want to see more, just click HERE to sign up for my newsletter and receive a free PDF quilt pattern called "Chained Weathervane".
Happy Quilting!
Elaine
P.S. I have done two of the traditional Lone Star quilts (one is the inspiration for my logo). I used the Quiltsmart method and had awesome results. Here's a link to ShopSewMee's Quiltsmart kits: https://tidd.ly/4aMxcmw (they are currently on sale too!)
P.P.S. Looking for more star blocks? Take a look at this roundup post: https://fabric406.com/blogs/fabric406-blog/30-of-the-best-star-quilt-block-patterns