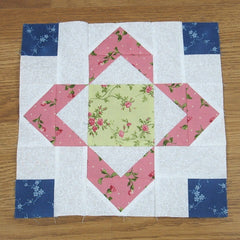
How to Sew an Aunt Sukey’s Choice Quilt Block
Let’s sew an Aunt Sukey’s Choice quilt block today! This 12″ finished block appeared in the Ladies Art Company publication way back when. It is a sweet traditional block that sews up quickly! Let's get sewing!
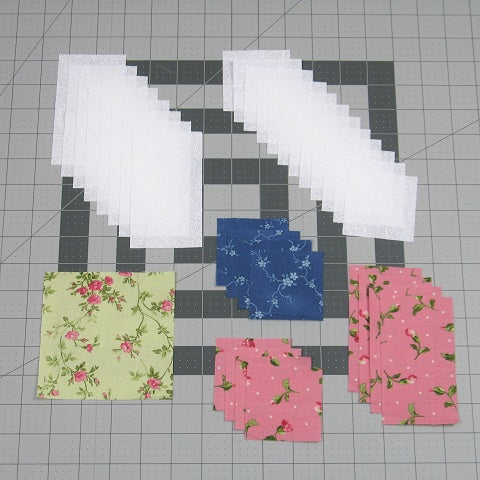
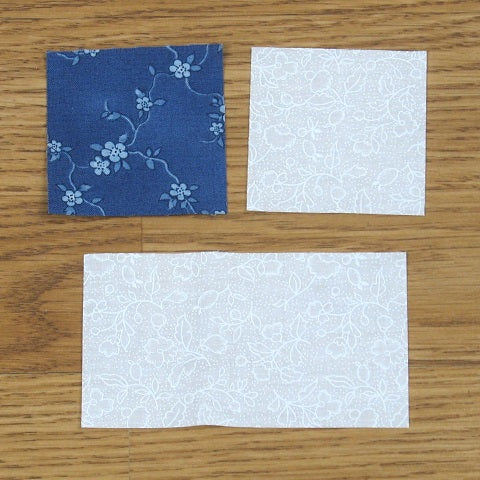
Fabric Requirements for a 12" Finished Aunt Sukey's Choice Quilt Block:
- Light: 12 – 2.5″ squares; 8 – 2.5″ x 4.5″ rectangles
- Blue: 4 – 2.5″ squares
- Green: 1 – 4.5″ square
- Pink: 8 – 2.5″ squares; 4 – 2.5″ x 4.5″ rectangles (the picture below only shows 4 – 2.5″ squares – guess I don’t know how to count!)
Sewing Directions:
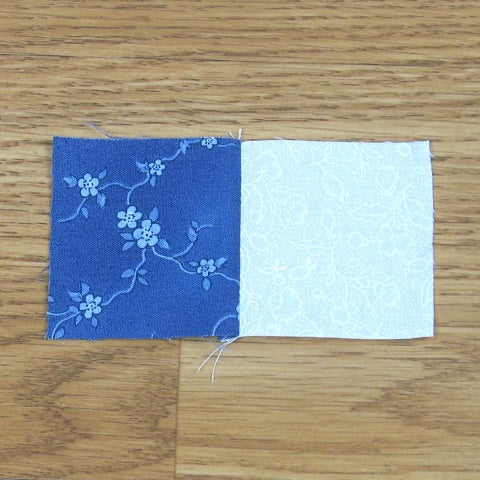
Step 1:
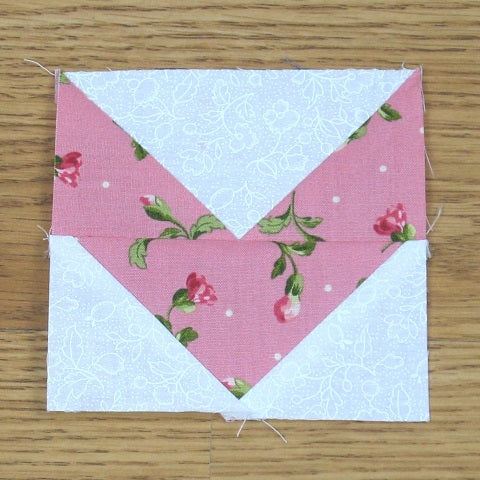
Flying Geese Units:
First you will make 4 Flying Geese units using 4 Light 2.5″ x 4.5″ rectangles and 8 Pink 2.5″ squares as shown in the top unit in the photo. Then do the same with the Pink 2.5″ x 4.5″ rectangles and the Light 2.5″ squares as shown in the bottom unit. You can see my method for making Flying Geese units here: https://fabric-406.myshopify.com/blogs/fabric406-blog/how-to-sew-a-basic-flying-geese-block

Step 2:
Sew two of the units together as shown and repeat for a total of 4 units.
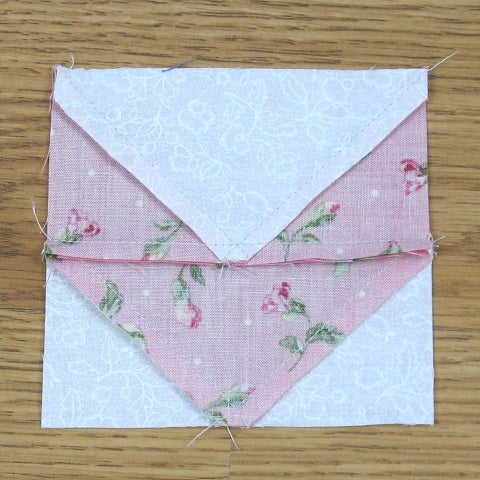
Step 3:
Press the seam allowance as shown below.
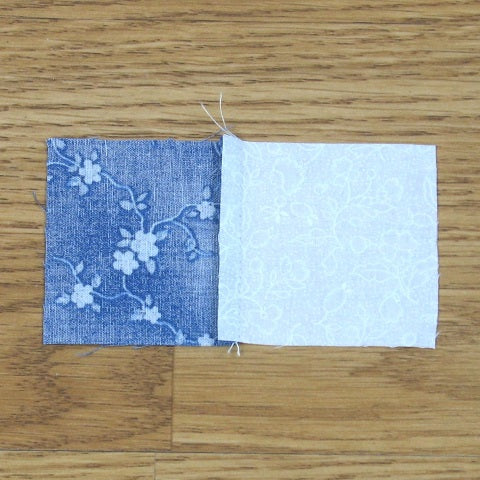
Step 4:
Three-Patch Units:
Now we’re going to make 4 Three-Patch units for the corners of our block. You could make this unit as a simple Four-Patch using 4 2.5″ squares but the way I’m showing has one less seam.
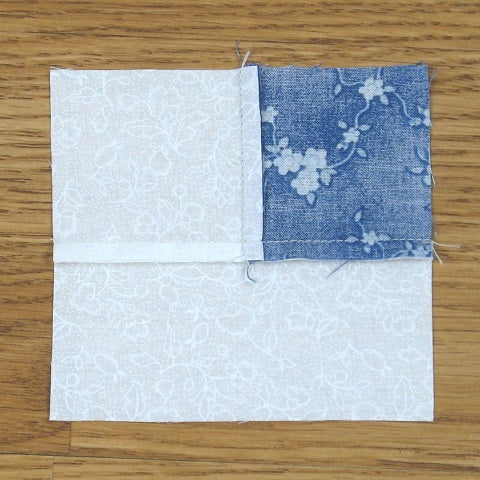
Step 5:
Sew the Blue and Light 2.5″ squares together. Make 4 units total.
Step 6:
Press the seam allowance toward the Blue 2.5″ square as shown below.
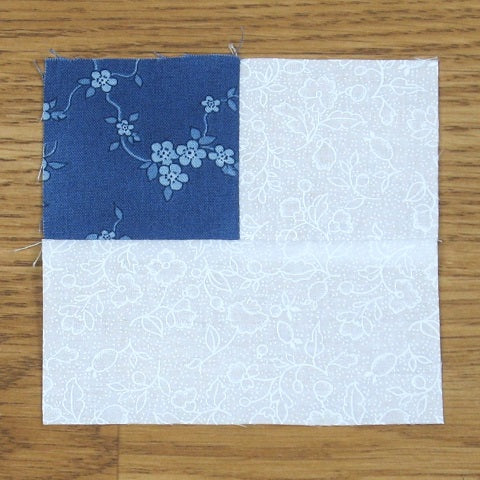
Step 7:
Sew a Light 2.5″ x 4.5″ rectangle to the Blue/Light unit made above. Repeat so you get a total of 4 units.
Step 8:
Press the seam allowance toward the Light rectangle as shown below.

Putting It All Together
Step 9:
Lay out the Flying Geese units, the Three-Patch units, and the Green 4.5″ square in a nine-patch configuration.
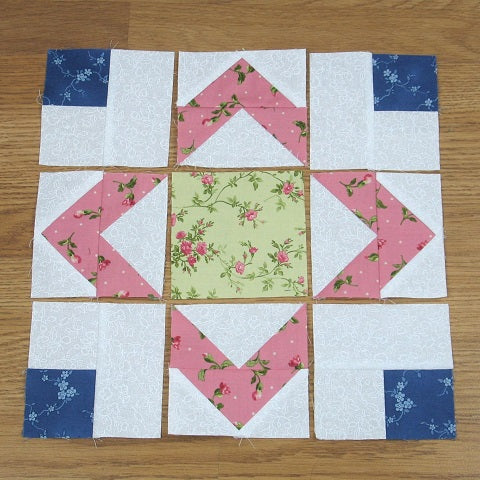
Step 10:
Sew the units together in 3 rows as shown below.

Step 11:
Press the seam allowances away from the Flying Geese units as shown below.
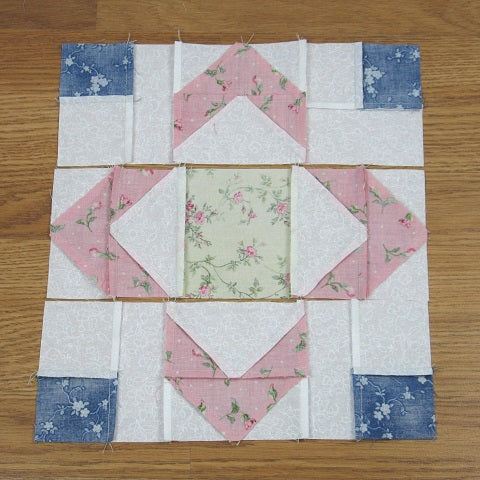
Step 12:
Sew the 3 rows together and …
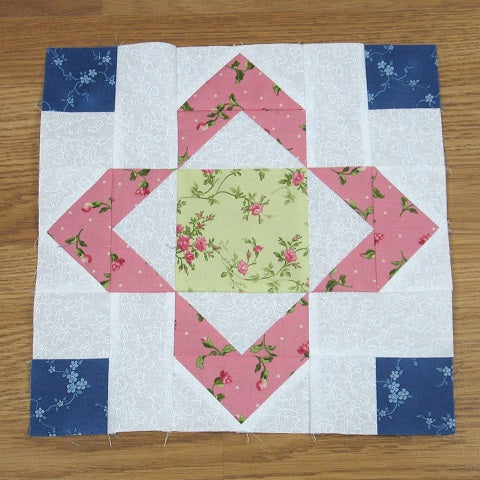
Step 13:
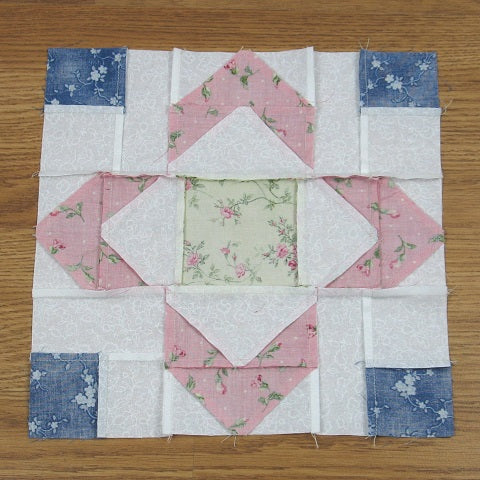
Press seam allowances toward the center of the block. All done!
Layout Ideas:
Here's a picture of a quilt I made several years ago using the Aunt Sukey's Choice block.

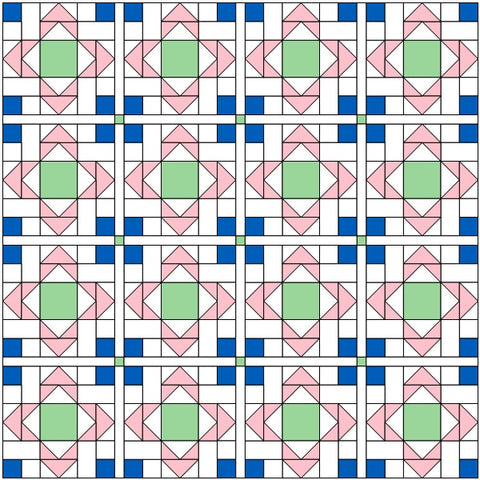
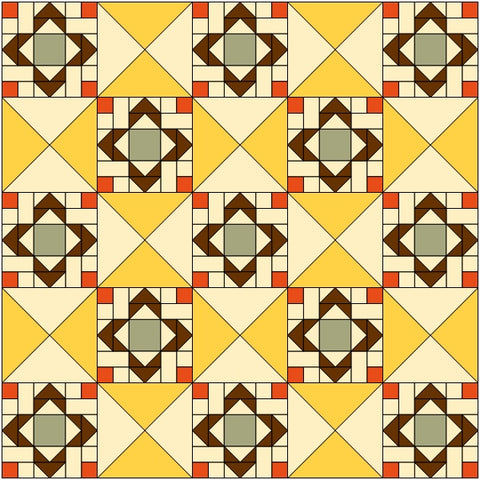
Here's the basic 4 x 4 layout using colors similar to the tutorial:

This example is the same layout as above but with narrow sashing and cornerstones added:
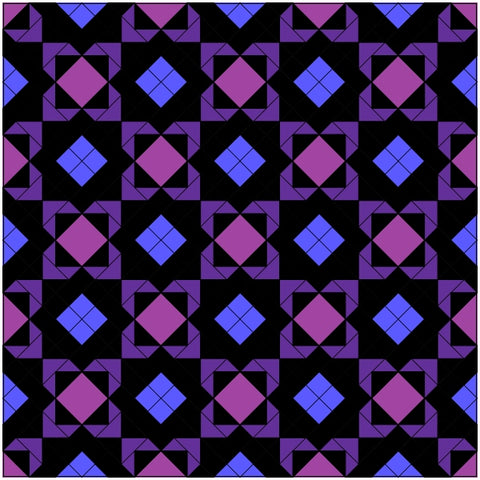
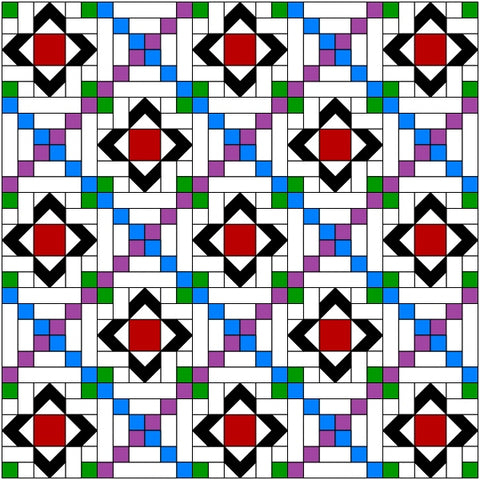
This is a typical on-point layout but the light has been replaced with black and jewel tones used for the rest of the patches. Sure looks different this way!
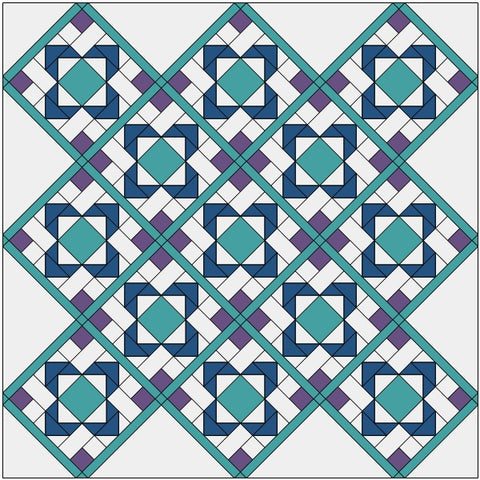
Here we have another on-point layout with sashing and cornerstones in green and plain light blocks for the setting triangles.
This layout uses an alternating chain block to set off the Aunt Sukey's Choice blocks:
And this example has a large Hourglass block used as an alternating block:
Conclusion:
The Aunt Sukey's Choice block was quick and fun to sew together! I love the diamond (or braced) design it makes.
I hope you’ve enjoyed this tutorial for the Aunt Sukey's Choice quilt block. If you like it and want to see more, just click HERE to sign up for my newsletter and receive a free PDF quilt pattern called "Chained Weathervane".
Happy Quilting!
Elaine
P.S. In case you missed it, check out my roundup post of easy quilt blocks at https://fabric406.com/blogs/fabric406-blog/30-easy-quilt-block-tutorials-for-the-beginning-quilter
P.P.S. Check out my patterns I have for sale on Etsy at https://www.etsy.com/shop/fabric406