The Traditional Starburst Quilt Block - Free Tutorial
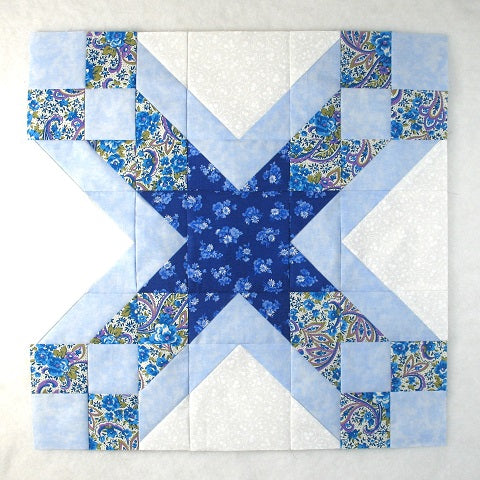
This gorgeous star quilt block is a delight for the eyes! The large 16" Starburst block also makes a wonderful secondary design when made into a quilt. I'll break down each part of the block into doable steps so you can successfully sew the block together.
This Starburst pattern is credited to Arleen Boyd, renowned quilter and teacher with many awards including first prize at the New York State Fair. Let's check her block out!

Fabric Requirements for a 16" Finished Starburst Quilt Block:
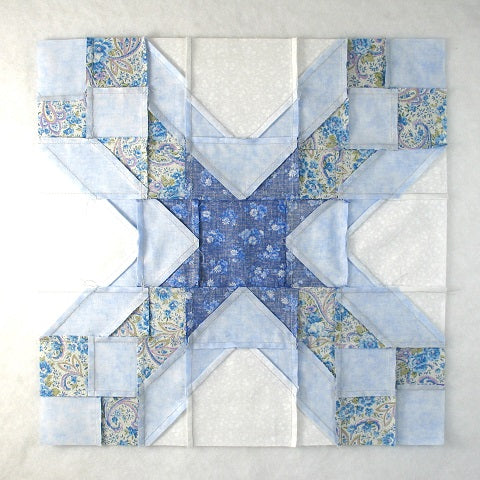
Traditionally, the dark and medium toned fabrics are switched from the way I've laid out the colors.
- White: 4 - 4.5" squares, and 8 - 2.5" squares
- Light Blue: 12 - 2.5" x 4.5" rectangles, and 16 - 2.5" squares
- Medium Blue: 20 - 2.5" squares
- Dark Blue: 1 - 4.5" squares, and 8 - 2.5" squares

Sewing Directions:
Four Patch Units:
Step 1:
Lay out two Light Blue and two Medium Blue 2.5" squares as shown in the picture below. Stitch them together into two rows and press the seam allowances toward the Medium Blue fabric as shown.
Step 2:
Sew the two rows together and press the seam allowance to one side as shown below. Repeat Steps 1 and 2 for a total of four Four Patch units.
Note that one of the Light Blue squares does not have either seam allowance going towards it (upper right square in the right image). Keep this square in mind for later reference (you could put a pin in it if you want).

Modified Flying Geese Units:
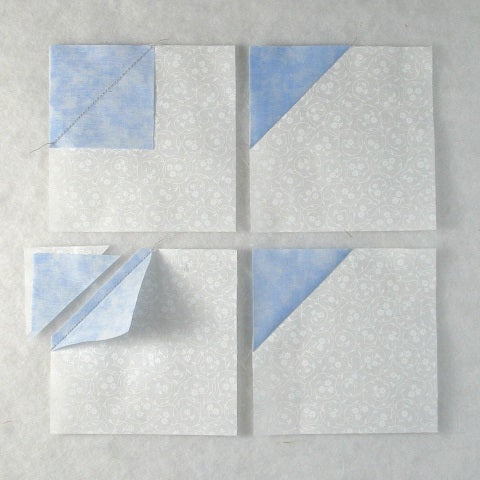
Step 3:
This unit could also be called a half of a Square in a Square block.
Using a White 4.5" square and two Light Blue 2.5" squares sew together a Modified Flying Geese unit. This is the same procedure as a normal Flying Geese block but a large square is used instead of a rectangle. Here are the first four steps (left to right, top to bottom):
- Mark a diagonal line from corner to corner on the back of the Light Blue 2.5" squares.
- Sew a Light Blue square to the White square along the marked line (top left image). Note the orientation of the marked line.
- Match the corners of the Light Blue square and press (top right image).
- Trim off seam allowance (bottom left image).
- Refold (bottom right image).
Step 4:
Repeat Step 3 on an adjacent corner of the White square as shown in the picture below.
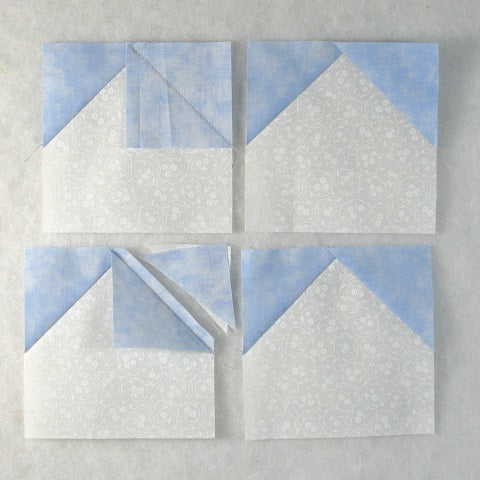
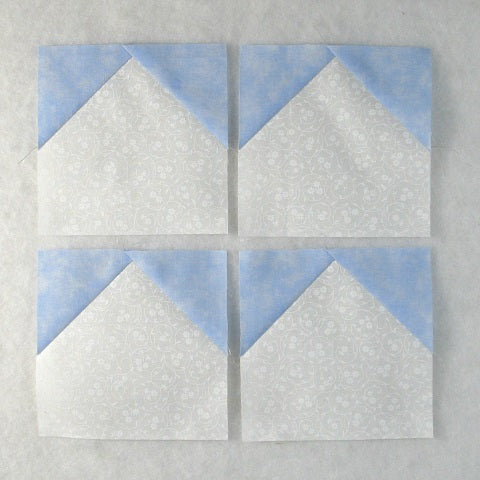
Step 5:
Repeat Steps 3 and 4 for a total of four Modified Flying Geese units:
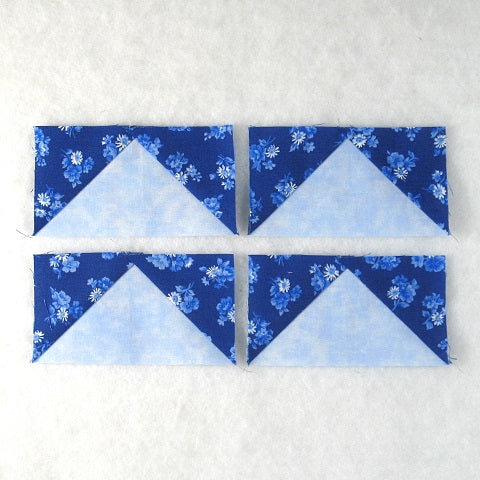
Flying Geese Units:
Step 6:
Now you need to make four normal Flying Geese units. Repeat Steps 3 through 5 only using four Light Blue 2.5" x 4.5" rectangles and the eight Dark Blue 2.5" squares.
For a detailed tutorial of my no-trim method for making perfect Flying Geese blocks check out https://fabric406.com/blogs/fabric406-blog/how-to-sew-a-basic-flying-geese-block.
Middle Units:
Step 7:
Lay out a Modified Flying Geese unit and a Flying Geese unit as shown in the picture below.
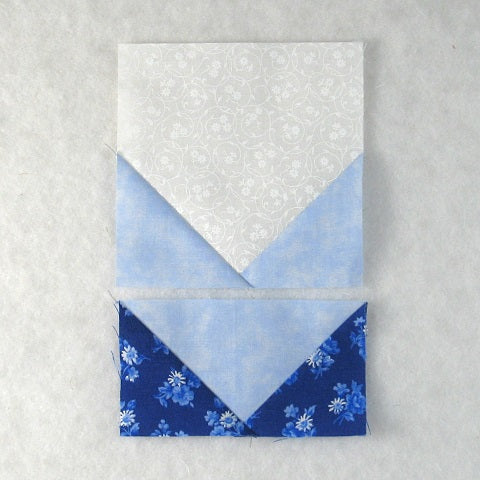
Step 8:
Sew the units together and press the seam allowance away from the Flying Geese unit as shown below.

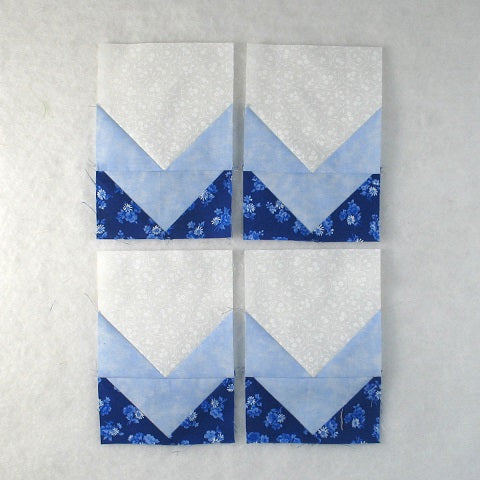
Step 9:
Repeat Steps 7 and 8 for a total of four Middle units.
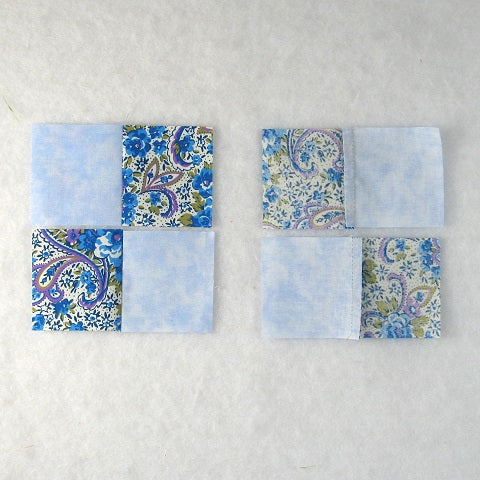
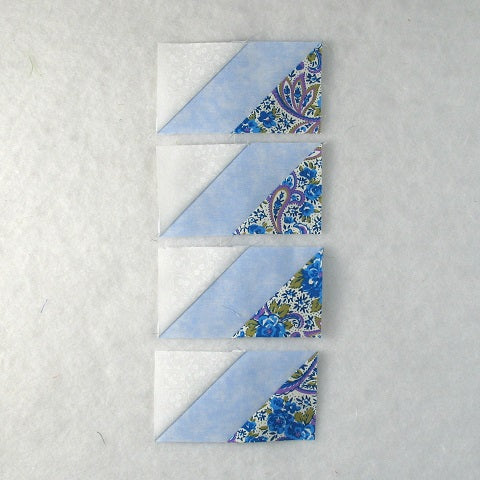
Diagonal Stripe Units:
Step 10:
The Diagonal Stripe units are made in the same manner as a Flying Geese unit except that opposite corners are used instead of adjacent corners.
Using four of the Light Blue 2.5" x 4.5" rectangles, four White 2.5" squares and four Medium Blue 2.5" squares sew together four Diagonal Stripe units. In the picture below you can see the first four steps using the White 2.5" squares.
Note the orientation of the diagonal line. This is important!

Step 11:
Now you can sew the Medium Blue 2.5" squares to the opposite corner of the Light Blue rectangle.
Once again, note the orientation of the marked line.

Step 12:
Repeat Steps 10 and 11 for a total of four Diagonal Stripe units like the ones shown in the picture below.
Step 13:
Repeat Steps 10 through 12 only changing the orientation of the marked line so that you get a diagonal stripe going in the opposite direction.

Step 14:
Here's a picture showing all eight of the units.

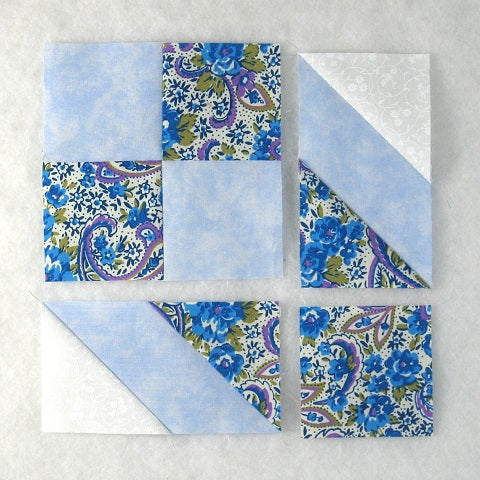
Corner Units:
Step 15:
Lay out a Step 2 Four Patch unit, one of each orientation Diagonal Stripe units, and one Medium Blue 2.5" square as shown in the picture below.
The Light Blue square that we noted in Step 2 is in the center of this unit.
Step 16:
Sew the units into two rows and press the seam allowances away from the Diagonal Strip units as shown below.

Step 17:
Sew the two rows together and press the seam allowance away from the Four Patch unit as shown in the picture below.
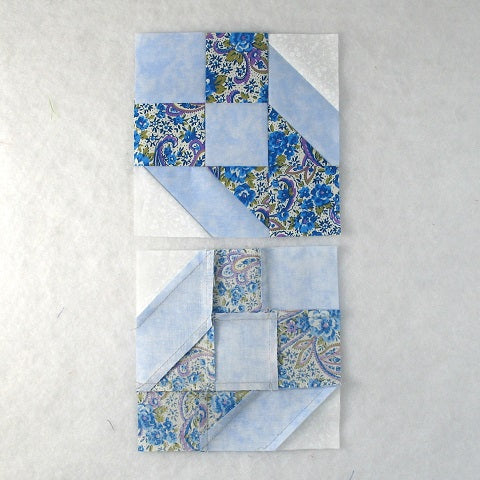
Step 18:
Repeat Steps 15 through 17 for a total of four Corner units.


Putting It All Together:
Step 19:
Lay out the Corner units, the Middle units, and the Center Dark Blue 4.5" square as shown in the picture below. From here the block goes together like an uneven Nine Patch block.

Step 20:
Sew the units into three rows.
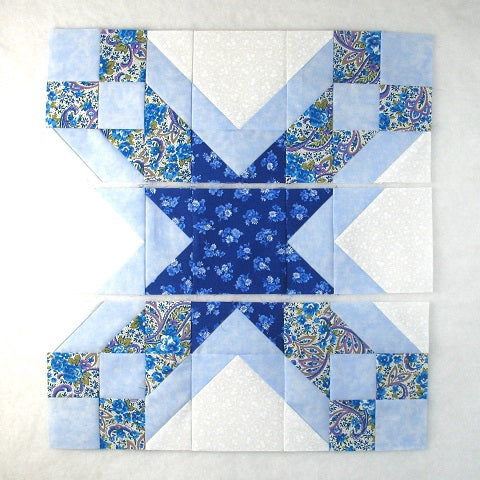
Step 21:
Press the seam allowances away from the Middle units as shown below.
Step 22:
Then sew the three rows together to complete the block.
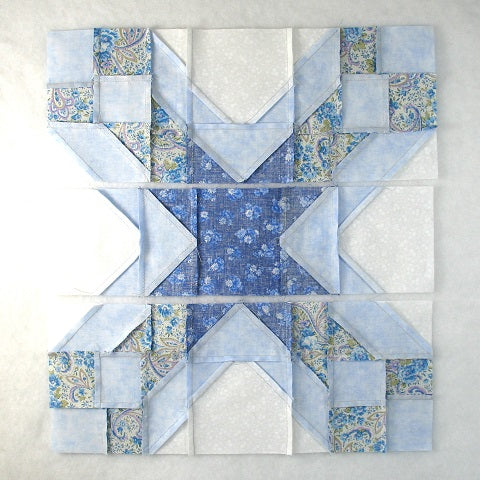
Step 23:
All that's left to do is press the seam allowances toward the center of the block. You're done!
Layout Ideas:
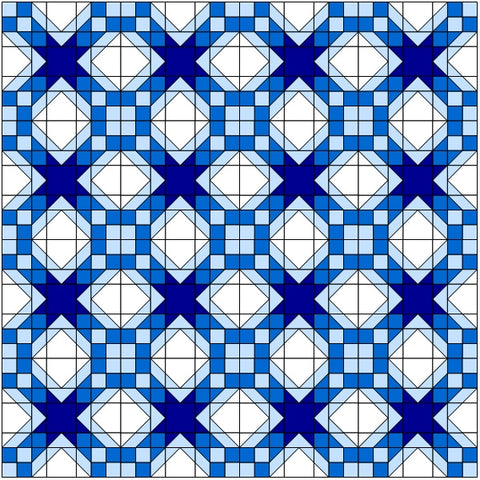
Here's the basic 4 x 4 layout using similar colors as the tutorial:
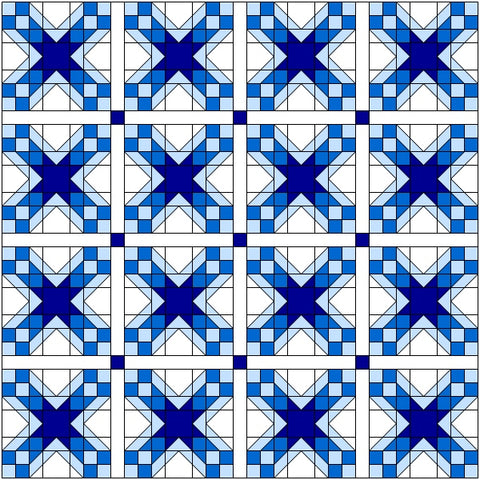
This example is the same as the above only with sashing and cornerstones added:
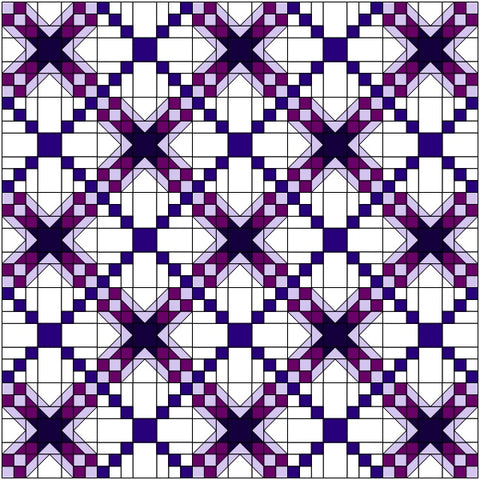
For this one I used a chain block as an alternating block. This brings out the 16 Patch block that forms where the blocks come together.
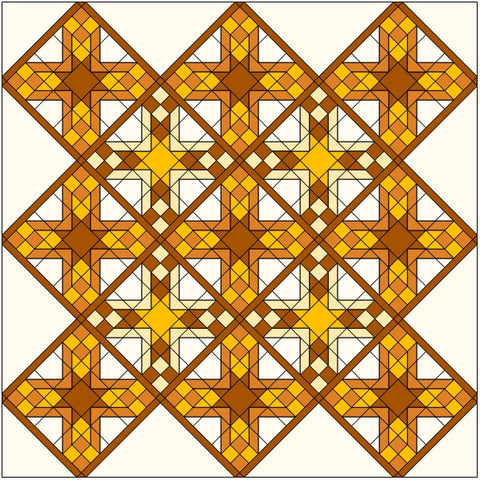
Here's an idea of what it would look like with a colored background fabric.

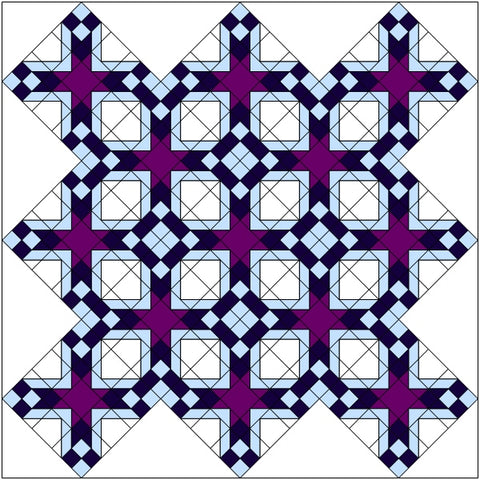
Another alternating block example.
In this example I alternated two different coordinated colorings of the block.

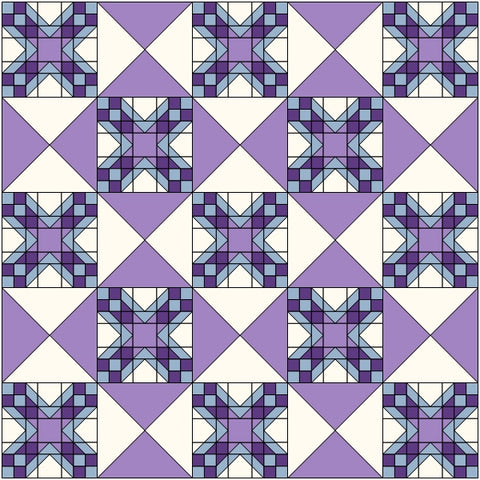
This on-point layout has background fabric in the setting triangles.
And here's another on-point layout with alternating blocks, narrow sashing and cornerstones, and plain setting triangles.
Conclusion:
While the Starburst quilt block has a bunch of steps, I think I broke it down into doable units for you to confidently stitch it together. And because it is such a large block, you don't have to make too many to make a quilt! To be honest, I was kind of thrilled that those diagonal seams lined up!
I hope you have enjoyed this tutorial. If you like it and want to see more, just click HERE to sign up for my newsletter and receive a free PDF quilt pattern called "Chained Weathervane".
Happy Quilting!
Elaine
P.S. Looking for something a little easier? Take a look at these blocks: https://fabric406.com/blogs/fabric406-blog/30-easy-quilt-block-tutorials-for-the-beginning-quilter
P.P.S. Check out my patterns I have for sale on Etsy at https://www.etsy.com/shop/fabric406