What Do You Do With Those Orphan Quilt Blocks?
At some point, we quilters need some ideas for projects and quilts using orphan quilt blocks. Here are some ideas for making a small table topper.
Often orphan blocks are the result of starting a quilt that we decide we don't really like, or maybe we made too many blocks for a project. However it came about, we don't want to trash the block - but what to do with it?
In my case, I have hundreds of orphan blocks from making these tutorials. I organize them according to color because I plan to make sampler quilts for charities with them (in my spare time - haha!). But some of them are 14" or larger and don't work into a sampler quilt easily.

The Summer Blooms block is one of those 14" blocks and I thought it would be a great table topper for my table in the summer time (and I might get it quilted by next summer too). Here's my process of making it.
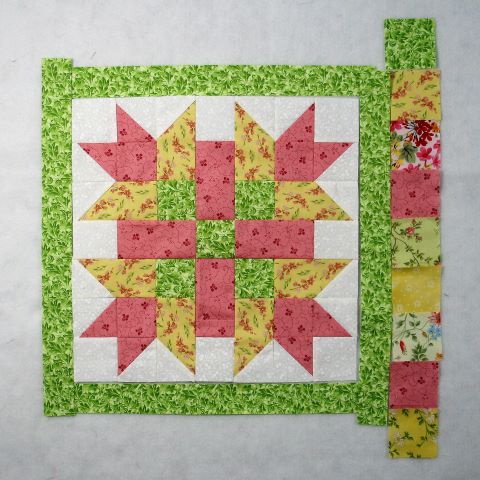
Border?
First I decided a 1" border was in order to bring attention to the block. I tried a white border but it just didn't do anything for me. Here I tried out a green border.

Half Square Triangles
I also have a lot of orphan half square triangles and auditioned them here.

HSTs Without Green Border
What would happen without the green border? I liked this layout better but not the scrappy half square triangles and I didn't have enough fabric left of the pink and green to make more HSTs.

Scrappy Squares
So back to the green border. This time I tested a scrappy squares border. I did limit my colors to pink, yellow and green unlike the half square triangles in the above photo. I decided to go with this.

Step 1:
Green borders on.

Step 2:
I laid out all the squares to get a nice arrangement before I started sewing them together.

Step 3:
I sewed the squares into strips for the border. This is about the time I realized a piano key border (1" x 2" or longer strips) would have been cute too. But I'm committed to this scrappy squares border.

Step 4:
Side borders on with seam allowances pressed toward the green border.

Step 5:
All done! I'm really pleased with the way it turned out. I plan to do the binding out of the main yellow fabric.

This Summer Blooms table topper was fun and easy to sew together. Plus I got rid of a bit of my scrap stash - always a good thing. I think I'll do a few more posts for orphan blocks!
I hope you've enjoyed this quilt block tutorial. If you liked this post and want to see more quilting tutorials like this, simply click here to sign up for my newsletter and also receive a free PDF quilt pattern called "Chained Weathervane".
Happy Quilting!
Elaine
P.S. To print a PDF of this tutorial, check out the free app at https://www.printfriendly.com/.
P.P.S. To figure out yardage for a quilt, check out this post: https://fabric406.com/blogs/fabric406-blog/how-much-fabric-do-i-need