Easy Pattern – Bear Tracks Quilt Block
Today we’re going to put together the easy Bear Tracks quilt block! This is another variation of the traditional Bear Paw block. You can find my previous Bear Paw variation block at https://fabric-406.myshopify.com/blogs/fabric406-blog/free-bear-paw-quilt-block-pattern. The Bear Tracks block that we are sewing today uses 4 colored fabrics and a light background fabric. So let’s get started!

Fabric Requirements for a 12" Finished Bear Tracks Quilt Block:
- Light/White: 8 – 3″ squares, and 4 – 2.5″ squares
- From each of the 4 prints: 1 – 4.5″ square, and 2 – 3″ squares

Sewing Directions:
Half-Square Triangle Units:
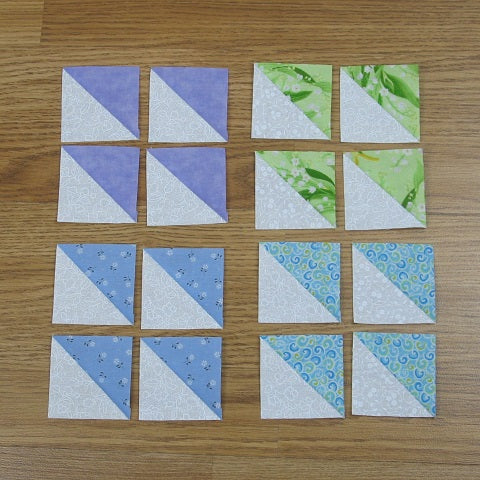
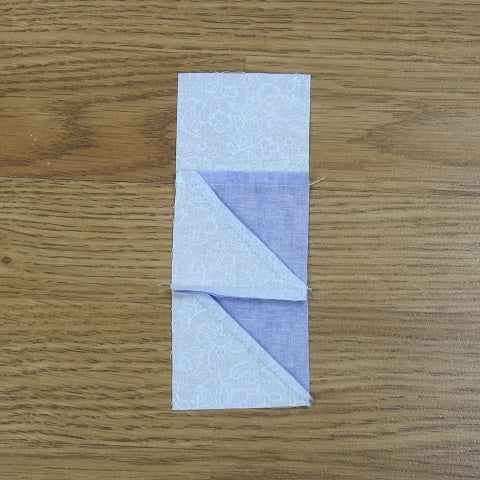
Step 1:
Using the 8 Light/White 3″ squares and the 8 Print 3″ squares, make 16 Half-Square Triangle (HST) units. You will need four HST units from each of the four prints as shown in the picture below. You can find my tutorial for making Half-Square Triangle units at https://fabric-406.myshopify.com/blogs/fabric406-blog/how-to-sew-a-basic-half-square-triangle-block
Bear Paw Units:
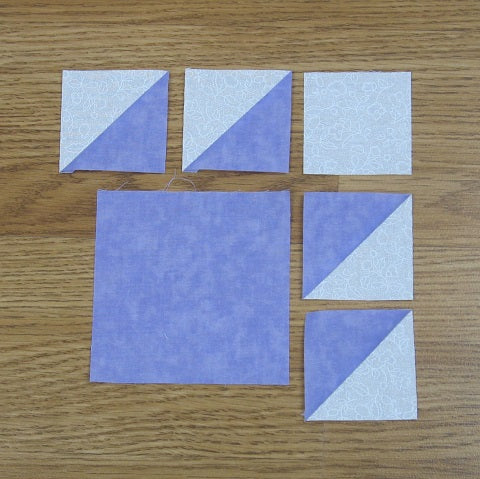
Step 2:
From each of the four Prints, lay out the 4.5″ square, the four HST units, and one Light/White 2.5″ square as shown below. This is just so you get the orientation of the HST units right.
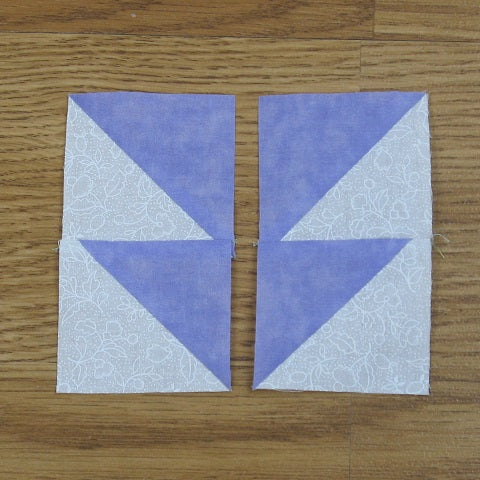
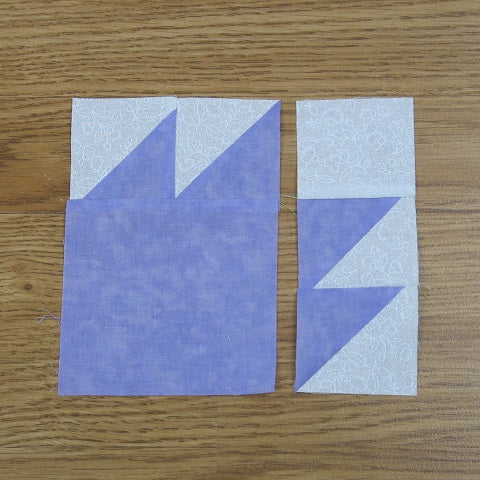
Step 3:
Sew two sets of HST units together as shown below. Notice that that the units are mirrors of each other.
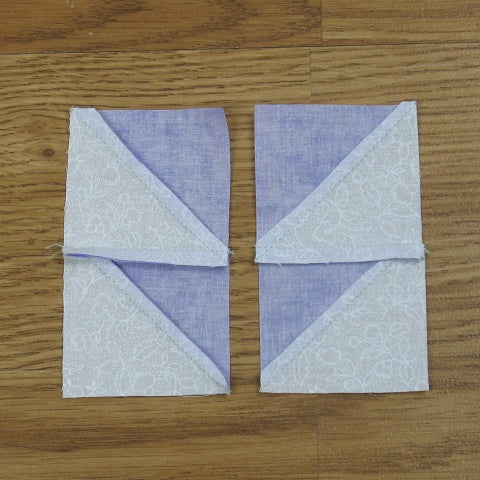
Step 4:
Press the seam allowances as shown in the picture below. Pressing in this direction will ensure that seams will nest together nicely making for nice points in the finished block.
Step 5:
Now sew the Light/White 2.5″ square to one end of one of the units you just made. In the picture below you can see that I added it to the two HST unit on the right side of my lay out.

Step 6:
Press the seam allowance toward the Light/White 2.5″ square as shown in the picture below.
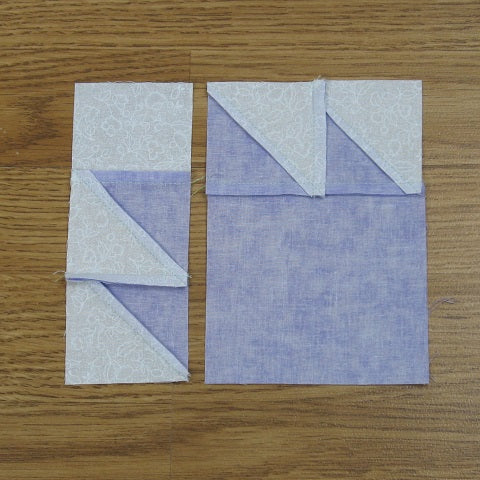
Step 7:
Now you can sew the other two HST unit to the 4.5″ square as shown below and…
Step 8:
Press the seam allowance toward the Print 4.5″ square like you can see in the picture below.
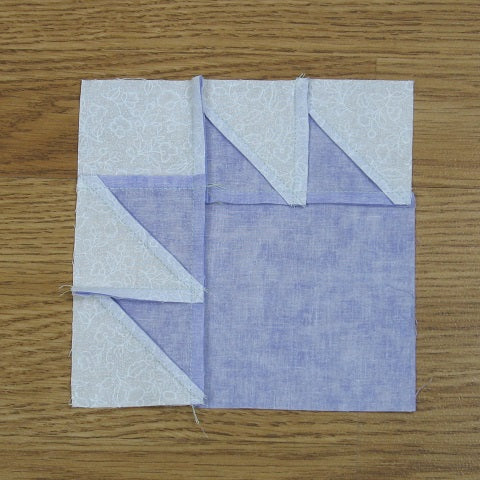
Step 9:
Sew the two columns together and…
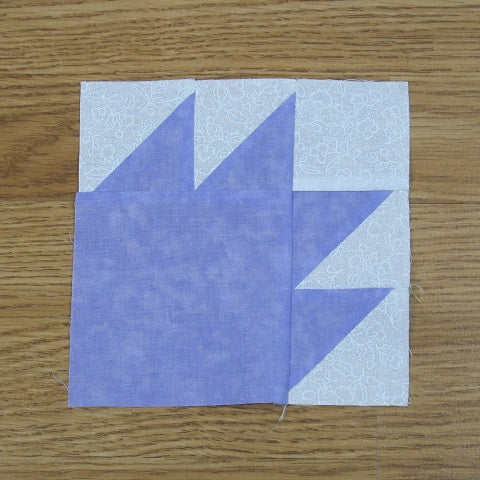
Step 10:
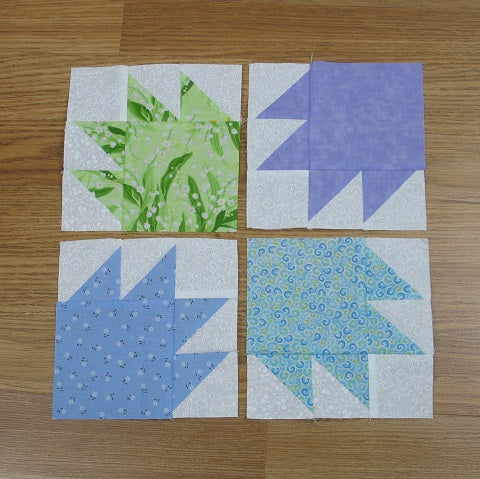
Press the seam allowance toward the Print 4.5″ square as shown below. Repeat Steps 2 through 6 with each of the Prints so that you wind up with 4 Bear Paw units.

Putting It All Together:
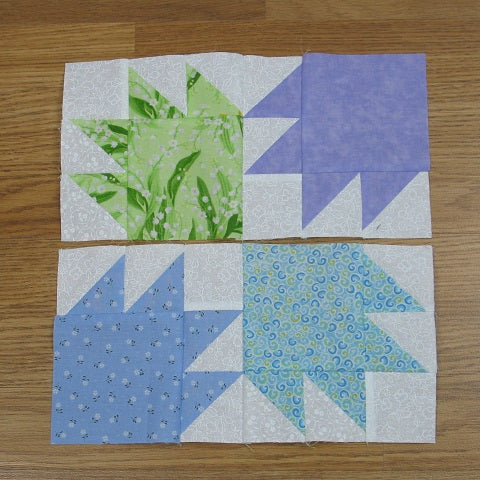
Step 11:
Lay out the four Bear Paw units you just made as shown in the picture below. Notice that two opposing Bear Paw units are pointing toward the center and two are pointing outward.
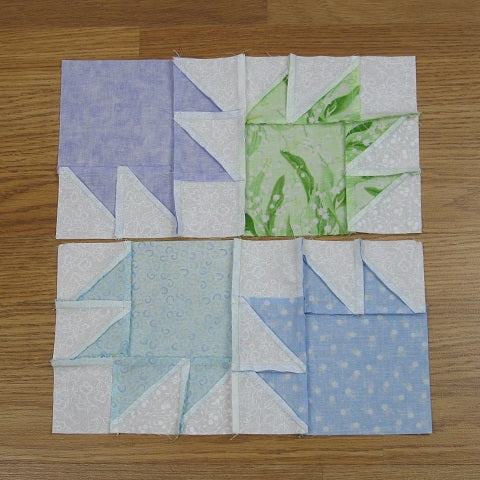
Step 12:
Sew the Bear Paw units together in two rows as shown below and…
Step 13:
Press the seam allowances in opposite directions as shown below.
Step 14:
Sew the two rows together and you are done, except for…
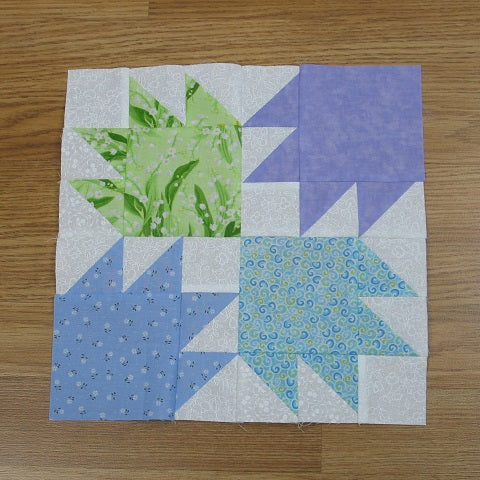
Step 15:
the pressing! Press seam allowance to one side.
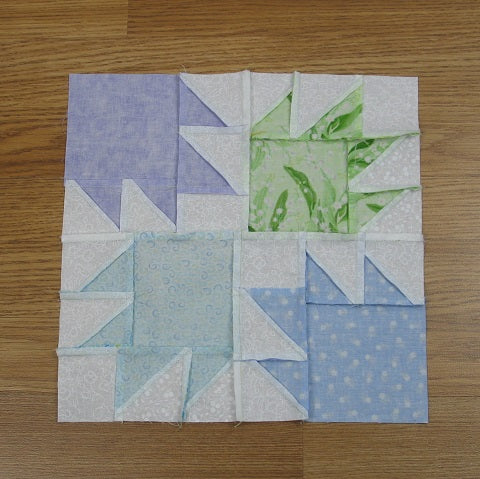
Variations:
Instead of using a Print 4.5″ square for the “paw” part of the Bear Paw unit, you could use a four-patch or a HST unit. You could also change the orientation of the Bear Paw units so they all face the same direction. If you used darker/warmer/non-floral fabrics, this would be a great quilt for a guy and would have a mountain lodge “feel” to it.
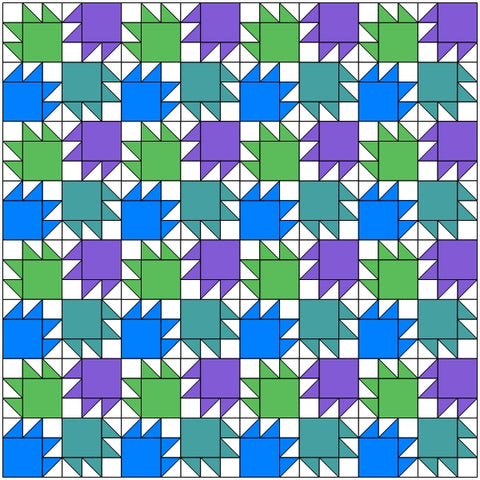
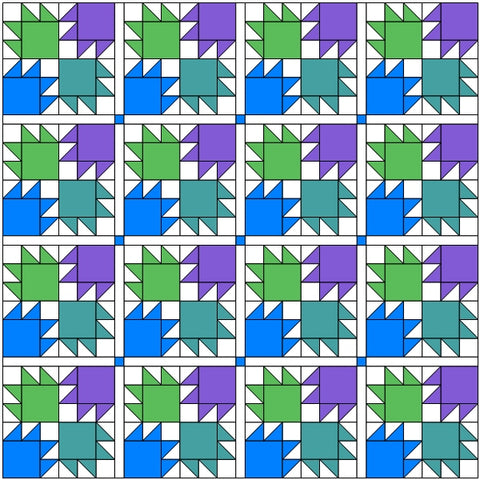
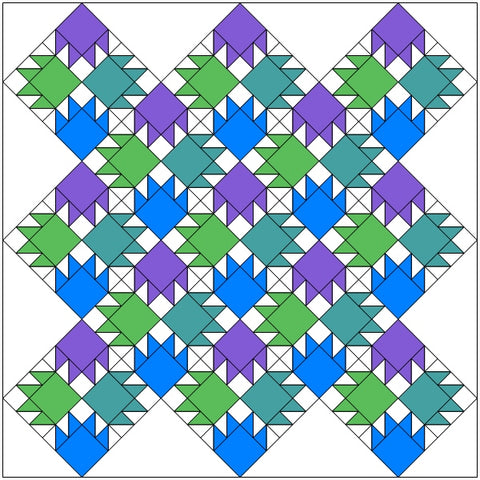
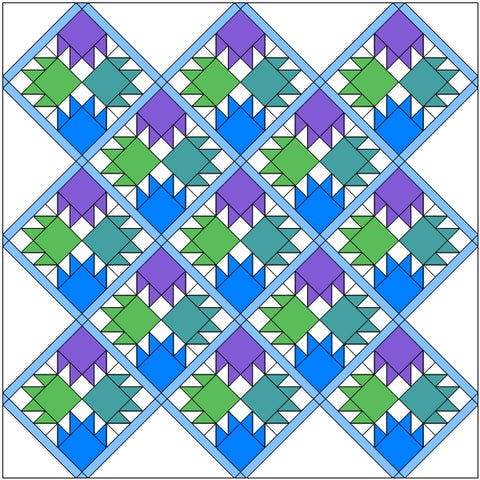
Layout Ideas:
In Conclusion:
This is such an easy block to put together and looks great! You could make a quilt using just the four Prints and the Light background or mix it up and use up some of your scraps. Since you only need enough Print fabric to make one 4.5″ square and two 3″ squares, you don’t need a huge amount of fabric to make the Bear Paw unit.
I really enjoyed putting together this block – quick and easy. Sometimes you just need an “easy” quilt to sew together. You know what I mean? When you need a gift in a hurry or after you’ve finished a more challenging project. The Bear Tracks block could be your “go to” block!
I hope you have enjoyed this tutorial. If you like it and want to see more, just click HERE to sign up for my newsletter and receive a free PDF quilt pattern called "Chained Weathervane".
Happy Quilting!
Elaine
P.S. Check out my patterns I have for sale on Etsy at https://www.etsy.com/shop/fabric406