Free Pattern – Best of All Quilt Block
The Best of All quilt block is a lovely traditional star quilt block that finishes at 12″ square. The double diamond design behind the double star is just beautiful! It is easy to sew together except for that one unit. But I’m going to show you a unique (and easier) way to construct that unit. Let’s get started!

Fabric Requirements for a 12" Finished Best of All Block:
- Light/White: 24 – 2.5″ squares, and 4 – 3″ squares
- Medium/Blue: 4 – 3″ squares, and 8 – 2.5″ squares
- Dark/Green: 8 – 2.5″ x 4.5″ rectangles
- Dark/Black: 1 – 4.5″ square

Sewing Directions:
Flying Geese Units:
Step 1:
First thing you need to do is make 8 Flying Geese units using the Dark/Green 2.5″ x 4.5″ rectangles and 16 Light/White 2.5″ squares. You can find my tutorial on Flying Geese units at: https://fabric-406.myshopify.com/blogs/fabric406-blog/how-to-sew-a-basic-flying-geese-block. Of course, this is the one picture I forgot to take so I had to crop a different picture to show the Flying Geese unit. Set four of these units aside to use later in the block.

Double Geese Units:
This is where the non-traditional way to piece this block together starts. Basically, we are going to go through the same steps used to make a Flying Geese unit but we’ll be using one of the Flying Geese units and 2 Medium/Blue 2.5″ squares. I’m going to call this unit a Double Geese unit.
Step 2:
First you will need to mark a diagonal line on the back of two Medium/Blue 2.5″ squares.
Step 3:
Place one square on one end of Flying Geese unit, right sides together as shown by the top unit in the picture below. Sew close to the marked line in what will be the seam allowance.
Step 4:
Match the corners of the square and press (middle unit in photo).
Step 5:
Open up the square and trim the seam allowance as shown in the bottom unit in the picture.

Step 6:
Place the other Medium/Blue 2.5″ square on the opposite end of the Flying Geese unit and repeat the process to complete the Double Geese unit. So I tried a different layout taking pictures – this one didn’t turn out so good!

Step 7:
Repeat to make a total of four Double Geese units.

Step 8:
Pair up one of the set aside Flying Geese units with one Double Geese unit and sew together as shown below. Press the seam allowance toward the Flying Geese unit. Honestly, this was the hardest step for me to get the seams to match. I used pins at start and end, went slow, and sewed with the Double Geese unit on top. The fourth one looked better than the first!

Corner Units:
Step 9:
Now for the corner units! Make 8 Half-Square Triangle (HST) units using the 4 Light/White 3″ squares and the Medium/Blue 3″ squares. Trim /square up the HST to a 2.5″ square. You will find my directions for making HSTs at https://fabric-406.myshopify.com/blogs/fabric406-blog/how-to-sew-a-basic-half-square-triangle-block

Step 10:
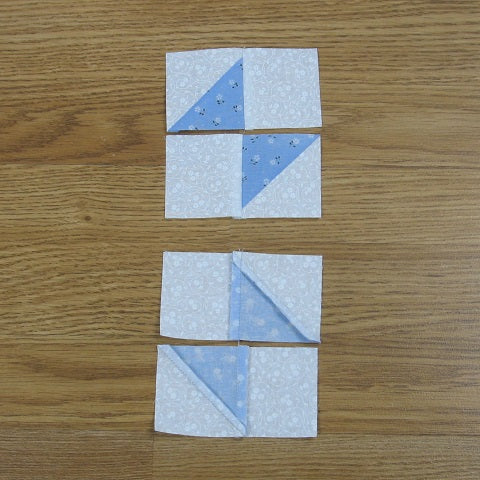
Lay out 2 of the HSTs and 2 Light/White 2.5″ squares as shown below.

Step 11:
Sew into two rows and press the seam allowances toward the Light/White 2.5″ squares as shown in the picture below.

Step 12:
Sew the two rows together and press the seam allowance as shown below. I do not recommend pressing using the tweek/twirl/furl method in this unit.

Putting it all Together:
Step 13:
Lay out all of the units you have sewn plus the center Dark/Black 4.5″ square as indicated in the photo below. You may need to turn the Corner units 180 degrees so that you can get the seam allowances to nest.

Step 14:
Sew the units into three rows and …

Step 15:
Press the seam allowances away from the Flying Geese/Double Geese units as shown.

Step 16:
Piece the rows together and …

Step 17:
Press the seam allowances toward the center of the block as shown below. Voila! You’re done!

Layout Ideas:
Here's your typical 4 x 4 layout in colors similar to the tutorial. I love the secondary designs that appear.

For this one I added in narrow sashing and cornerstones. You miss out on matching all those seams up when you add sashing!

This example has an alternating star block. This is lovely!

This is an on-point layout with colored sashing and cornerstones and plain blocks for the setting triangles.

And this on-point layout has an alternating chain block.

This on-point version has an alternating large Hourglass block.

In Conclusion:
This block is a little challenging but the way I’ve described making the Double Geese units is much faster than the traditional way. The unit also laid nicer. Traditionally, you would cut triangles and sew them to a small center square – sewing with bias edges can be tricky.
I love the look of this Best of All quilt block and don’t be shy about using darker colors in it – it will look great! I hope you love it too.
I hope you have enjoyed this tutorial. If you like it and want to see more, just click HERE to sign up for my newsletter and receive a free PDF quilt pattern called "Chained Weathervane".
Happy Quilting!
Elaine
P.S. In case you missed it, check out my roundup post of easy quilt blocks at https://fabric406.com/blogs/fabric406-blog/30-easy-quilt-block-tutorials-for-the-beginning-quilter
P.P.S. Check out my patterns I have for sale on Etsy at https://www.etsy.com/shop/fabric406
