How to Sew a Traditional Sunflower Quilt Block
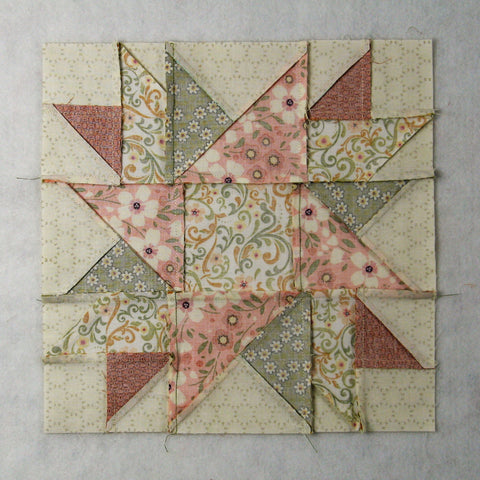
Today let's piece together this delightful traditional Sunflower quilt block. It's design starts with a basic Friendship Star block but then there's all the extra points layered in. Let's get sewing!

Update: I now have a PDF pattern of this block available in my Etsy shop if you prefer to have a printed pattern. Check it out by clicking this link: SUNFLOWER
Fabric Requirements for a 12" Finished Sunflower Quilt Block:
- Light/Ivory: 2 - 5.5" squares, 2 - 3" squares, and 8 - 2.5" squares (I know the picture shows 4 - 5.5" squares - it's wrong)
- Medium 1/Peach: 4 - 5" squares
- Medium 2/Scroll: 4 - 2.5" x 4.5" rectangle, and 1 - 4.5" square
- Dark 1/Coral: 2 - 3" squares
- Dark 2/Green: 2 - 5.5" squares (again, picture shows more than needed)
Sewing Directions:
Corner Units:
Step 1:
Using the Light/Ivory 3" squares and the Dark 1/Coral 3" squares, sew together four Half Square Triangle (HST) units as shown in the picture below. Trim/square up the units to 2.5" square. You can find the tutorial for making a basic HST at https://fabric406.com/blogs/fabric406-blog/how-to-sew-a-basic-half-square-triangle-block
Step 2:
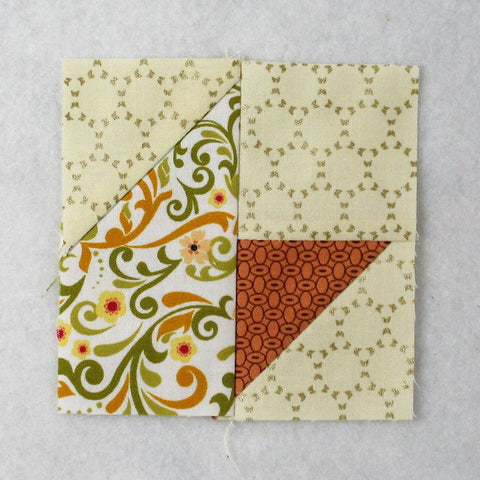
Match up one Light/Ivory 2.5" square with one HST from Step 1 as shown below and sew together. Press the seam allowance toward the Light/Ivory square. Repeat for a total of four units.
Step 3:
Now you will match up one of the remaining Light/Ivory 2.5" squares with one of the Medium 2/Scroll 2.5" x 4.5" rectangles. This is just like a half of a Flying Geese block. Draw a diagonal line from corner to corner on the back of the Light/Ivory 2.5" square and sew on the line (top image); match up the corners and press (2nd image); trim away the excess seam allowance (3rd image); and unit is completed (bottom image). Repeat for a total of four units.
Step 4:
Match one Step 2 unit and one Step 3 unit and sew together as shown in the picture below.
Step 5:
Press the seam allowance. Here you can see that I pressed toward the Step 3 unit but you can press in either direction. Repeat Steps 4 and 5 for a total of four Corner units.
Half and a Quarter Units:
Step 6:
Really didn't know what to call this unit so Half and a Quarter it is! To start making this unit, you'll need to make four Half Square Triangle units using the 2 Light/Ivory 5.5" squares and the 2 Dark 2/Green 5.5" squares as shown in the picture below. You don't need to trim these units just yet.
Step 7:
Mark a line on the back of the Step 6 HSTs perpendicular to the seam as shown below. It's more important to have the line be perpendicular to the seam than to go precisely to each corner because you'll be squaring up the unit. Pair up one of the Step 6 HSTs and one Medium 1/Peach 5" squares.
Step 8:
Here you can see that the HST and the Medium 1/Peach square aren't exactly the same size. Not to worry, you'll be trimming that up later.
Step 9:
In the picture below you can see the next few steps. First, sew 1/4" on each side of the marked line (top left image). Then cut on the marked line (top right image). Open up the units and press toward the Medium 1/Peach fabric. You will get two different patches (bottom two images). The bottom right patch is a bonus - you don't need it for this block. Square up the unit to 4.5" square.
Step 10:
Repeat Steps 7 through 9 for a total of four units like the ones shown in the picture below.
Putting It All Together:
Step 11:
Lay out the Corner units, the Half and a Quarter units, and the Medium 2/Scroll 4.5" square as shown in the picture below.
Step 12:
From here you'll sew the Sunflower block together like a typical Nine Patch block. Sew the units together into three rows as shown below.
Step 13:
Press the seam allowances away from the Half and a Quarter units as shown in the picture below.
Step 14:
Finally, sew the three rows together and you're done!
Step 15:
Well, except for the pressing. Press the seam allowances toward the center of the block as you can see in the picture below.
Conclusion:
I enjoyed sewing the Sunflower quilt block together! It was a little more challenging but not terribly difficult. I seemed to have trouble counting how many 5.5" squares I needed though!! I probably could have picked better fabrics for this block. It looks nice in person but the in the pictures, it looks busy. If I had used a solid in place of the Medium 2/Scroll, I think I would like it better. All in all, I like it though.
I hope you've enjoyed this tutorial for the Sunflower quilt block. If you liked this post and want to see more quilting tutorials like this, simply click here to sign up for my newsletter and also receive a free PDF quilt pattern called Chained Weathervane.
Happy Quilting!
Elaine
P.S. I have a table runner pattern that uses this Sunflower block. You can check it out at SUNFLOWER


