From Block to Quilt - Making the Columbian Star Quilt Block Into a Wall Hanging
I fell in love with the Columbian Star quilt block when I did the tutorial for it awhile back (picture below). I wanted to do something with it but didn't have very much of the background fabric so I figured it would go into a sample quilt someday.
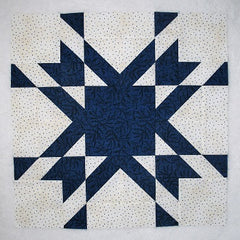
Well, lo and behold, while looking for some other fabric, I found a fat quarter of the background! It took some finagling but I did get it to work. Follow along as I show you what I did. Here's what I started with - it's a large block - 18" square.
Fabric Requirements for the Additional Borders:
- Light Background: 4 - 2.5" x 24.5" strips, 4 - 2.5" x 6.5" rectangles, and 8 - 2.5" x 4.5" rectangles
- Dark Blue: 2 - 1.5" x 22.5" strips, 2 - 1.5" x 24.5" strips, 2 - 1.5" x 28.5" strips, 2 - 1.5" x 30.5" strips, and 16 - 2.5" squares
- Additionally, you will need the 8 - 2.5" half square triangle units left over from making the Columbian Star block. If you don't have them, then you'll need 4 Light Background and 4 Dark Blue 3" squares to make the half square triangle units.

Sewing Directions:
First Border:
Step 1:
Using the eight Light Background 2.5" x 4.5" rectangles and the eight Dark Blue 2.5" squares, sew together what I call Half Flying Geese units.
- Mark a diagonal line from corner to corner on the back of the Dark Blue 2.5" squares.
- Sew a Dark Blue square to the Light Background rectangle along the marked line (top left image). Note the orientation of the marked line.
- Match the corners of the Dark Blue square and press (second left image).
- Trim the seam allowance (third left image).
- Refold (bottom left image).
- Repeat for a total of four units.
Repeat the process on the other four rectangles only changing the orientation of the Dark Blue square as shown in the right four images below.

Step 2:
Here is a picture of all eight of the units completed.

Step 3:
- Lay out one of each of the Step 2 units, 2 Half Square Triangle units, and one Light Background 2.5" x 6.5" rectangle as shown in the top row in the picture below.
- Sew the units together.
- Repeat for a total of four pieced strips.
- Press the seam allowances in two of the strips as shown in the third row and two of the strips as shown in the fourth row.

Step 4:
- Lay out the Columbian Star block, four Step 3 pieced strips and four Dark Blue 2.5" squares as shown in the picture below.
- Sew the units into three rows and press the seam allowances in opposite directions.
- Sew the three rows together and press the seam allowances.
- I pressed my seam allowances away from the Columbian Star block but you can press whichever direction you choose.

Second Border:
Step 5:
Using the Dark Blue 1.5" x 22.5" strips and 1.5" x 24.5" strips apply a narrow border to the Step 4 unit in the same fashion as Step 4. I recommend pressing the seam allowances toward the Dark Blue fabric. (I've run out of room on my design wall to show the whole unit with any detail.)

Third Border:
Step 6:
Sew a Dark Blue 2.5" square to each end of two of the Light Background 2.5" x 24.5 strips. Press the seam allowances away from the Dark Blue fabric as shown in the picture below.

Step 7:
In much the same manner as Steps 4 and 5 above, sew the remaining two Light Background 2.5" x 24.5" strips to opposite sides of the Step 5 unit. Press the seam allowance toward the Light Background fabric. Then sew the Step 6 units to the other two sides and press toward the Light Background fabric.

Fourth Border:
Step 8:
Using the Dark Blue 1.5" x 28.5" strips and 1.5" x 30.5" strips, repeat Step 5 to finish the quilt.

Here's a picture of the completed small quilt/table topper/wall hanging. It will measure 30" square once it's quilted and bound.

Conclusion:
I was so happy to find the light fabric so I could complete a wall hanging using this block! I like the way it turned out - now to just get it quilted!!
I hope you have enjoyed this tutorial. If you like it and want to see more, just click HERE to sign up for my newsletter and receive a free PDF quilt pattern called "Chained Weathervane".
Happy Quilting!
Elaine
P.S. Check out this blog post where I did a similar procedure on 7 different blocks: https://fabric406.com/blogs/fabric406-blog/7-orphan-quilt-blocks-reimagined
P.P.S. Check out my patterns I have for sale on Etsy at https://www.etsy.com/shop/fabric406