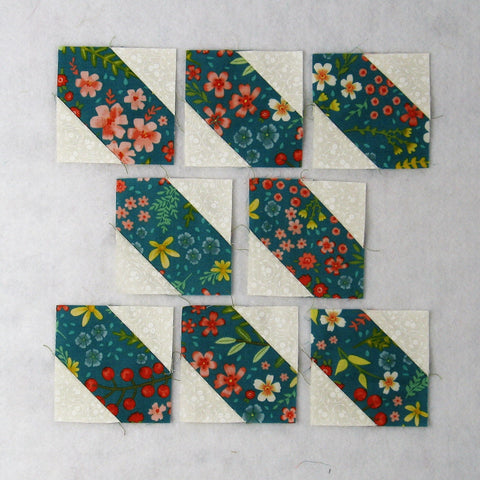
Road to Tennessee Quilt Block Tutorial
Posted by Elaine Huff on
Today let's look at the quick and easy Road to Tennessee quilt block. There are lots of ways to arrange this block but we'll start with the original. Let's get sewing!
Fabric Requirements for a 12" Finished Road to Tennessee Quilt Block:
- Light/Ivory: 32 - 2" squares
- Medium/Coral: 8 - 3.5" squares
- Dark/Teal: 8 - 3.5" squares
Sewing Directions:
Basic Unit:
Step 1:
Using a Medium/Coral 3.5" squares and 2 Light/Ivory 2" squares, sew together the Basic unit of the block. You will be making a partial Square in a Square block. You can find the tutorial for a basic Square in a Square block at https://fabric406.com/blogs/fabric406-blog/how-to-sew-a-basic-square-in-a-square-block. As you can see in the picture below, you will be snowballing opposite corners of the Medium/Coral 3.5" square with the Light/Ivory 2" squares.
Step 2:
Repeat Step for a total of 8 Basic units.
Step 3:
Repeat Steps 1 and 2 using the Dark/Teal 3.5" squares and the remaining Light/Ivory 2" squares as shown below.
Step 4:
After you've trimmed away the seam allowance, press the seam allowance toward the Dark/Teal fabric as shown in the picture below. This is so all the seam intersections will nest nicely when putting the Road to Tennessee quilt block together.
Putting It All Together:
Step 5:
Lay out all 16 Basic units as shown in the picture below. (Additional layouts are at the end of the tutorial.)
Step 6:
Sew the units together into four rows as shown below.
Step 7:
Press the seam allowances in the first and third rows in one direction and the second and fourth row in the opposite direction as you can see in the picture below.
Step 8:
Sew the rows together and ...
Step 9:
Press the seam allowances in one direction as shown below. You're done!
Conclusion:
The Road to Tennessee was quick and easy to sew together. I think it would make an awesome scrappy quilt as well. And all the layout options make it fun!
Additional Layouts:
I thought of this one after I had put the block together. It is also called X's and O's or Tic Tac Toe.

Here's an image of what a scrappy quilt might look like.

I hope you've enjoyed this tutorial for the Road to Tennessee quilt block. If you liked this post and want to see more quilting tutorials like this, simply click HERE to sign up for my newsletter and also receive a free PDF quilt pattern called Chained Weathervane.
Happy Quilting!
Elaine
P.S. To figure out yardage for a quilt, check out this post: https://fabric406.com/blogs/fabric406-blog/how-much-fabric-do-i-need


