Sunny Lanes Quilt Block - a Scrappy Tutorial
This scrappy version of the Sunny Lanes quilt block is easy to sew together and creates great graphic interest in a quilt! Plus it uses of a ton of 2" squares. Let's get started!
Fabric Requirements for a 12" Finished Sunny Lanes Quilt Block:
- Light/White: 4 - 3.5" x 6.5" rectangles
- Medium/Green: 8 - 3.5" squares
- Assorted Prints: 32 - 2" squares

Sewing Directions:
Rectangle Units:
Step 1:
The first half of the Rectangle units are the same steps as those for the Flying Geese block. Since this unit is larger, I went ahead and sewed another seam 1/2" from the first seam and created a bonus 2.5" Half Square Triangle.

Step 2:
The second half of the Rectangle unit is made by doing the Step 1 steps only on the opposite corner of the Light/White rectangle. You will wind up with a diagonal stripe in the unit. Repeat Steps 1 and 2 for a total of two units with the same orientation as shown in the picture below.

Step 3:
Now you need to create two more Rectangle units with the diagonal stripe going in the opposite direction as the Step 2 unit.

Step 4:
Here you can see the little bonus Half Square Triangle.

Step 5:
Here are the two units completed.

Step 6:
The picture below shows the four Rectangle units you will need. Notice that the diagonal stripes go in opposite directions. You need two units of each orientation.

Four Patch Units:
Step 7:
Make 4 Four Patch units using 16 of the Assorted Prints 2" squares like the ones in the picture below. You can find my tutorial for making a basic Four Patch block at https://fabric406.com/blogs/fabric406-blog/how-to-sew-a-basic-four-patch-quilt-block
The last image shows how I used the tweak/twirl/furl method for pressing the seam allowance.

Sixteen Patch Unit:
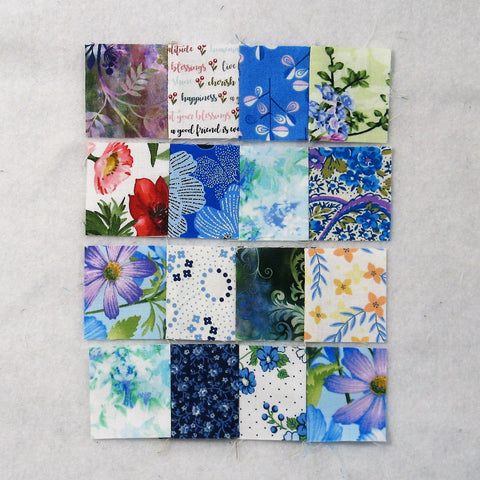
Step 8:
Arrange the remaining 16 Assorted Prints 2" squares in a 4 x 4 layout as shown in the picture below.

Step 9:
Sew the 2" squares together in four rows as shown below.
Step 10:
Press the seam allowances in opposite directions from row to row (rows 1 and 3 in one direction, and rows 2 and 4 in the opposite direction) as shown in the picture below.

Step 11:
Sew the rows together, and...

Step 12:
Press the seam allowances in one direction as shown in the picture below.


Putting It All Together:
Step 13:
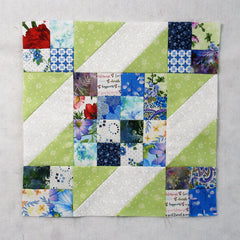
Lay out the Rectangle units, the Four Patch units, and the Sixteen Patch unit as shown in the picture below.

Step 14:
From here the block goes together like an uneven Nine Patch block. First you sew the units together in three rows.

Step 15:
Press the seam allowances toward the Rectangle units as shown in the picture below.

Step 16:
Finally, sew the three rows together, and...

Step 17:
Press the seam allowances away from the center of the block. All done!

Layout Options:
Here's an example of the block done with just four colors. Additionally, alternating blocks were rotated 90 degrees. Looks great!

In this example (scrappy version), all the blocks in the second and fourth column were rotated 90 degrees. You get a modified chevron design here!

Here I've made every other block with Rectangle units that are the opposite coloring as the original tutorial. (Instead of green/white/green, they are white/green/white) Nice stripe design.

In the example below I was just having fun rotating and switching blocks from the previous example and came up with this kind of maze design. My personal favorite.

Conclusion:
I love scrappy quilts and the Sunny Lanes fit the bill! The Light/White and Medium/Green fabrics keep a cohesiveness to the block/quilt.
This is a pretty easy quilt to resize as well. Blocks made with 1.5" squares and 2.5" x 4.5" rectangles will finish at 8" square. Blocks made with 2.5" squares and 4.5" x 8.5" rectangles will finish at 16" square.
I hope you've enjoyed this Sunny Lanes quilt block. If you liked this post and want to see more quilting tutorials like this, simply click here to sign up for my newsletter and also receive a free PDF quilt pattern called Chained Weathervane.
Happy Quilting!
Elaine
P.S. To print a PDF of this tutorial, check out the free app at https://www.printfriendly.com/.
P.P.S. To figure out yardage for a quilt, check out this post: https://fabric406.com/blogs/fabric406-blog/how-much-fabric-do-i-need