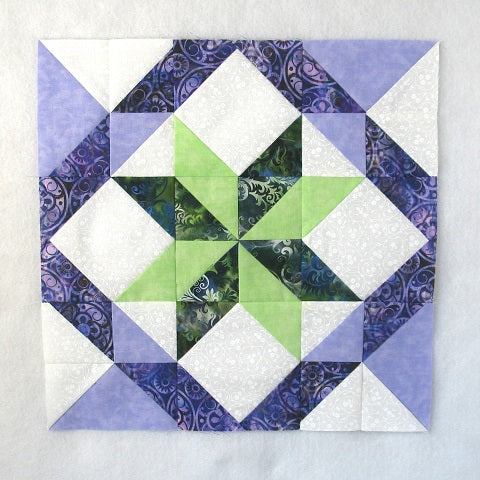
Free Tutorial for the All Hallows Quilt Block, a Beautiful Star Block for any Season
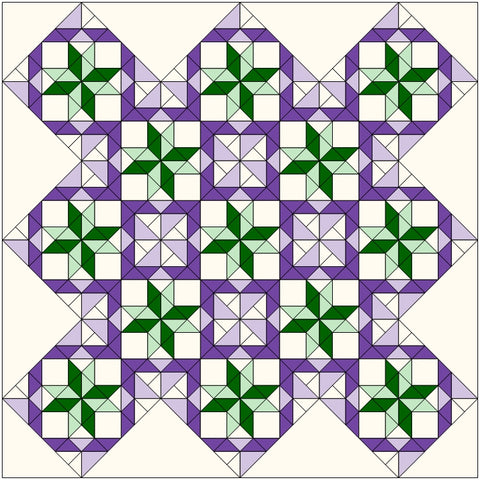
Let's take a look at how to sew the All Hallows quilt block. This traditional star block makes a beautiful secondary Pinwheel design when multiple blocks are sewn together. It uses only Half Square Triangles, Square in a Square and Flying Geese units to construct but there are a lot of points to match up! Originally it is made with only three colors but I had to add in two more to really get the secondary design to pop. Let's get started!

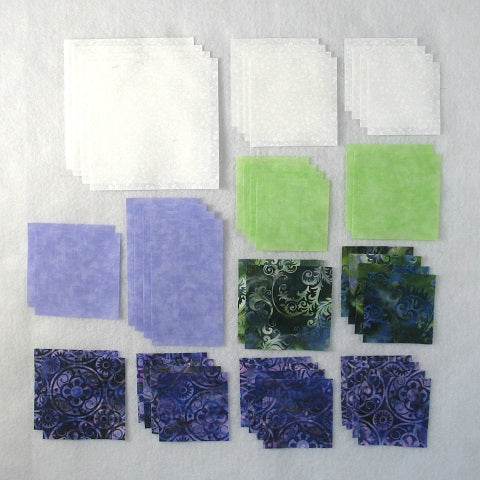
Fabric Requirements for a 12" Finished All Hallows Quilt Block:
- Light/White: 4 - 4.5" squares, 4 - 3" squares, and 4 - 2.5" squares
- Medium/Green: 2 - 3" squares, and 4 - 2.5" squares
- Medium/Purple: 2 - 3" squares, and 4 - 2.5" x 4.5" rectangles
- Dark/Green: 2 - 3" squares, and 4 - 2.5" squares
- Dark/Purple: 2 - 3" squares, and 12 - 2.5" squares
Sewing Directions:
Half Square Triangle Units:
Step 1:
Using a Light/White 3" square and a Dark/Purple 3" square sew together a Half Square Triangle unit as follows:
- Mark a diagonal line from corner to corner on the back of the Light/White square.
- Match up a Light/White and a Dark/Purple 3" square, right sides together, and sew 1/4" (or a little less) on each side of the marked line.
- Cut along the diagonal line. You will have two half-square triangle patches.
- Open up the patch and press the seam allowance toward the darker fabric.
- Trim the unit to 2.5" square.
You can see these steps in the picture below.
For a detailed tutorial check out my blog post at https://fabric406.com/blogs/fabric406-blog/how-to-sew-a-basic-half-square-triangle-block.

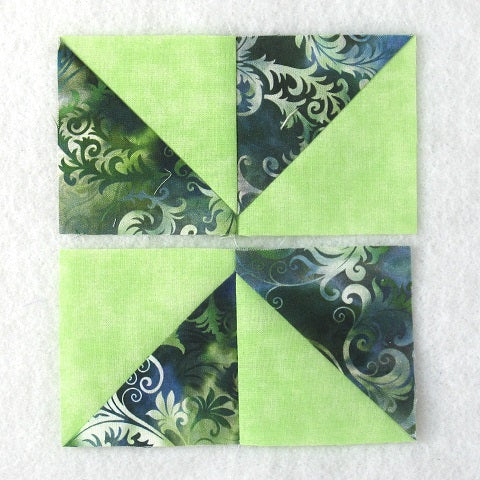
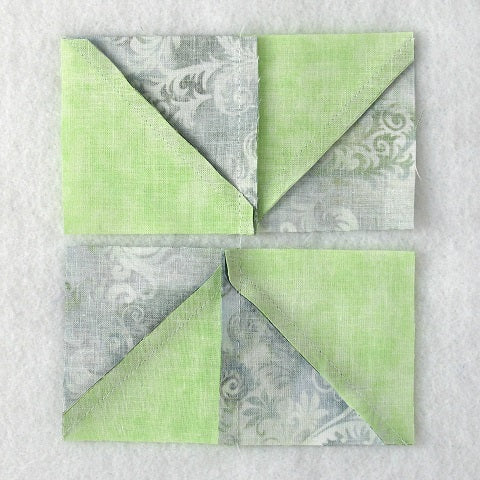
Step 2:
Repeat Step 1 for a total of four White/Dark Purple Half Square Triangle units.

Step 3:
Repeat Steps 1 and 2 only using the Light/White 3" squares and the Medium/Purple 3" squares as shown in the picture below.

Step 4:
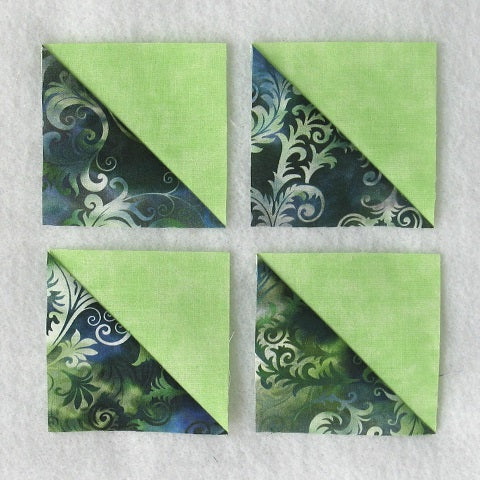
Repeat Steps 1 and 2 only using the Medium/Green and Dark/Green 3" squares as shown below.
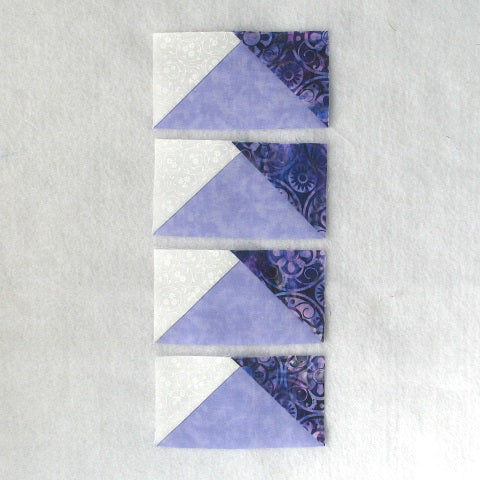
Flying Geese Units:
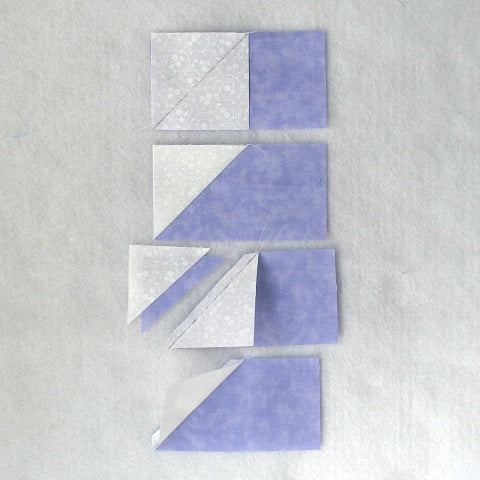
Step 5:
Using the Medium/Purple 2.5" x 4.5" rectangles and Light/White 2.5" squares, make a Flying Geese unit. You can find my detailed tutorial using my no-trim method for making perfect Flying Geese at https://fabric406.com/blogs/fabric406-blog/how-to-sew-a-basic-flying-geese-block. In the picture below you can see the first four steps.
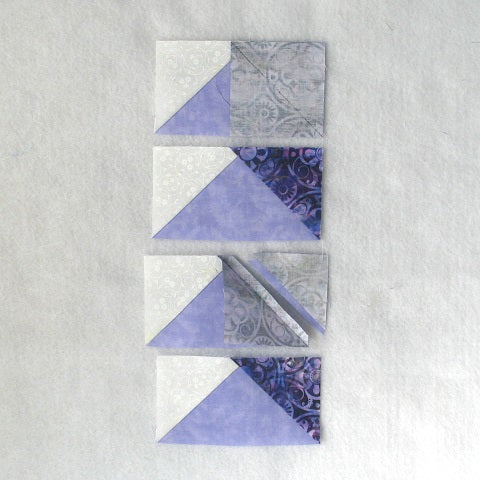
Step 6:
Now repeat Step 5 only on the adjacent corner and using a Dark/Purple 2.5" square.
Step 7:
Repeat Steps 5 and 6 for a total of four Flying Geese units like those in the picture below.
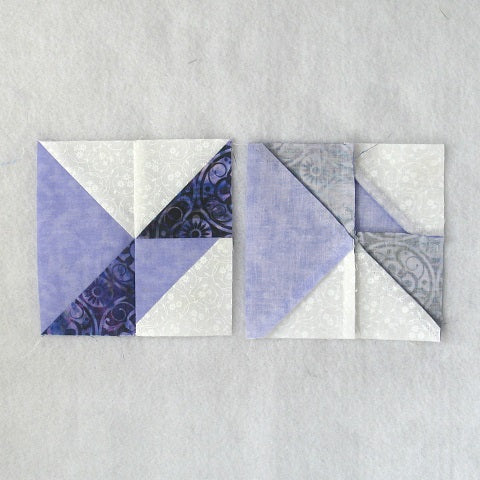
Corner Units:
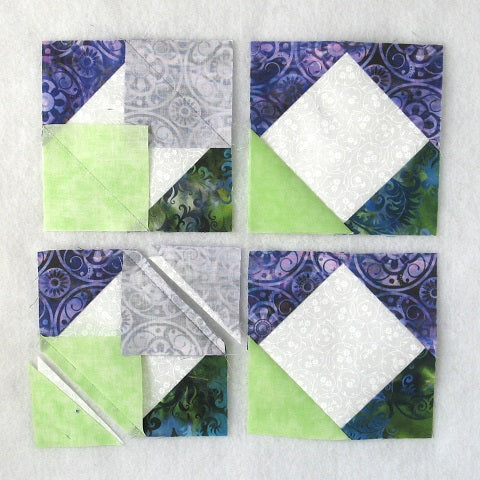
Step 8:
Using a Step 2 and a Step 3 Half Square Triangle unit, sew together a two-patch unit as shown in the picture below. Press the seam allowance toward the Medium/Purple fabric.

Step 9:
Repeat Step 8 for a total of four two-patch units as shown below.

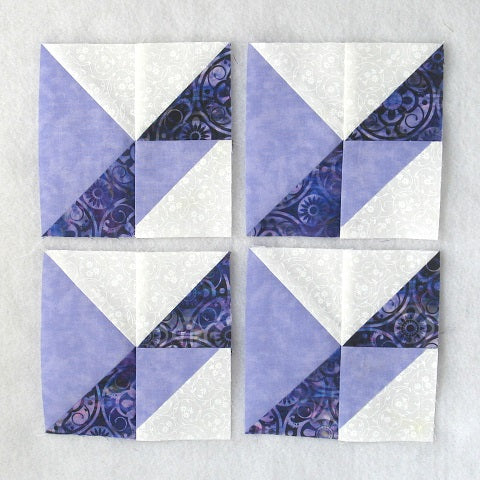
Step 10:
Sew together a Step 7 Flying Geese unit and a Step 9 two-patch unit as shown below and press the seam allowance toward the two-patch unit.
Step 11:
Repeat Step 10 for a total of four Corner units like the ones in the picture below.
Square in a Square Units:
Step 12:
Using a Light/White 4.5" square, two Dark/Purple 2.5" squares, one Dark/Green 2.5" square, and one Medium/Green 2.5" square, sew together a Square in a Square patch.
You can find my detailed tutorial for making a basic Square in a Square block at https://fabric406.com/blogs/fabric406-blog/how-to-sew-a-basic-square-in-a-square-block.
In the picture below you can see the first four steps that use a Dark/Purple and a Dark/Green 2.5" square.
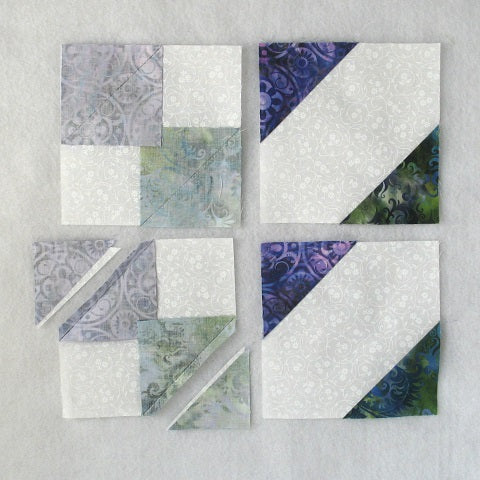
Step 13:
Repeat Step 12 on the other two corners of the Light/White 4.5" square to complete the patch. This time you will be using a Dark/Purple and a Medium/Green 2.5" square. Make sure you get the color orientation as shown below.
Step 14:
Repeat Steps 12 and 13 for a total of four Square in Square units like the ones below.

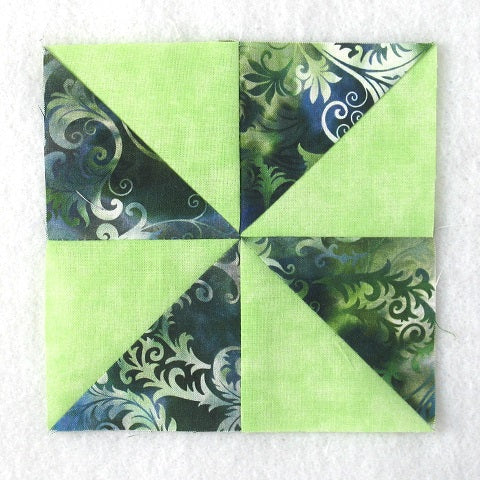
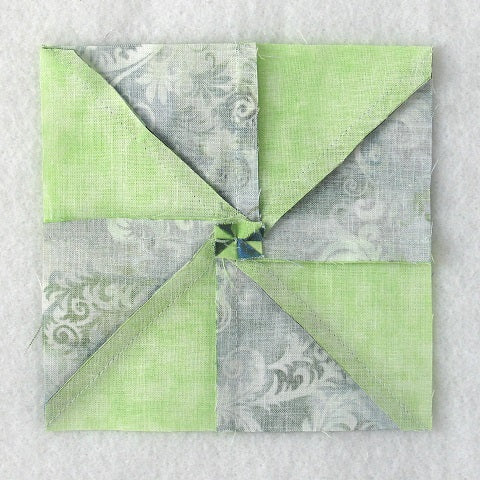
Center Pinwheel Unit:
Step 15:
Lay out the Step 4 Half Square Triangle units as shown in the picture below.

Step 16:
Sew the patches into two rows.
Step 17:
Press the seam allowances toward the Medium/Green fabric. Notice that the seam allowances in each row go the same direction.
Step 18:
Sew the two rows together.
Step 19:
Press the seam allowance. You can see that I pressed using the tweak/twirl/furl method and all the seam allowances lay in a clockwise direction. This method makes the unit lay flatter but you can press however you wish.

Putting It All Together:
Step 20:
Lay out the Center Pinwheel unit, the Corner units, and the Square in a Square units as shown in the picture below. From here the block goes together like a basic Nine Patch block.
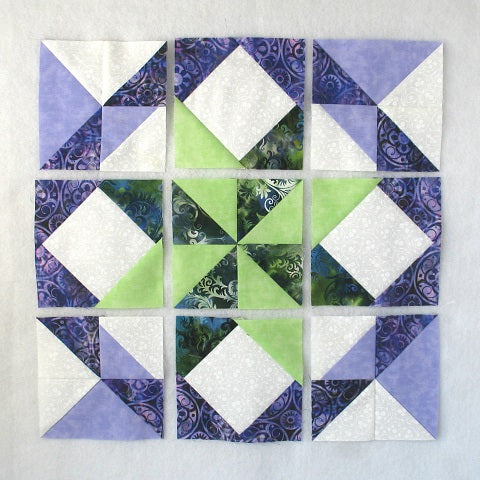
Step 21:
Sew the units into three rows.

Step 22:
Press the seam allowances toward the Square in a Square units as shown below.

Step 23:
Sew the three rows together to complete the block.
Step 24:
Press the seam allowances away from the center of the block as shown in the picture below.

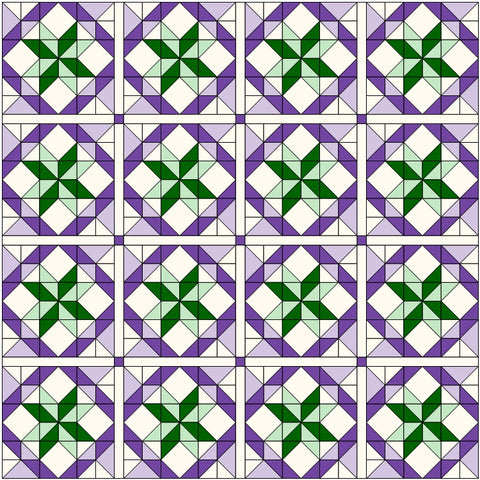
Layout Ideas:
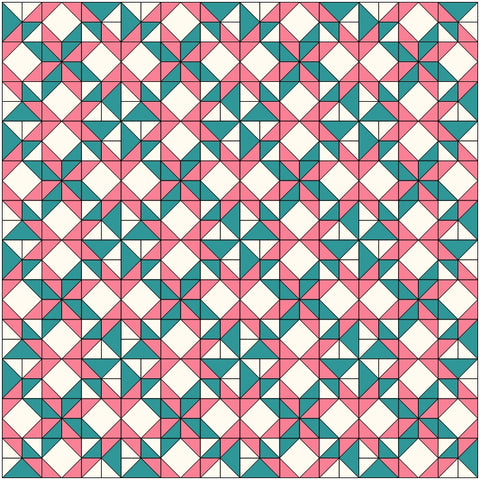
Here's the basic 4 x 4 layout using similar colors as the tutorial. Isn't that a great secondary pinwheel and diamond design?

In this example, I've added in narrow sashing and cornerstones.
Here's a two-color option.
This is an on-point layout with solid color setting triangles.
Conclusion:
I really like this All Hallows block! While the individual components were easy, there are a lot of points to match up. Just take your time and it all works out.
If you liked this post and want to see more quilting tutorials, simply click HERE to sign up for my newsletter and also receive a free PDF downloadable pattern called "Chained Weathervane".
Happy Quilting!
Elaine
P.S. Looking for scrappy quilt blocks? Check out this roundup post: https://fabric406.com/blogs/fabric406-blog/40-of-the-best-free-scrappy-quilt-block-tutorials
P.P.S. Need a quilt pattern in a hurry? Check out my easy downloadable PDF patterns at https://fabric406.etsy.com