The Easy Traditional Quilt Block Called Triplet
The Triplet quilt block is easy to create and makes an interesting quilt. With only Hourglass units and squares plus using only two colors, it goes together quickly. It was first published in the Kansas City Star publication. Let's get started!

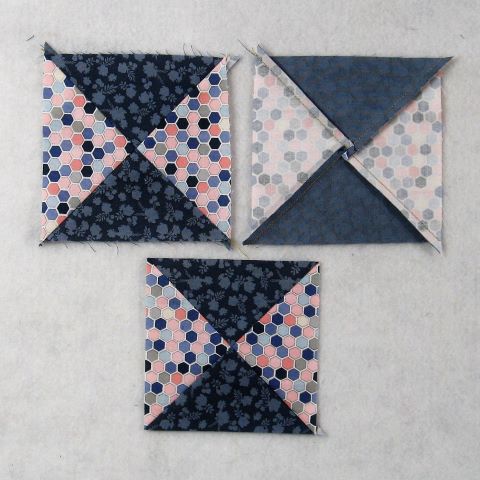
Fabric Requirements for a 12" Finished Triplet Quilt Block:
- Light/Pink Print: 2 - 5.5" squares, and 2 - 4.5" squares
- Dark/Navy: 2 - 5.5" squares, and 4 - 4.5" squares
(I couldn't count again so the number of the 5.5" squares in the picture are incorrect!)

Sewing Directions:
Hourglass Units:
Step 1:
Using the Light/Pink Print 5.5" squares and the Dark/Navy 5.5" squares, sew together four Half Square Triangles. Press the seam allowances toward the Dark/Navy fabric as shown below. You can find detailed tutorials for making Half Square Triangles at https://fabric406.com/blogs/fabric406-blog/how-to-sew-a-basic-half-square-triangle-block and https://fabric406.com/blogs/fabric406-blog/two-easy-methods-for-making-half-square-triangle-quilt-blocks

Step 2:
Draw a diagonal line from corner to corner and perpendicular to the seam line on the back of one of the Step 1 Half Square Triangles. Match it up with another Half Square Triangle as shown in the picture below.

Step 3:
Sew the two HSTs together by stitching 1/4" away from both sides of the drawn line. Then cut along the line, creating two units.

Step 4:
Open up the unit and press the seam allowances. You can see in the picture below that I've used the tweak/twirl/furl method for pressing, but you can press however you wish. Trim the unit to 4.5" square.
Step 5:
Repeat Steps 2 through 4 for a total of four Hourglass units. You only need 3 units for each block, so set aside the fourth unit for another block.


Putting It All Together:
Step 6:
Lay out the three Hourglass units, the two Light/Pink 4.5" squares, and the four Dark/Navy 4.5" squares as shown in the picture below.

Step 7:
From here the block goes together like a basic Nine Patch block. Sew the units into three rows.

Step 8:
Press the top and bottom rows away from the Light/Pink fabric and the middle row toward the center of the block as shown in the picture below. (Hindsight being 20/20, I should have pressed the seam allowances in the opposite directions. The seams would nest when sewing blocks together when every other one is rotated 90 degrees.)

Step 9:
Sew the three rows together, and

Step 10:
Press the seam allowances away from the center of the block. All done!

Layout Options:
Here's a basic 4 x 4 layout with every other block rotated 90 degrees.

In the example below, sashing and cornerstones were added to the above layout.

Here's what the first layout option would look like if you made each block a different dark color but with the same light fabric.

And here it is with sashing and cornerstones added.

In this example, I used a large Half Square Triangle as an alternating block and rotated them around to get this design. Very striking!

And here's the same layout as before except the Hourglass blocks aren't rotated from row to row. Such a different look! I think this is my favorite.

Conclusion:
The Triplet block was easy and quick to sew together. It would be a good scrappy block as well because you don't need a whole lot of fabric to make it. I especially like the last layout and may have to make a quilt using this block!
I hope you've enjoyed this quilt block tutorial. If you liked this post and want to see more quilting tutorials like this, simply click here to sign up for my newsletter and also receive a free PDF.
Happy Quilting!
Elaine
P.S. To print a PDF of this tutorial, check out the free app at https://www.printfriendly.com/.
P.P.S. To figure out yardage for a quilt, check out this post: https://fabric406.com/blogs/fabric406-blog/how-much-fabric-do-i-need