Free Bear Paw Quilt Block Pattern
Today let’s put together a variation of the traditional Bear Paw quilt block. There are lots of other names for this block like The Best Friend, Bear’s Tracks, Bear’s Foot, Cat’s Paw, Duck’s Foot in the Mud, Hand of Friendship, Illinois Turkey Track, and Tea Leaf Design – WOW, that’s a lot! The variation I’m showing you is with a four-patch in the “paw” part instead of a plain patch. This variation of the Bear Paw quilt block finishes at 14″. Let’s get started!

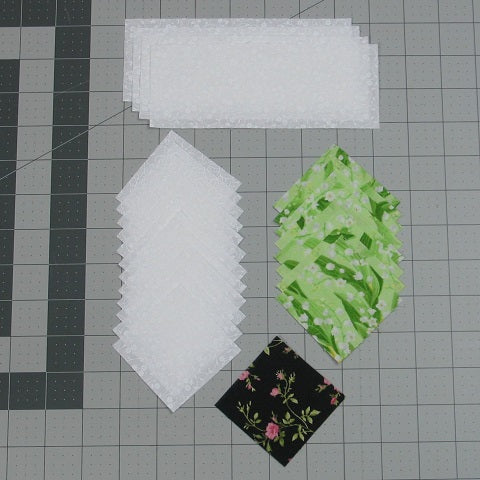
Fabric Requirements for a 14" Finished Bear Paw Quilt Block:
- Light/White: 4 – 2.5″ x 6.5″ rectangles, 8 – 3″ squares, and 12 – 2.5″ squares
- Medium/Green: 8 – 2.5″ squares
- Dark/Black: 8 – 3″ squares, and 1 – 2.5″ square
The 3″ squares are missing from the picture below because I’m somewhat of a frugal quilter and I used the leftover half-square triangles from the Windblown block tutorial that I did a while ago. You can find that tutorial by clicking this link: https://fabric-406.myshopify.com/blogs/fabric406-blog/windblown-quilt-block-pattern
Sewing Directions:
Four-Patch Units:
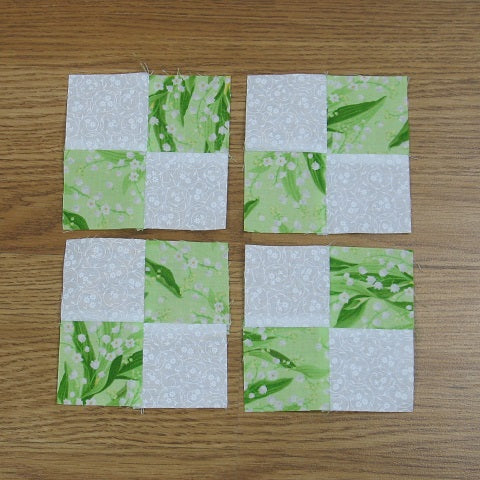
Step 1:
The first thing you need to do is sew 4 four-patch units using the Light/White 2.5″ squares and the Medium/Green 2.5″ squares. You can find my tutorial on the Four-Patch at this link: https://fabric-406.myshopify.com/blogs/fabric406-blog/how-to-sew-a-basic-four-patch-quilt-block
I did press my seam allowances using the tweak/twirl/furl technique for this unit.
Half-Square Triangle (HST) Units:
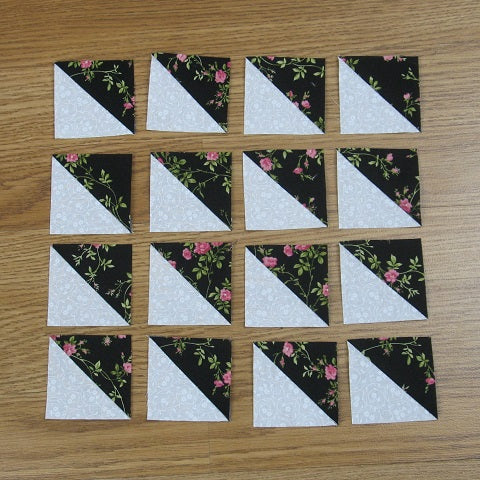
Step 2:
The second step is to make 16 Half-Square Triangle (HST) units using the 8 Light/White 3″ squares and the 8 Dark/Black 3″ squares. Trim/square-up the units to 2.5″ square. The Half-Square Triangle tutorial can be found at: https://fabric-406.myshopify.com/blogs/fabric406-blog/how-to-sew-a-basic-half-square-triangle-block
Building the Bear Paw Unit:
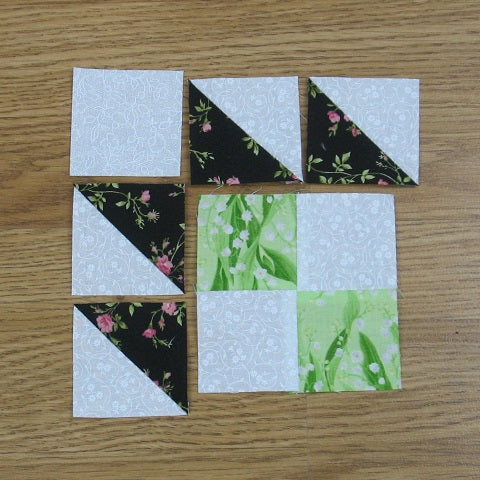
Step 3:
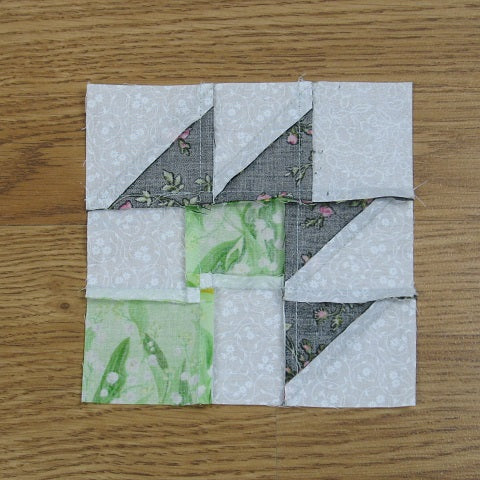
I recommend that you lay out 4 of the HST units, one of the Four-Patch units and one of the Light/White 2.5″ squares as shown below so you don’t get mixed up with the direction of the HST units.
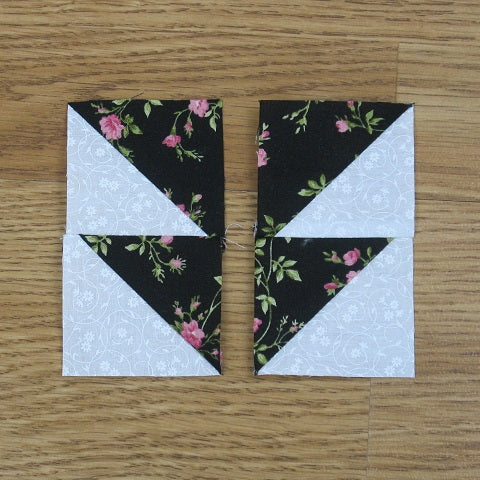
Step 4:
You will need to make mirrored units of the HSTs as shown below. Sew four sets of each of the mirrored units and…
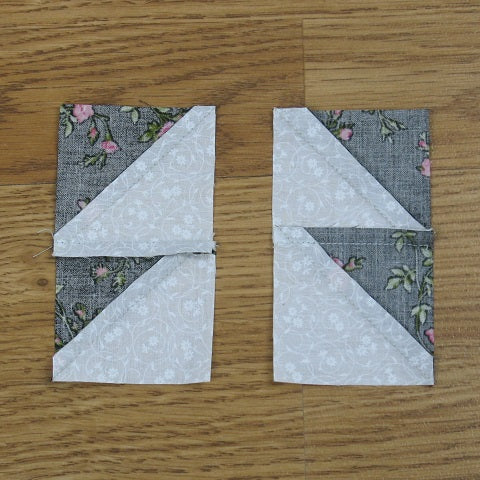
Step 5:
Press the seam allowances as shown below – it’s different for each set.
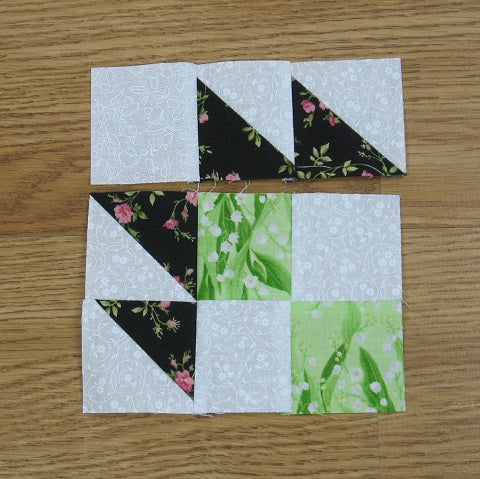
Step 6:
Now you can lay out the units (again) and sew them into two rows as shown below. The seams should nest together so you can match them up easily.
Step 7:
And press the seam allowances in opposite directions as shown in the picture below.
Step 8:
And now you can sew the rows together and…

Step 9:
Press the seam allowance toward the Four-Patch unit as shown below.

Sewing It All Together:
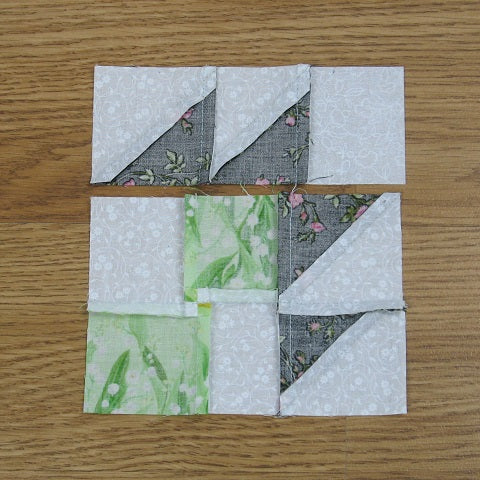
Step 10:
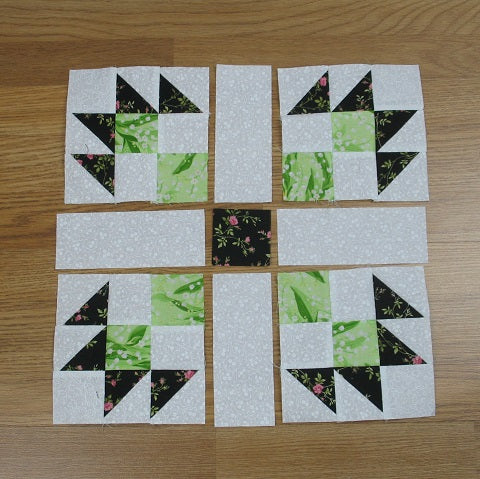
Lay out the Bear Paw units you just made, the Light/White 2.5″ x 6.5″ rectangles, and the Dark/Black 2.5″ square as shown below.
Step 11:
Now you can sew the units into three rows (oops! I forgot to take a picture of this step). It’s just like sewing an uneven Nine-Patch block together. Press the seam allowances toward the Light/White 2.5″ x 6.5″ rectangles.
Step 12:
Sew the rows together and you’ve completed the block – well, except for the pressing!
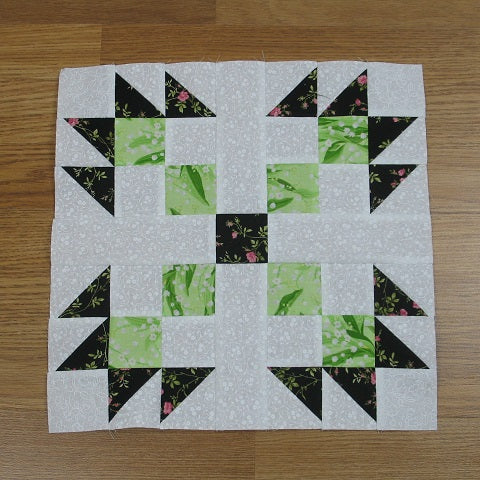
Press the seam allowances toward the center. You’re Done!
Layout Ideas:
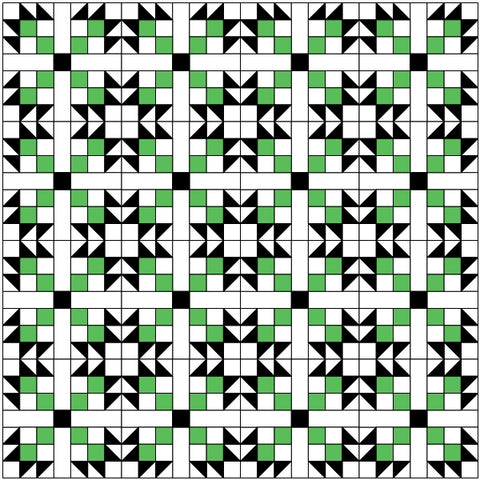
Here's the basic 4 x 4 layout. I like how stars show up in the intersections!
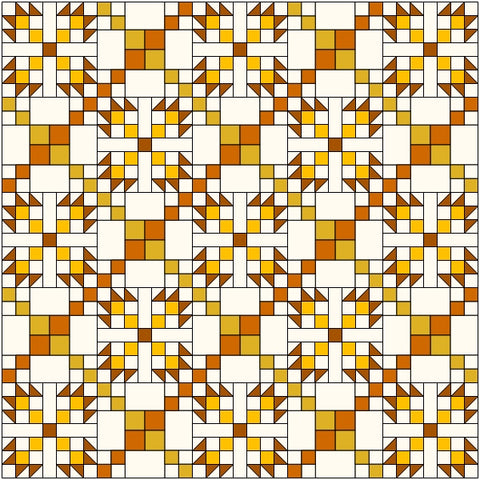
This example shows a scrappy block with an alternating chain block. I used just a light and dark fabric in the alternating block to give your eye something to rest on in between the scrappy blocks.

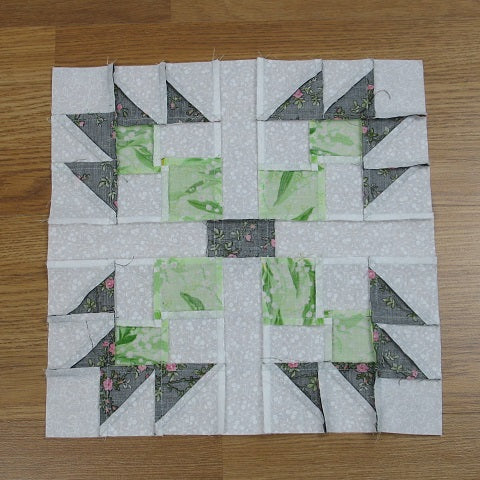
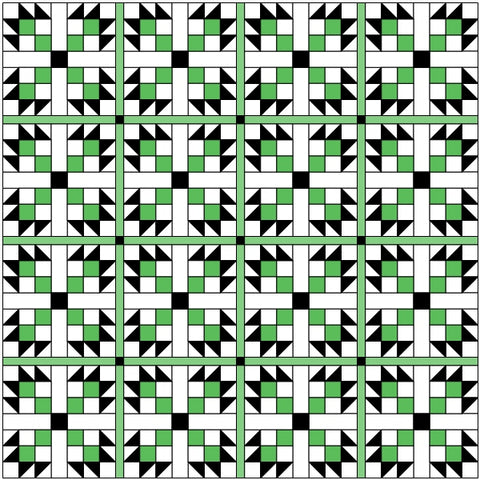
And this is the original coloring with colored narrow sashing and cornerstones added.
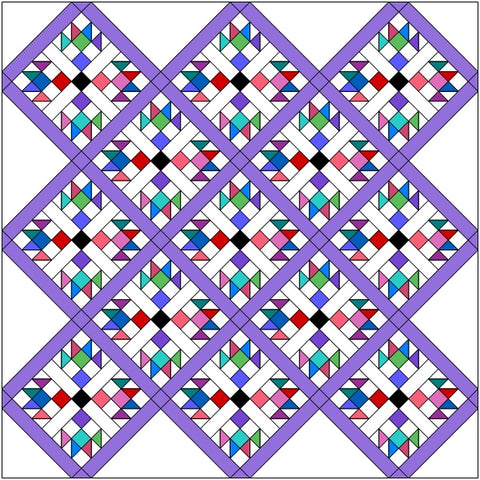
This is an example of an on-point layout with purple sashing and cornerstones and plain setting triangles.
Here's another layout with a different alternating chain block.
And this one has a large Hourglass block for the alternating block.

In Conclusion:
This really is one of my favorite blocks (I know, I know, I say that about all of them – but they are all favorites!) The Bear Paw quilt block is easy and quick to sew together.
Variations:
Traditionally, it is made with just 2 colors – light and dark but I’ve seen the block done scrappy style and it looks great! You can substitute any 4.5″ patch in place of the Four-Patch unit like an HST or small partial log-cabin unit. Lots of options!
I hope you’ve enjoyed this Bear Paw quilt pattern.
I hope you have enjoyed this tutorial. If you like it and want to see more, just click HERE to sign up for my newsletter and receive a free PDF quilt pattern called "Chained Weathervane".
Happy Quilting,
Elaine
P.S. Looking for more easy quilt block? Take a look at these blocks: https://fabric406.com/blogs/fabric406-blog/30-easy-quilt-block-tutorials-for-the-beginning-quilter
P.P.S. Check out my patterns I have for sale on Etsy at https://www.etsy.com/shop/fabric406